
Grand Prix V6-204 3.4L DOHC VIN X SFI (1995)
5.
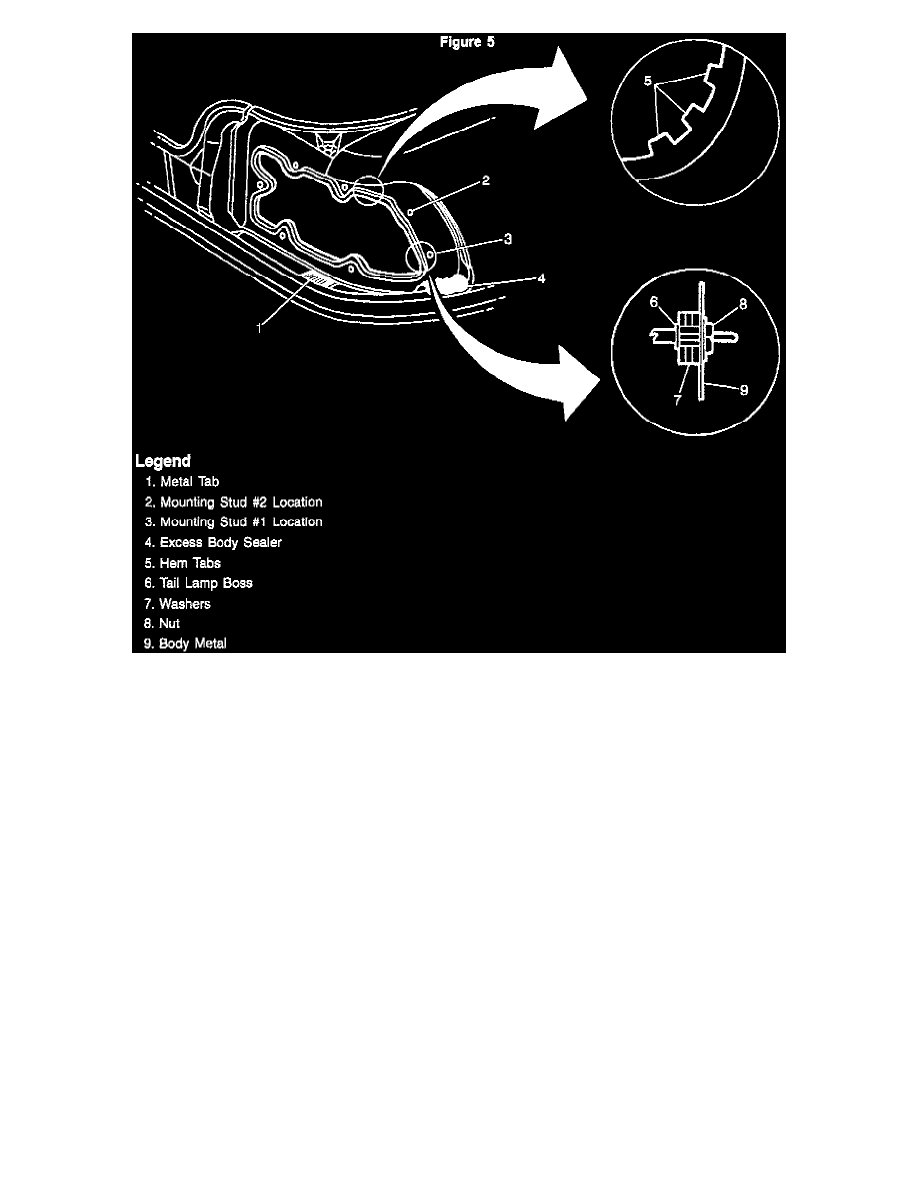
Remove excess body sealer from the outboard corner of the rear end panel as shown in Figure 5.
6.
Apply a thin layer of body sealer over any metal that was exposed during Steps # 4 and # 5.
7.
Bend down the metal tab located on the rear end panel to a horizontal position. See Figure 5.
8.
Position and apply several layers of masking tape on the new production tail lamp assembly using the dimensions shown in Figure 6.
Important:
Do not perform this step if installing a new service only replacement tail lamp assembly.
a.
Using a sharp utility knife or file, remove the remaining 2 mm x 75 mm exposed "wedge-shaped" area of the lamp as shown in Figure 6. Do
not remove any additional material beyond the dimensions shown.
b.
Remove the masking tape from the lamp.
9.
Fit the new tail lamp assembly to the body and note if any mounting studs are contacting the sides of the mounting holes in the rear end mounting
panel as shown in Figure 4.
If contact or interference is noted, increase the clearance by filing out or elongating the mounting hole at the point of interference.
Important:
When filing or elongating the mounting holes to improve clearance, only remove as much material as necessary at the point of interference. Do
not enlarge the entire hole.
10.
Inspect and verify that the metal "hem tabs" located on the underside of the 1/4 panel extension are not causing interference with the tail lamp
during installation. See Figure 5. If it appears that they are hanging down too far and causing interference, carefully tap them up using a ball peen
hammer.