
Grand Prix V6-204 3.4L DOHC VIN X SFI (1995)
16.
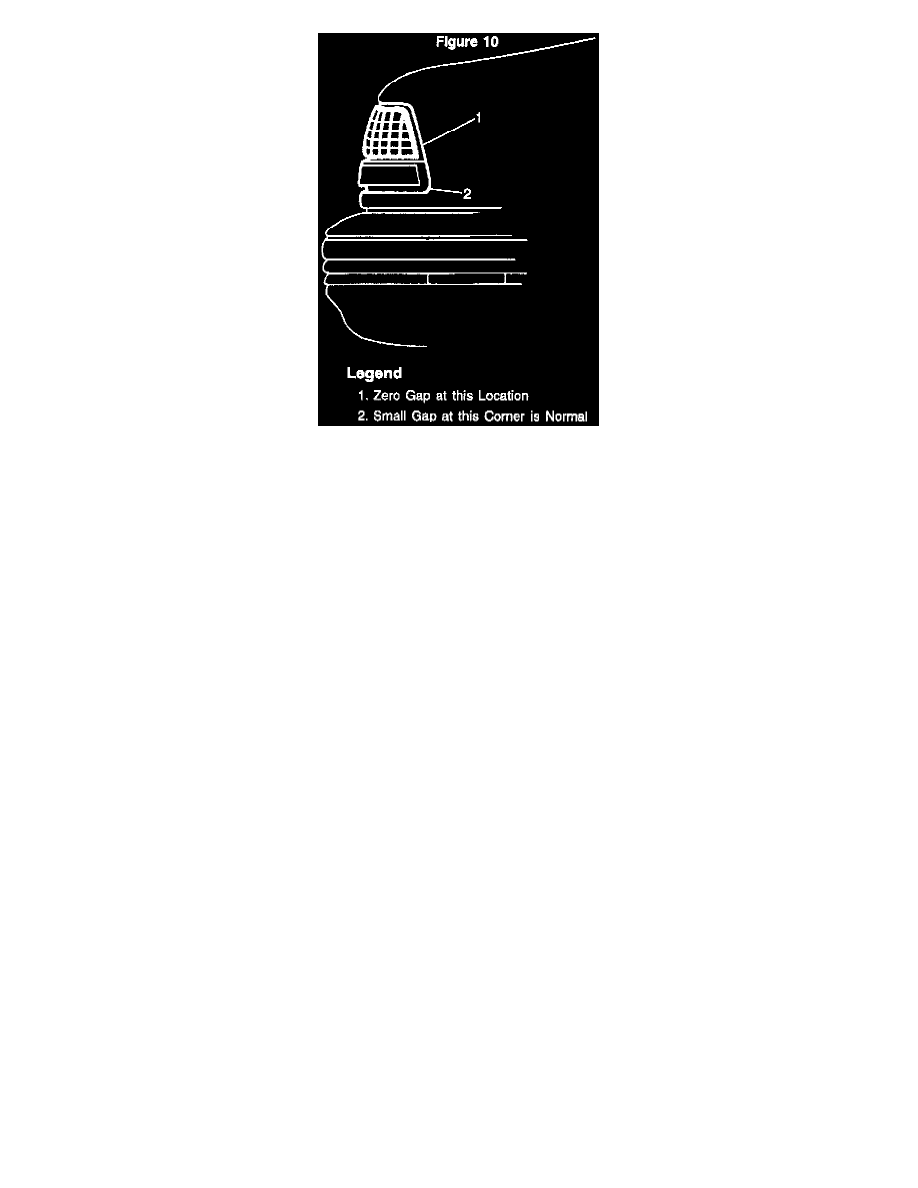
Verify that the outboard corner of the tail lamp assembly fits properly to the 1/4 panel as shown in Figure 10.
Important:
If the tail lamp assembly does not fit properly to the body at the location shown in Figure 10, remove the tail lamp assembly and perform the
following:
a.
Remove one washer at a time from mounting stud # 1 to reduce the gap between the lower halt of the tail lamp assembly and the 1/4 panel.
b.
Remove one washer at a time from mounting stud # 2 to reduce the gap between the upper half of the tail lamp assembly and the 1/4 panel.
c.
Reinstall the tail lamp to the body and verify that the tail lamp fits properly to the 1/4 panel. If necessary, continue removing one washer at a
time from the appropriate mounting stud until the tail lamp fits properly to the body.
17.
Install the tail lamp bulb sockets to the tail lamp.
Important:
Prior to water leak testing, allow the sealant applied to the tail lamp to air dry at room temperature for at least three hours. Do not attempt to
reduce the drying time by applying heat to the sealant.
18.
Water leak test the tail lamp and body to ensure a satisfactory repair.
19.
Install the rear compartment end panel trim.
Parts Information
P/N
Description
Production Replacement Tail Lamp
5977913
Assembly - (Left)
5977914
Production Replacement Tail Lamp
Assembly - (Right)
Parts are currently available from GMSPO.
Warranty Information