
Grand Prix V6-3.1L VIN J (2000)
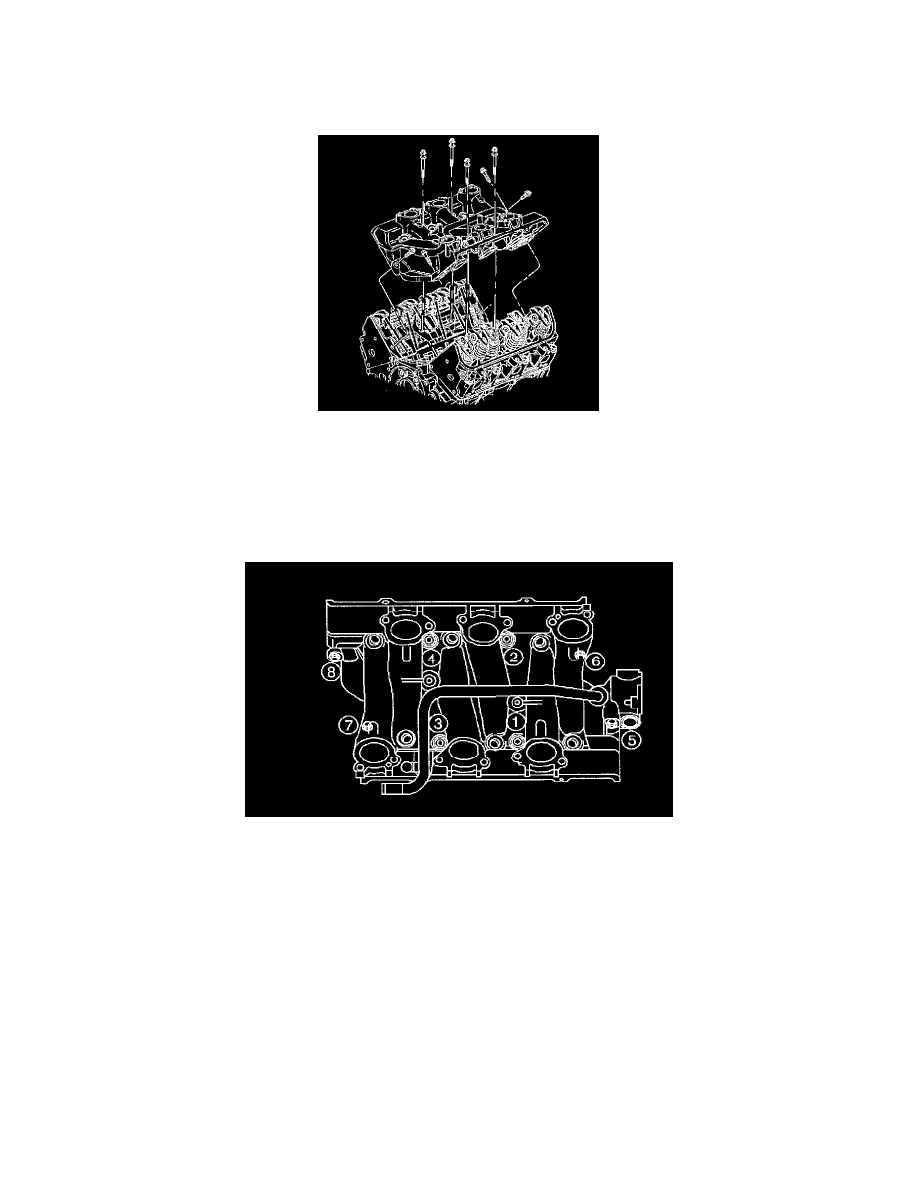
5. Apply 8 - 12 mm (0.08 - 0.11 inch) bead of RTV Sealer, GM P/N 12345739 or equivalent, on each ridge where front and rear of the lower intake
manifold contact the engine block (1).
6. Install the lower intake manifold gaskets.
7. Install the valve rocker arms and pushrods. Refer to Valve Rocker Arm and Push Rod Replacement.
8. Install the lower intake manifold.
9. Apply sealant, GM P/N 12345382 to the threads of the bolts.
Notice: An oil leak may result if the vertical bolts are not tightened before the diagonal bolts.
10. Hand tighten the vertical lower intake manifold bolts.
11. Hand tighten the diagonal lower intake manifold bolts.
12. Install NEW lower intake manifold bolts.
Revised Updated Torque Specification, Bulletin #vss20030024
The torque specification is a 2-step process; tighten the vertical lower intake manifold bolts (the four middle ones) to 7 Nm (62 lb in). Tighten the
diagonal lower intake manifold bolts (two on each end) to 7 Nm (62 lb in).Tighten the vertical lower intake manifold bolts (the four middle ones)
to 13 Nm (115 lb in). Tighten the diagonal lower intake manifold bolts (two on each end) to 25 Nm (18 lb ft).