
Grand Prix V6-3.1L VIN J (2000)
Alignment: Service and Repair
Front Wheel Alignment
Front Camber Adjustment
Removal Procedure
1. Raise the vehicle and provide suitable support. Refer to Vehicle Lifting.
2. Remove the tire and wheel assemblies from the front and the rear axles. Refer to Tire and Wheel Removal and Installation.
3. Remove the strut from the vehicle. Refer to Strut Assembly Replacement.
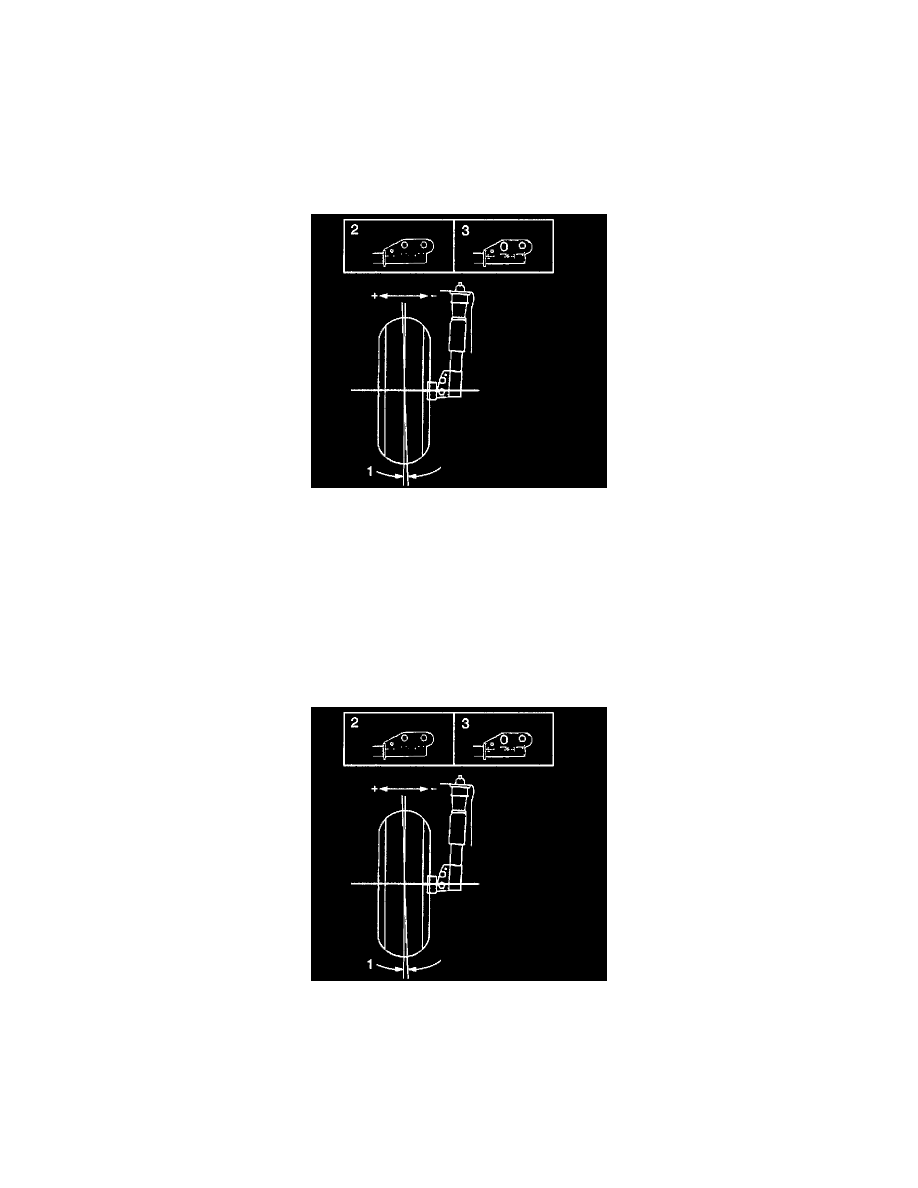
4. Place the strut in a vise and file the hole lateral (oblong). Compare the appearance of the holes before filing (2) with after filing (3):
-
File the lower strut-to-knuckle attaching hole for a front camber adjustment (as in the first illustration).
-
File the upper strut-to-knuckle attaching hole for a rear camber adjustment (as in the second illustration).
Installation Procedure
Notice: Refer to Fastener Notice in Service Precautions.
1. Install the strut to the vehicle. Refer to Strut Assembly Replacement.
Tighten the strut-to-knuckle bolts as far as to allow movement of the knuckle.
2. Install the tire and wheel assemblies. Refer to Tire and Wheel Removal and Installation.
3. Adjust the camber (1).
Tighten the strut-to-knuckle bolts to 120 Nm (88 ft. lbs.).
4. Lower the vehicle.
Front Wheel Toe Adjustment
1. Remove the small seal clamp from the inner tie rod boot.
2. Position the steering wheel in the straight ahead position.