
Grand Prix V6-3.1L VIN J (2000)
4.
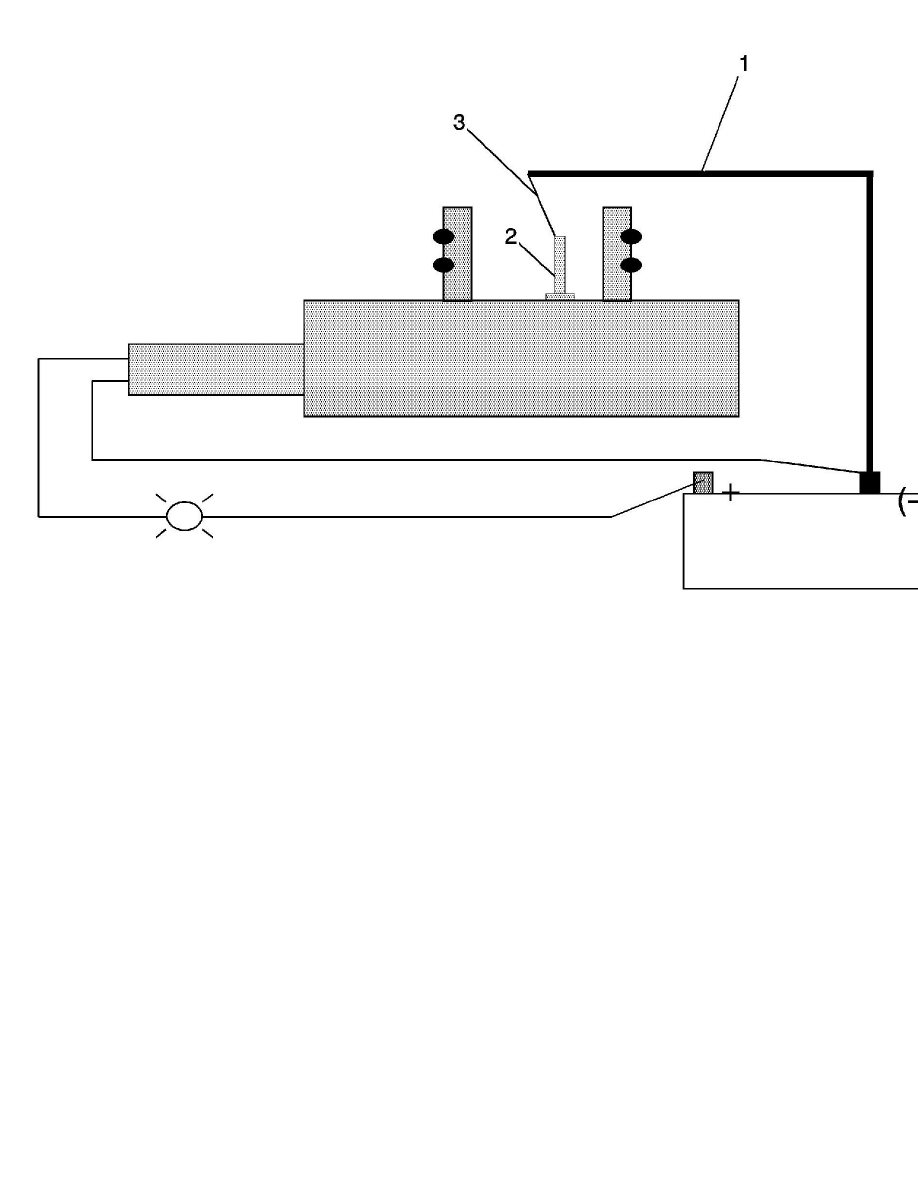
With the key off, connect the coolant level sensor into the vehicle's wiring harness. Connect a ground wire (1) to the battery negative terminal.
Using a sharp probe (3) attached to the ground wire, ground the coolant sensor probe (2) as shown in the illustration. Make sure a good contact is
made. With the key on and the engine off, observe the low coolant light for at least 15 seconds.
^
Light is on - Replace the low coolant sensor and re-check system operation.
^
Light is out - Proceed to Step 5.
5.
Using a small wire brush or emery cloth, polish the low coolant level sensor probe to remove any film or oxidation. The probe should be a bright
brass color when finished. Use Brake Parts Cleaner to flush removed deposits from the low coolant sensor probe. Re-install the low coolant sensor
into the vehicle and proceed to Step 6.
6.
Flush the cooling system and install new DEX-COOL(R) mixture as outlined in the SI. Check the vehicle's warranty history to determine if any
engine gasket had recently been changed. If there has not been a recent gasket replacement, locate and repair the source of the engine oil
contamination.
Warranty Information