
Grand Prix V6-3.1L VIN J (2000)
7.
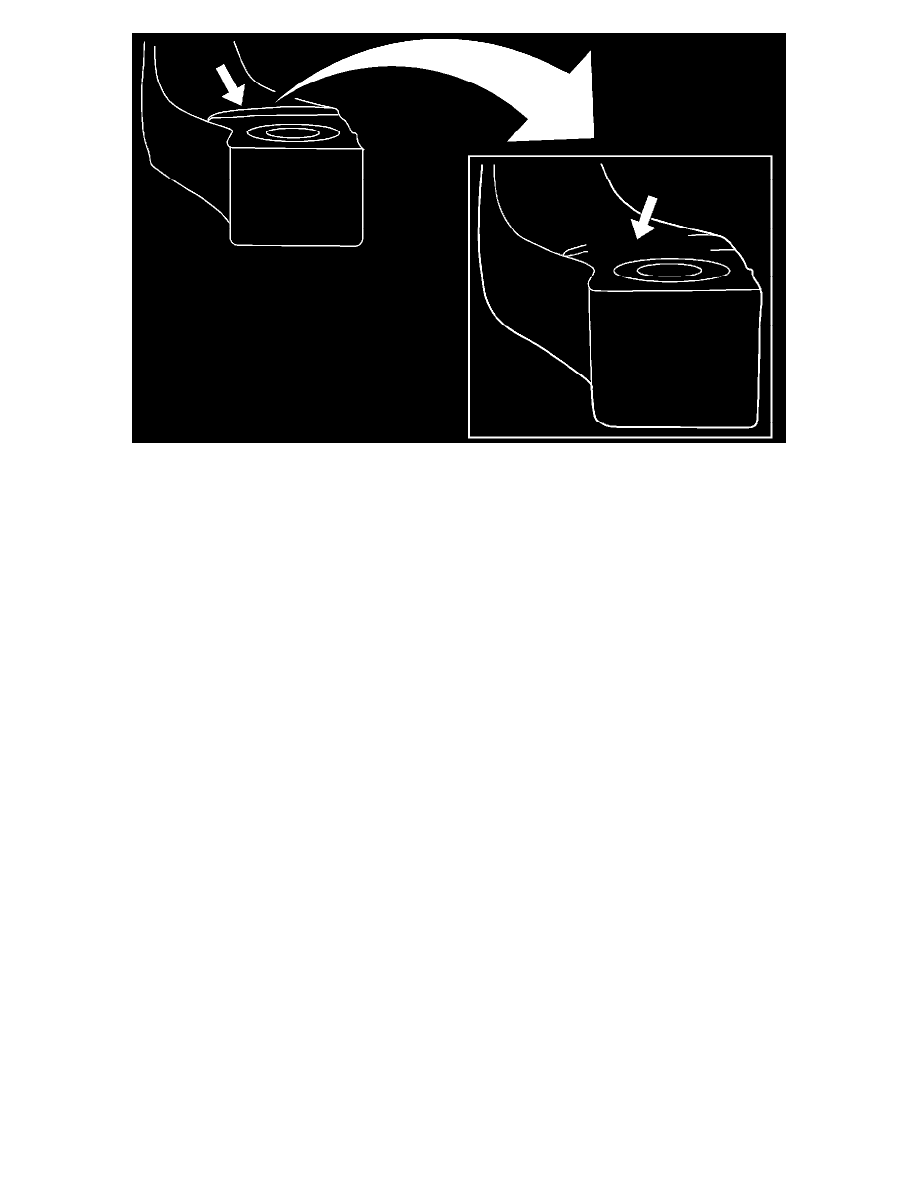
Use the emery cloth supplied in the service kit to remove the sharp edge on the knuckle shown above. The graphic on the left shows the " before
sanding" knuckle and the exploded graphic on the right shows the "after sanded" knuckle.
8.
Ensure that the sharp edge and the flashing on the knuckle are removed from the outer tie rod end boot/seal area.
9.
Install the new outer tie rod end supplied in the service kit by screwing the outer tie rod end onto the inner tie rod end assembly. Turn the outer tie
rod end as many turns as it took to remove the old outer tie rod end from the inner tie rod end assembly.
10.
Install the prevailing torque nut to the outer tie rod assembly.
Tighten
Tighten the prevailing torque nut to 30 N.m (22 lb ft). Tighten the prevailing torque nut an additional 115 degrees of rotation.
11.
"Hand Tighten" the jam nut at this time.
12.
Install the tire and wheel assembly.
13.
Lower the vehicle.
14.
Inspect the front toe and adjust if necessary.
15.
Tighten the jam nut against the outer tie rod assembly.
Tighten
Tighten the jam nut to 68 N.m (50 lb ft).