
Grand Prix V6-3.8L SC VIN 1 (1997)
Fuel Tank Unit: Service and Repair
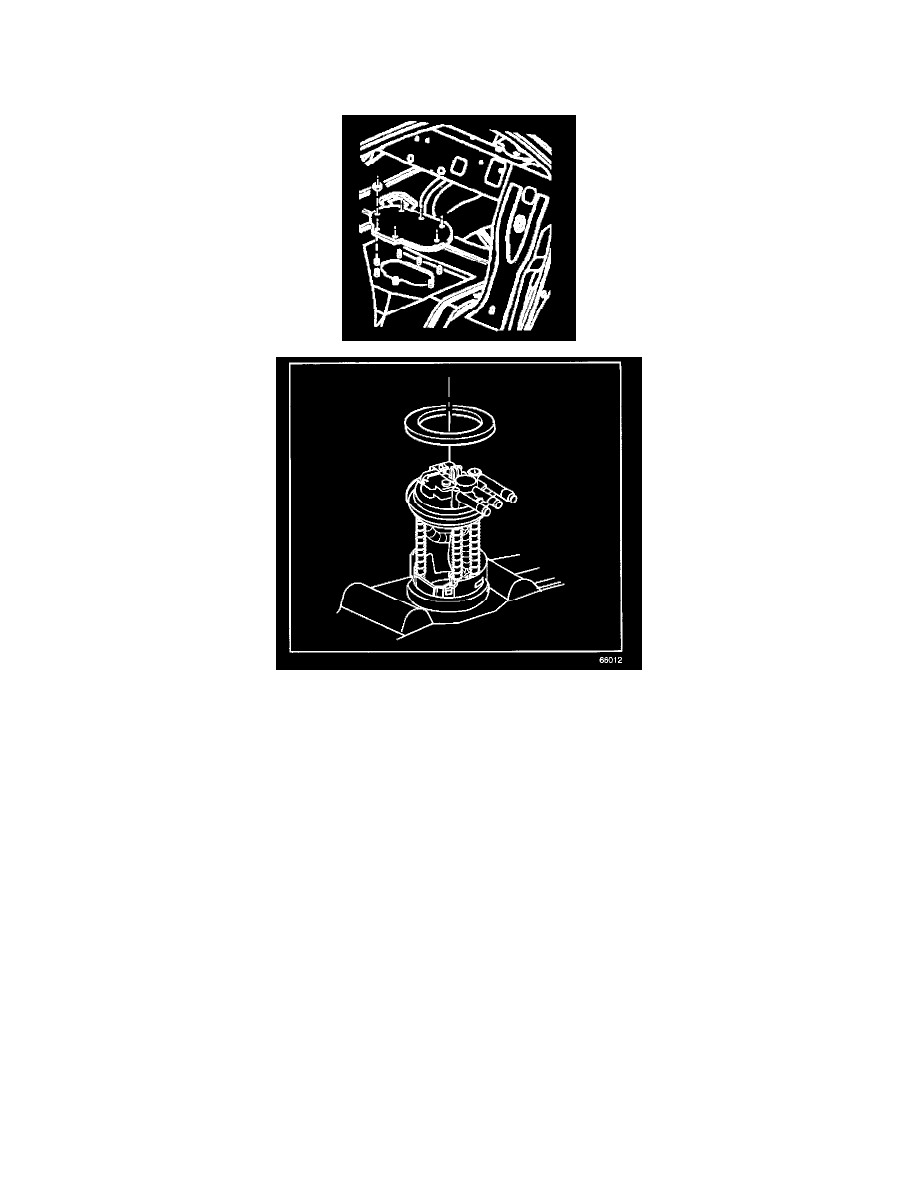
Fuel Sender Assembly Replacement
THIS ARTICLE HAS BEEN UPDATED BY TSB # 71-63-04 DATED 8/97.
REMOVAL PROCEDURE
WARNING: Fuel Vapors can collect while servicing fuel system parts in enclosed areas such as a trunk. To reduce the risk of fire and
increased exposure to vapors:
-
Use forced air ventilation such as a fan set outside of the trunk.
-
Plug or cap any fuel system openings in order to reduce fuel vapor formation.
-
Clean up any spilled fuel immediately.
-
Avoid sparks and any source of ignition.
-
Use signs to alert others in the work area that fuel system work is in process.
WARNING: To prevent personal injury, safety goggles must be worn when working with fuel.
Important: Always replace the fuel sender 0-rings when reinstalling the fuel sender assembly. The modular fuel sender assembly will spring-up when
the snap ring is removed. When removing the modular fuel sender assembly from the fuel tank, the reservoir bucket on the fuel sender assembly is full of
fuel. The modular fuel sender assembly must be tipped slightly during removal in order to avoid damage to the float. Place any remaining fuel into an
approved container once the modular fuel sender assembly is removed from the fuel tank.
Notice: Clean all of the following areas before performing any disconnections in order to avoid possible contamination in the system:
-
The fuel pipe connections
-
The hose connections
-
The areas surrounding the connections
1. Relieve the fuel system fuel pressure.
2. Disconnect the negative battery cable.
3. Drain the fuel tank to no more than 1/4 of a tank full.
4. Remove the spare tire cover, the jack, and the spare tire.