
Grand Prix V6-3100 3.1L MFI VIN M (1994)
13.
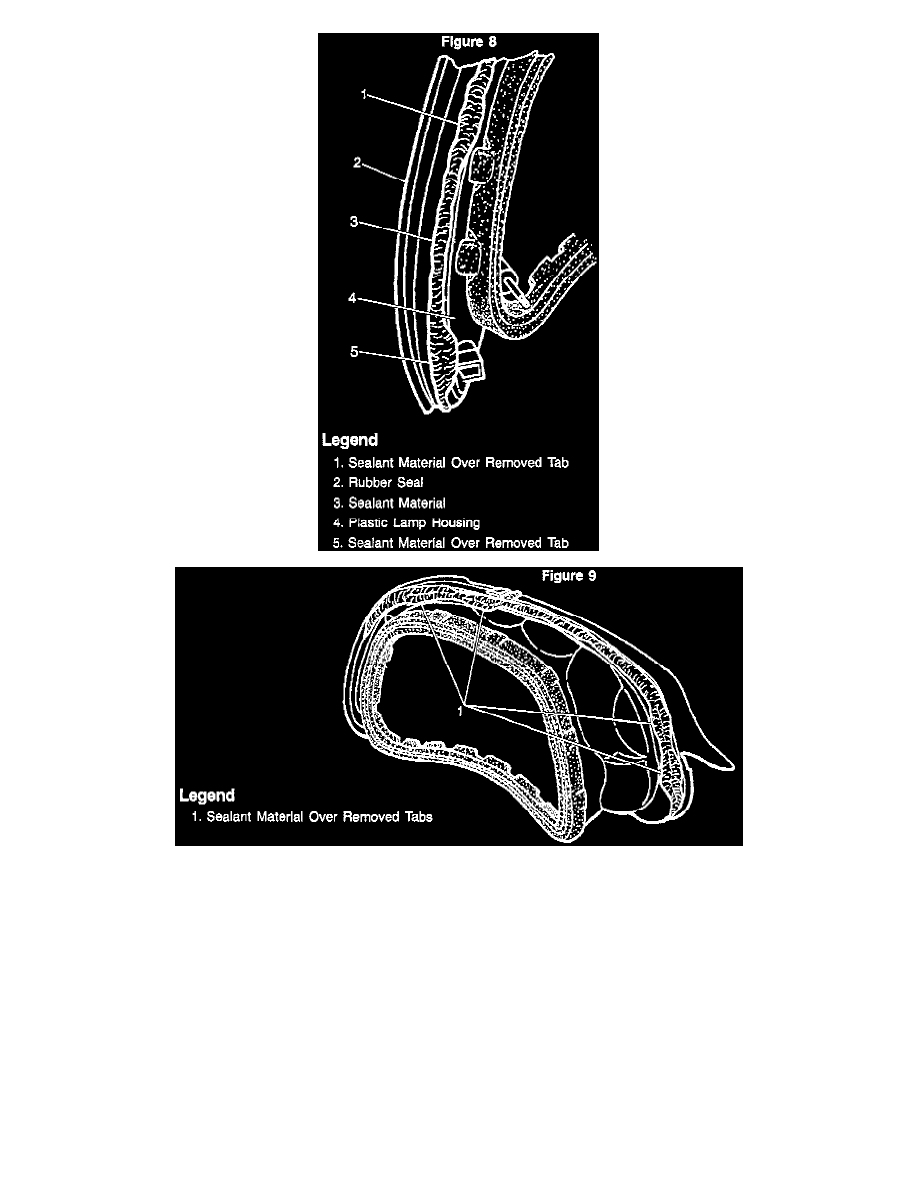
Using 3M Ultra Pro # 08302 Clear Auto Body Sealant, or equivalent, apply additional sealing material between the lens and gasket on the new tail
lamp housing in the areas shown in Figures 7-9.
Important:
The sealant applied to the tail lamp should be allowed to air dry at room temperature for at least three hours prior to water leak testing. Do not
attempt to reduce the drying time by applying heat to the sealant.
14.
Install flat washers as necessary to make a .060 in. spacer (shim) on tail lamp mounting stud # 1 and also on mounting stud # 2. See Figure 5 for
mounting stud location identification and washer placement.
15.
Install the tail lamp assembly to the body with the washers properly positioned and tighten the nuts to 5 N.m (44 lb in.) using the tightening
sequence shown in Figure 4.