
Grand Prix V6-3100 3.1L MFI VIN M (1994)
Rear Knuckle: Service and Repair
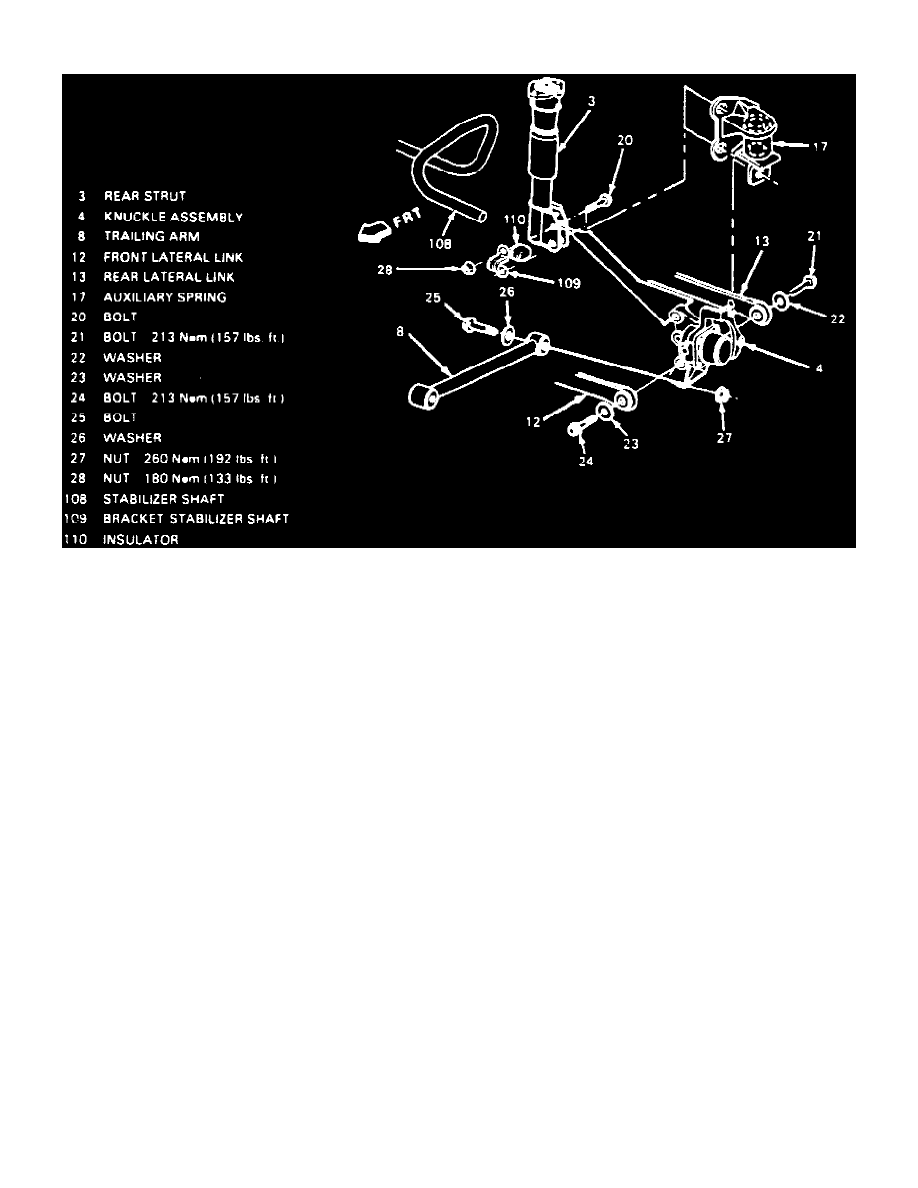
Fig. 4 Exploded View Of Tri-link Suspension Assembly
1. Raise and support vehicle, then remove tire and wheel assembly.
2. Place scribe marks on strut and knuckle to ensure installation in same position.
3. Remove jack pad.
4. Install rear leaf spring compressor tool No. J-35778, or equivalent, onto transverse spring assembly and tighten to hold spring pressure. Do not
remove spring or retention plates.
5. Remove auxiliary spring as outlined under Leaf Spring
6. Disconnect front link from knuckle.
7. Remove brake caliper, leaving hose attached, and suspend caliper out of way.
8. Disconnect anti-lock brake system electrical harness connector, if equipped.
9. Remove brake rotor, then the hub and bearing assembly.
10. Disconnect trailing link from knuckle, Fig. 4 .
11. Remove strut to knuckle attaching nuts, then the stabilizer shaft bracket.
12. Remove strut to knuckle attaching bolts, then the knuckle.
13. Reverse procedure to install. Tighten strut to knuckle attaching bolts and trailing link retaining nut to specifications.