Grand Prix V6-3100 3.1L MFI VIN M (1994)

Stabilizer Bar: Service and Repair
Front Suspension
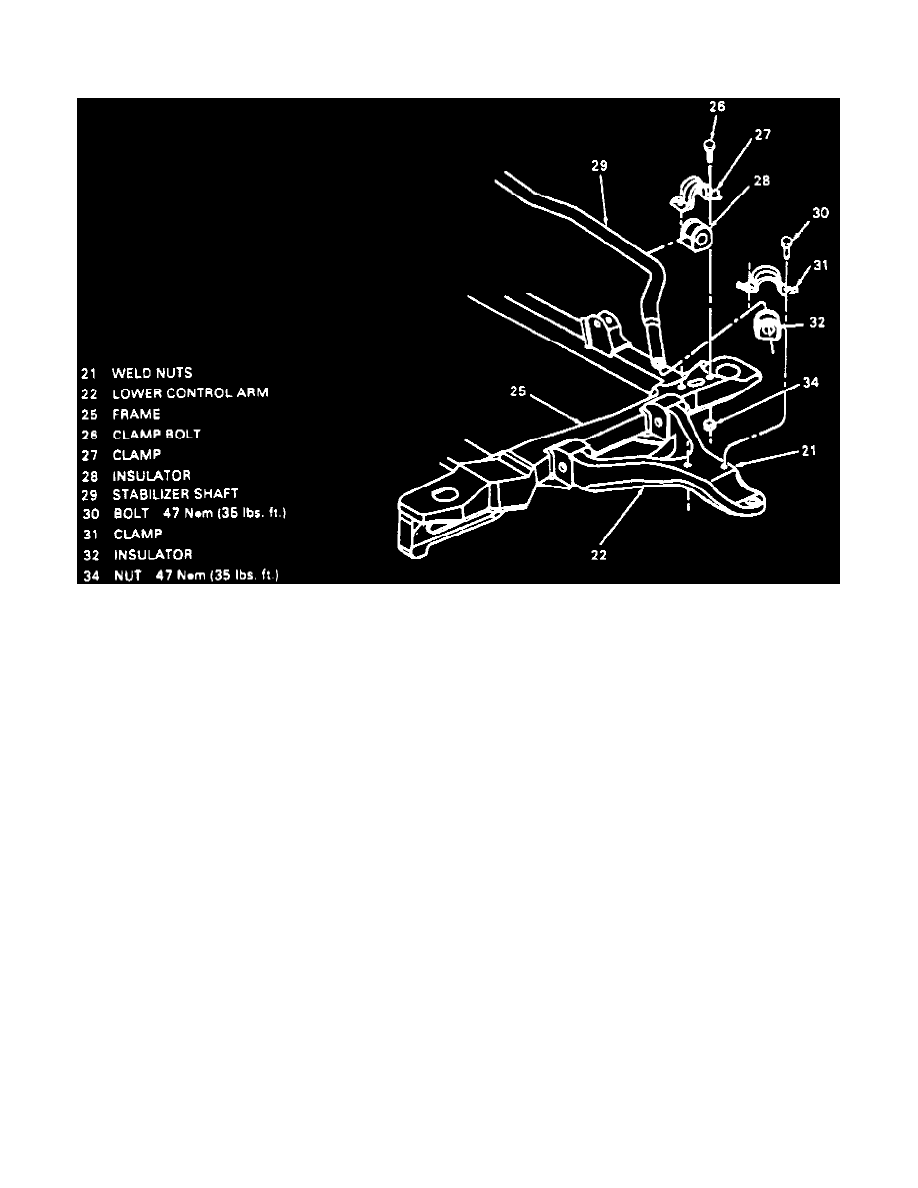
Fig. 5 Stabilizer Shaft & Insulators Replacement
1. Raise and support vehicle, then remove wheel and tire assembly.
2. Move steering shaft dust shield to gain access to pinch bolt.
3. Remove pinch bolt from lower intermediate steering shaft.
4. Loosen all insulator clamp attaching nuts and bolts, Fig. 5 .
5. Place suitable jack under center of rear frame crossmember.
6. Loosen two front frame to body bolts four turns.
7. Remove two rear frame to body bolts.
8. Lower rear of frame just enough to gain access for stabilizer shaft removal.
9. Remove insulators and clamps from frame and control arms.
10. Pull stabilizer shaft rearward, swing down and remove from left side of vehicle.
11. Reverse procedure to install, noting the following:
a. Coat new insulators with rubber lubricant.
b. Tighten clamp to frame nuts and clamp to lower control arm bolts to specifications.
c. Tighten frame to body bolts, pinch bolt and wheel lug nuts to specifications.
d. Torque lug nuts to 100 ft. lbs.
