
Grand Prix V8-5.3L (2007)
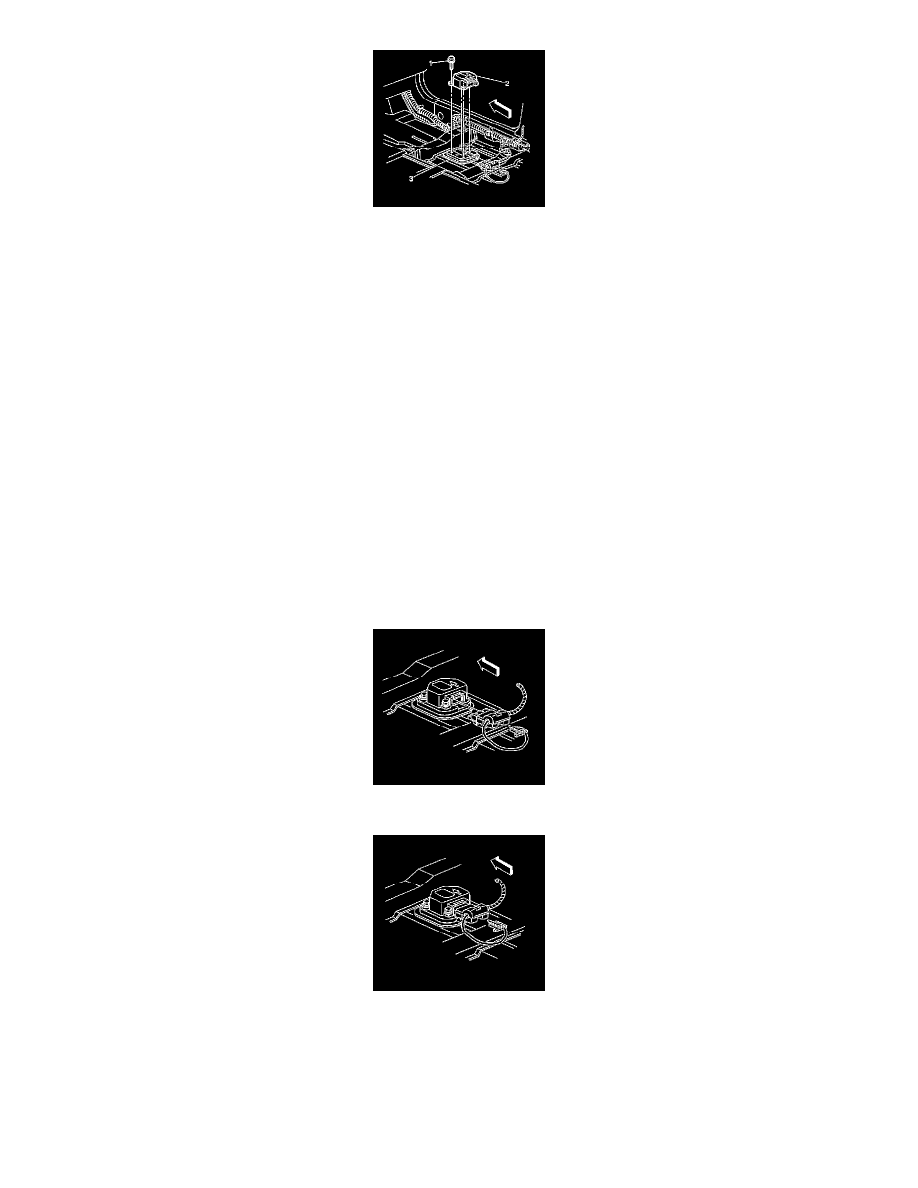
2. Position the SDM (2) horizontally to the floor pan (3).
3. Point the arrow on the SDM toward the front of the vehicle.
Notice: Refer to Fastener Notice.
4. Install the SDM mounting fasteners (1).
Tighten the fasteners to 10 N.m (89 lb in).
Important: If the SDM mounting holes or fasteners are damaged to the extent that the module can no longer be properly mounted, use
the following repair. Torque the replacement fastener with a hand tool in order to prevent stripping the replacement fastener.
First Repair
1. Remove and discard the stripped fastener (1).
2. Install the SDM (2) with new fastener GM P/N 10156138.
Tighten the fastener to 10 N.m (89 lb in).
Second Repair
1. Remove and discard the stripped fastener (1).
2. Install the SDM (2) using a larger fastener GM P/N 10267482 with a washer GM P/N 11500305.
Tighten the fastener to 5 N.m (44 lb in).
5. Install the SDM wiring harness connector.
6. Install the CPA to the SDM wiring harness connector.
7. Install the push-in retainers which position the carpet on top of the rocker panels.
8. Install the lower center pillar trim panel.
9. Install the quarter lower trim.
10. Install the carpet and the front carpet retainer.
11. Install the passenger front seat.
Important: The AIR BAG indicator may remain ON after the SDM has been replaced. DTC B1001 may set requiring the SDM part