
GTO V8-6.0L VIN U (2005)
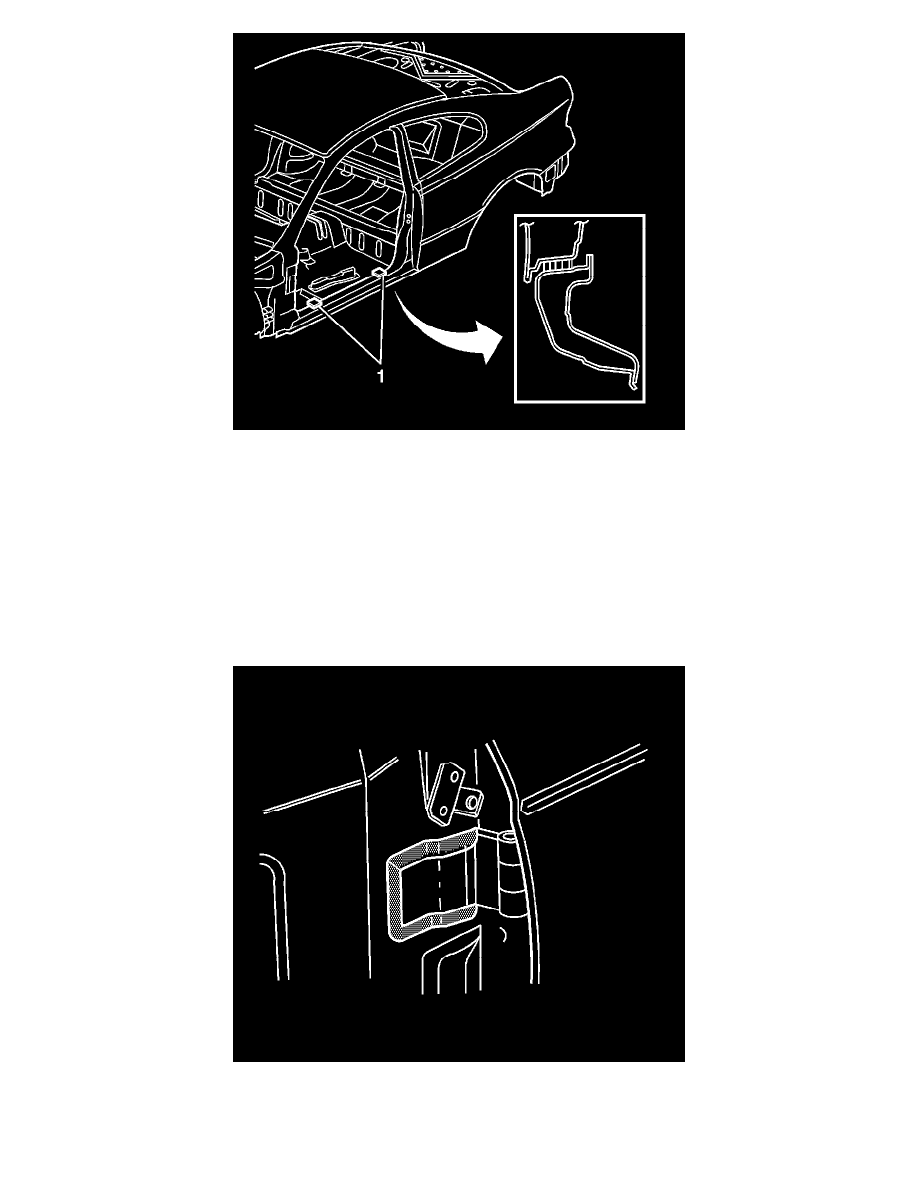
1. Obtain two 10 mm (0.40 in) wood spacers (1).
2. Tape the spacers in the positions shown near the dimples in the flange of the rocker panel.
3. Prepare all mating surfaces as necessary.
4. Apply 3M Weld-Thru Coating P/N 05916 or equivalent, to all mating surfaces.
5. Install the body side door hinge straps and the hinge pins to the door assembly . Refer to Door Replacement - Front (See: Service and
Repair/Door Replacement - Front) .
6. With the aid of an assistant, position the door assembly to the door opening frame.
Important: Position the rear of the door approximately 3 mm (0.11 in) higher than specified to allow for the additional weight of the door
hardware and trim components.
7. Adjust its position in the rear with shims as required.
8. Tack weld the upper and lower door body side hinges to the door opening frame assembly.
9. Remove the spacer blocks and shims and recheck the door alignment.
10. Complete the welding of the body side door hinge straps.
11. With the aid of an assistant, remove the door assembly from the body side door hinge straps. Refer to Door Replacement - Front (See: Service and