
GTO V8-6.0L VIN U (2005)
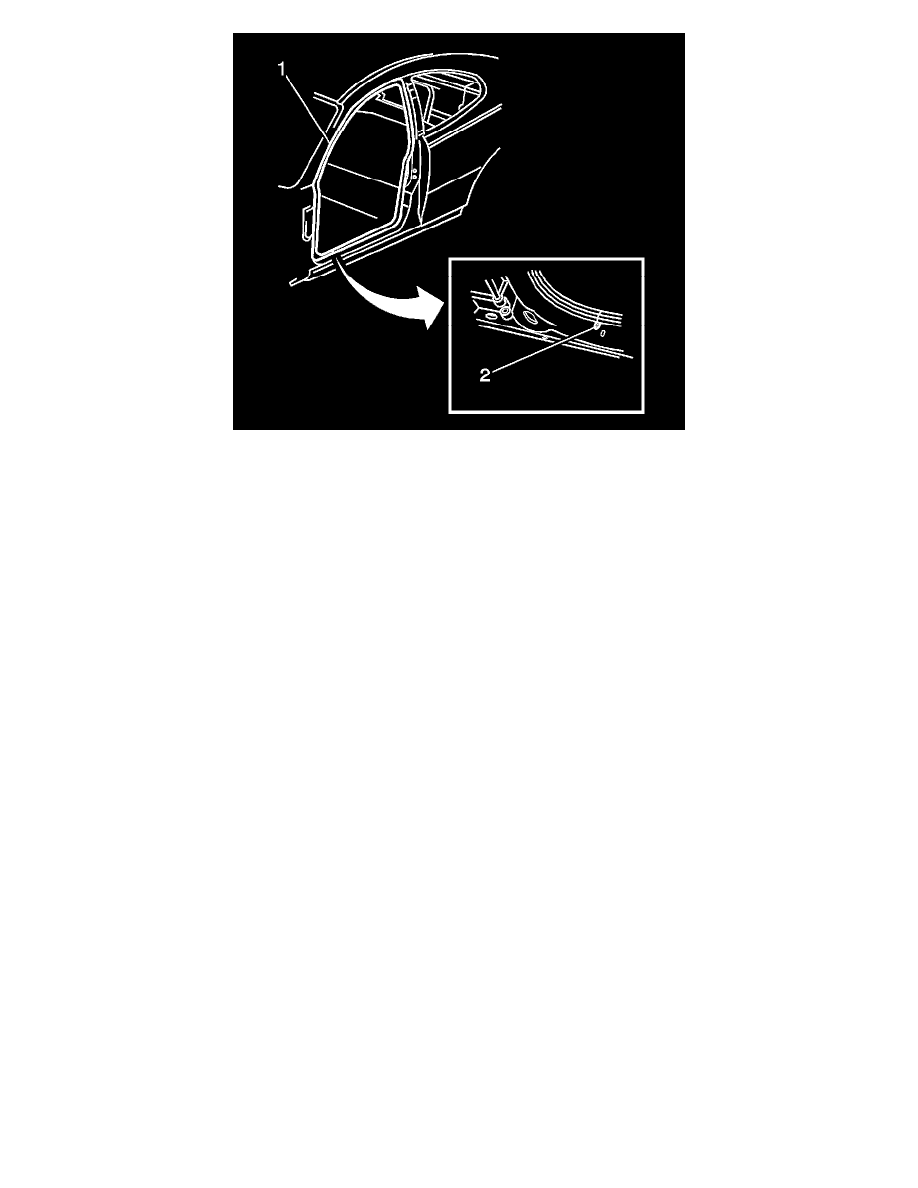
1. Position the door opening weather-strip (1) to the pinch-weld flange.
2. Align the identification mark on the weather-strip with the center line of the of the mark (2) in the door frame opening.
Important: Allow crowding of the weather-strip in all corners of the door opening frame to ensure the weather-strip does not short cut
corners and damage the door trim.
3. Install the hinge pillar trim panel. Refer to Trim Replacement - Hinge Pillar (See: Interior Moulding / Trim/Trim Panel/Service and Repair/Trim
Replacement - Hinge Pillar) in Interior Trim.
4. Install the windshield garnish molding. Refer to Garnish Molding Replacement - Windshield Pillar (See: Interior Moulding / Trim/Trim
Panel/Service and Repair/Garnish Molding Replacement - Windshield Pillar) in Interior Trim.
5. Install the center pillar upper trim panel. Refer to Trim Panel Replacement - Upper Center Pillar (See: Interior Moulding / Trim/Trim
Panel/Service and Repair) in Interior Trim.
6. Install the quarter panel trim. Refer to Trim Panel Replacement - Rear Quarter (See: Interior Moulding / Trim/Trim Panel/Service and Repair) in
Interior Trim.
7. Install the door sill plate. Refer to Door Sill Plate Replacement (See: Interior Moulding / Trim/Scuff Plate/Service and Repair/Removal and
Replacement) in Interior Trim.
Important: Make sure the weather-strip lip sits over the trim panels.
8. Close the door.