
GTO V8-6.0L VIN U (2005)
Hood Latch Release Cable: Service and Repair
Hood Latch Release Cable Replacement
Removal Procedure
1. Open the hood.
2. Remove the upper radiator shroud. Refer to Fan Shroud Replacement in Engine Cooling.
3. Remove the left-hand instrument panel outer cover. Refer to Instrument Panel (I/P) Outer Trim Cover Replacement (See: Interior Moulding /
Trim/Dashboard / Instrument Panel/Service and Repair/Instrument Panel (I/P) Outer Trim Cover Replacement) in Instrument Panel, Gages, and
Console.
4. Disconnect the wiring harness from the right-hand strut tower.
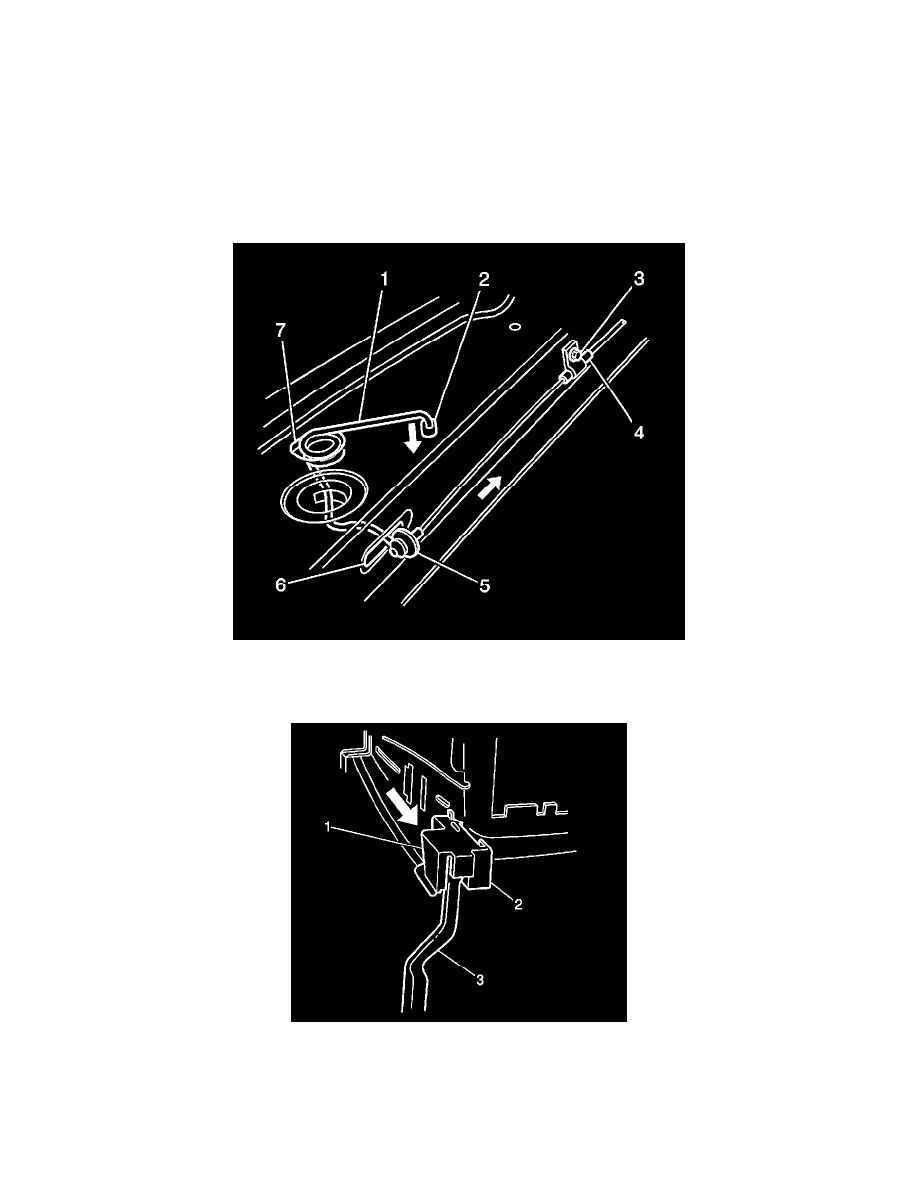
5. Remove the hood latch release cable screw (3) and unhook release cable assembly (5) from the primary hood latch (1).
6. Tie a wire or string to the end of the hood release cable (5). Ensure that the end of the wire or string remains in the engine compartment.
7. Using a flat-bladed tool, lever the retaining tabs (1) top and bottom on the release lever bracket (2) and slide the lever assembly (3) rearward.