
GTO V8-6.0L VIN U (2005)
1. Use GM Vehicle Care Brake and Clutch Fluid Super DOT-4, GM P/N 88958860, or an equivalent DOT-4 brake fluid, in order to lubricate the
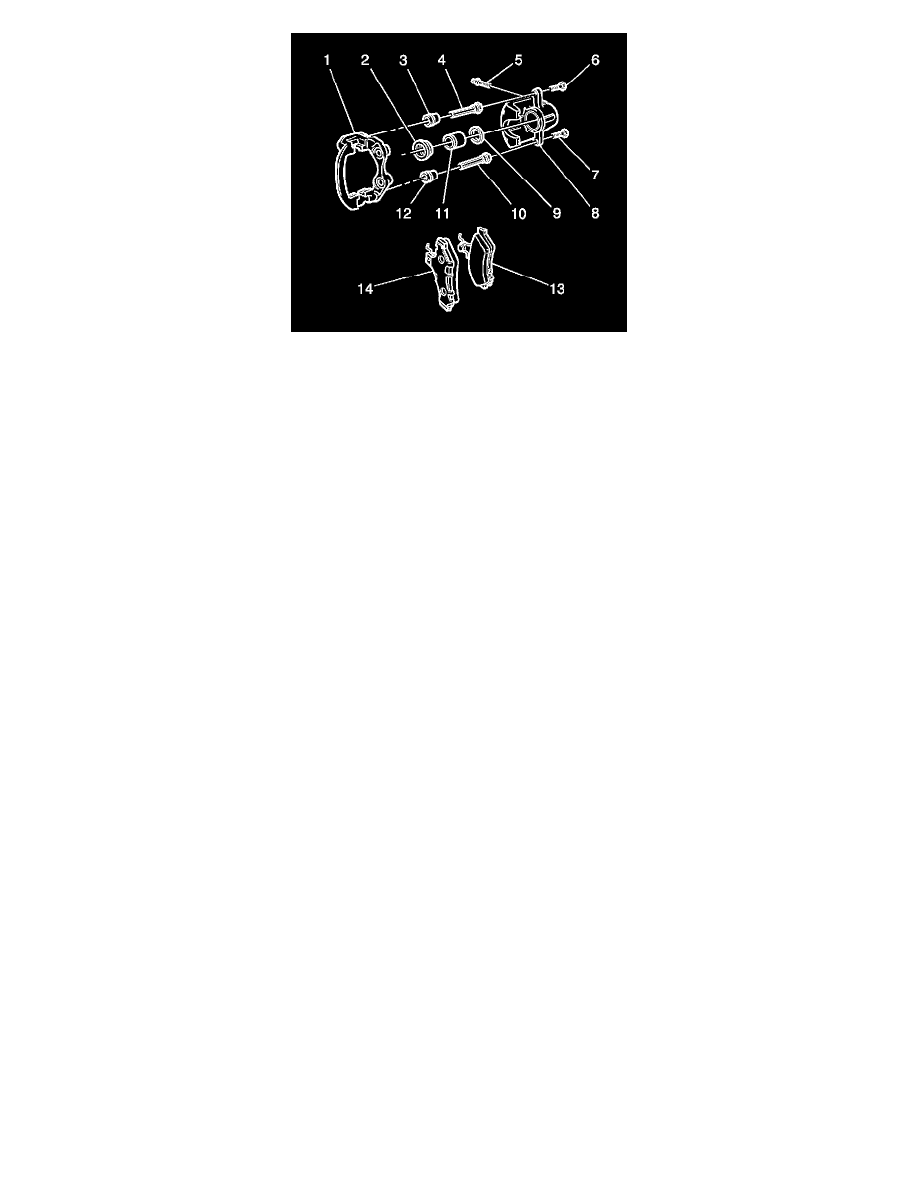
following components:
^
The caliper piston (11)
^
The piston cylinder bore
^
The piston boot (2)
^
The NEW seal (9)
^
The 2 NEW guide pin boots (3,12)
2. Install the NEW seal to the inner groove of the cylinder bore.
3. Ensure the seal is not twisted.
4. Ensure the seal is fully seated in the groove.
5. Install the piston boot over the end of the piston.
6. Install the piston into the cylinder bore.
7. Install the piston boot to the cylinder bore groove.
8. Ensure the piston boot flange is squarely and firmly seated in the cylinder bore groove.
9. Push the piston squarely into the cylinder bore until fully seated.
10. Ensure the piston boot is fully seated in the piston groove and in the cylinder bore groove.
11. Lubricate the 2 guide pins (4,10) with silicone lubricant.
12. Install the guide pins to the bracket (1) WITHOUT the guide pin boots.
13. Install the caliper housing (8) to the bracket.
14. Use a wrench in order to prevent the guide pins from rotating.
15. Notice: Refer to Fastener Notice in Service Precautions.
Install 2 NEW guide pin bolts (6,7).
Tighten the bolts to 32 Nm (24 ft. lbs.).
16. Important: If any binding is evident, add more lubricant to the guide pins and replace the guide pin bolts.
Verify the guide pins and the caliper housing slide easily in the bracket.
17. Remove the bracket from the guide pins.
18. Install 2 NEW guide pin boots to the guide pins.
19. Install the bracket to the guide pins.
20. Complete the following procedure in order to install EACH guide pin boot:
1. Squeeze the guide pin boot in order to remove excess air.
2. Install the guide pin boot to the guide pin groove.
3. Install the guide pin boot to the bracket groove.
21. Identify the outer brake pad (14). The outer brake pad has a full shim on the backing plate.
22. Install the outer brake pad to the caliper.
23. Identify the inner brake pad (13)The inner brake pad has a shim with an asymmetrical cut-out.
24. Install the inner brake pad to the caliper with the cut-out on the lower half of the pad.
25. Verify the spring clip is located correctly in the top of the caliper body.
26. Install the bleeder valve (5) and the valve cap to the caliper housing.
27. Install the caliper to the vehicle and bleed the brake system.