GTO V8-6.0L VIN U (2005)

15. Transfer the plug (3), if fitted, spacer (1) and plug (2).
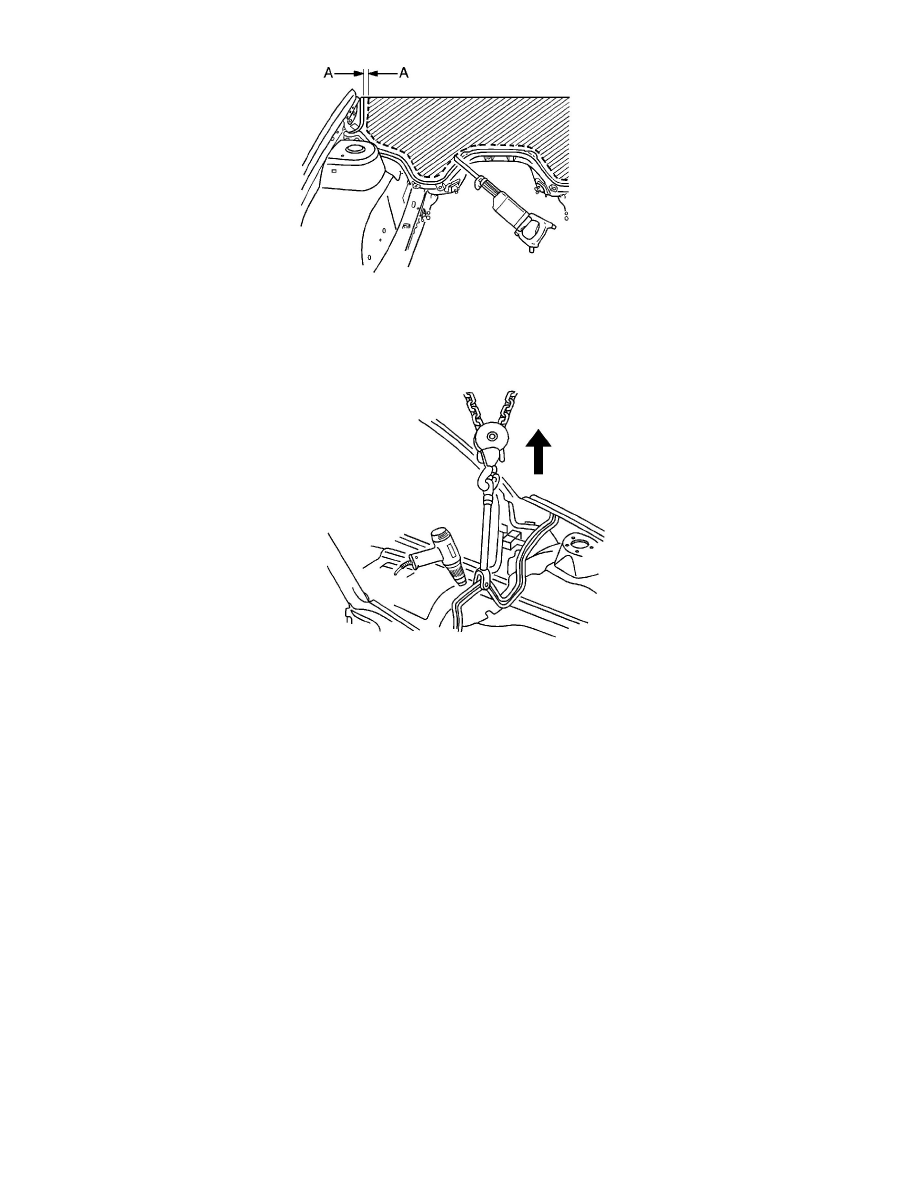
16. Using a cutting tool, cut the dash panel assembly (A) approximately 50 mm (2 in) above the glue track.
17. Remove the dash panel assembly section.
18. Cut the section of remaining panel to enable removal of the main wiring harness.
19. Drill a hole in the flange above the transmission tunnel, and attach a chain block and a clevis.
20. Apply and maintain a light tension to the remaining part of the dash panel assembly.
21. Either cut the adhesive with a hot knife or heat the adhesive using a heat gun and pull the panel from the glue track.
22. Clean the excess adhesive from the glue track using a hot knife or a heat gun.
INSTALLATION PROCEDURE
IMPORTANT:
-
The service part comes as an assembly that includes the plenum lower panel. If the repair does not require the plenum, remove the plenum before
you install the dash panel.
-
Before painting the vehicle, apply masking tape to prevent paint entering the glue track.
1. The vehicle should be painted before installation of the dash panel assembly.
2. Temporarily install the new dash panel assembly prior to applying the adhesive to check for correct fit.
IMPORTANT: The vehicle surface should be finished and the paint fully dry before installation.
3. Prepare all mating surfaces as necessary.
IMPORTANT:
-
Installation is best performed with the aid of an assistant.
-
The adhesive has a 40-50 minute working time. Do not allow the dash panel to totally cure off the vehicle, as proper alignment of the dash
panel to the vehicle will be difficult.
4. Apply metal panel bonding adhesive GM P/N 12378566/7 (Canadian P/N 88901674/5), or equivalent, to the glue track from the lowest points to
prevent air bubbles forming in the adhesive. Completely fill the channel in a continuous bead.
5. Apply a patch of metal panel bonding adhesive GM P/N 12378566/7 (Canadian P/N 88901674/5), or equivalent, approximately 50 mm (2 in)
