
GTO V8-6.0L VIN U (2005)
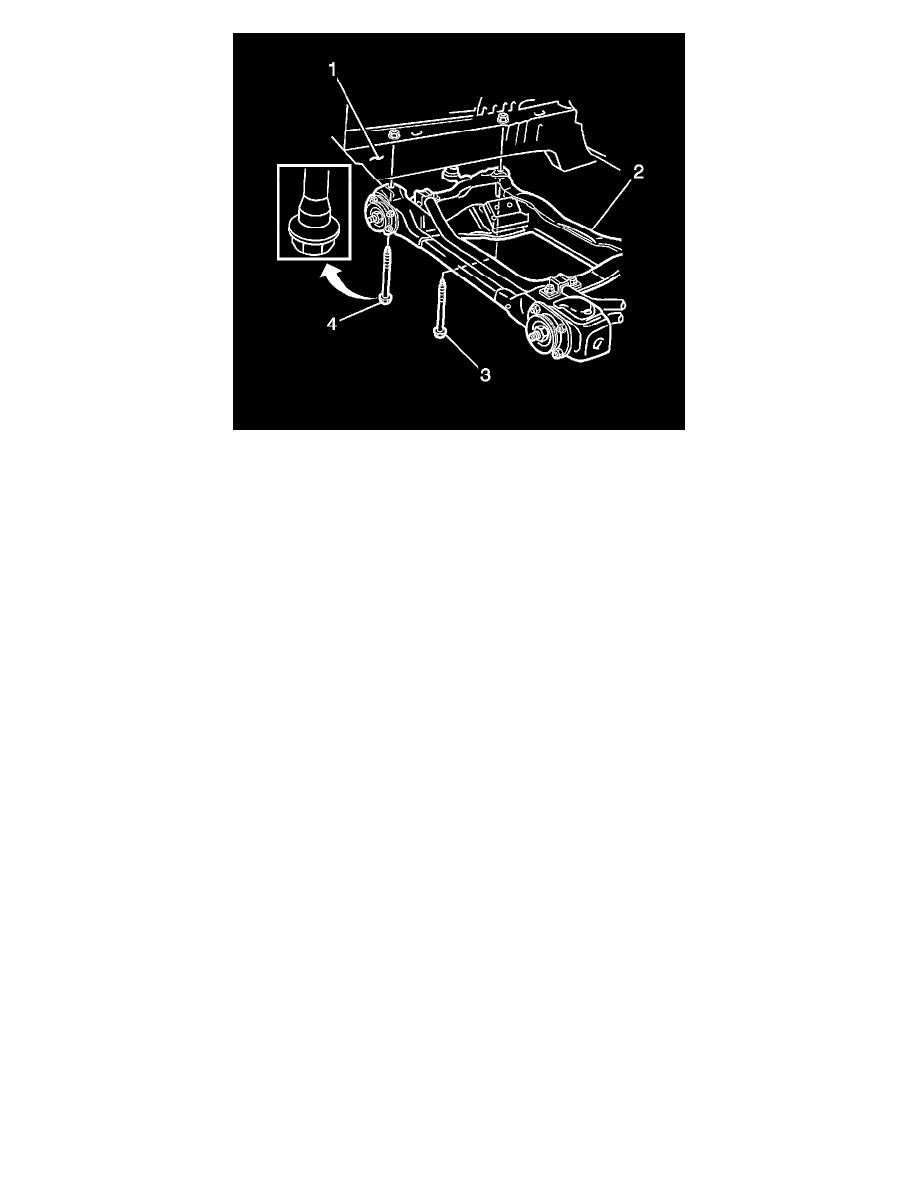
1. Install the front frame (2) to the vehicle.
Notice: Refer to Fastener Notice in Cautions and Notices.
Important: The 4 bolts (3, 4) must be replaced with new ones when installing the front frame.
2. Install the 2 front, black colored front frame bolts (4).
Tighten the 2 front, black colored front frame bolts (4) to 125 N.m (92 lb ft).
3. Install the 2 rear, silver colored front frame bolts (3).
Tighten the 2 rear, silver colored front frame bolts (3) to 125 N.m (92 lb ft).
4. Install the engine mount brackets to the front frame. Refer to Engine Mount Bracket Replacement - Left and Engine Mount Bracket Replacement
- Right in Engine Mechanical - 6.0L.
5. Remove the J 28467-B and J 41803 .
6. Install the hood. Refer to Hood Replacement (Without Hood Scoops) (See: Body and Frame/Doors, Hood and Trunk/Hood/Service and
Repair/Hood Replacement (Without Hood Scoops))Hood Replacement (With Hood Scoops) (See: Body and Frame/Doors, Hood and
Trunk/Hood/Service and Repair/Hood Replacement (With Hood Scoops)) in Body Front End.
7. Install the lower control arm rod insulators. Refer to Front Lower Control Arm Rod Insulator Bushing Replacement in Front Suspension.
8. Install the lower control arm rods. Refer to Front Lower Control Arm Rod Replacement in Front Suspension.
9. Install the lower control arms. Refer to Lower Control Arm Replacement in Front Suspension.
10. Install the power steering gear. Refer to Power Steering Gear Replacement in Power Steering System.
11. Install the stabilizer shaft. Refer to Stabilizer Shaft Replacement in Front Suspension.
12. Install the front wheels and tires. Refer to Tire and Wheel Removal and Installation in Front Suspension.