
GTO V8-6.0L VIN U (2005)
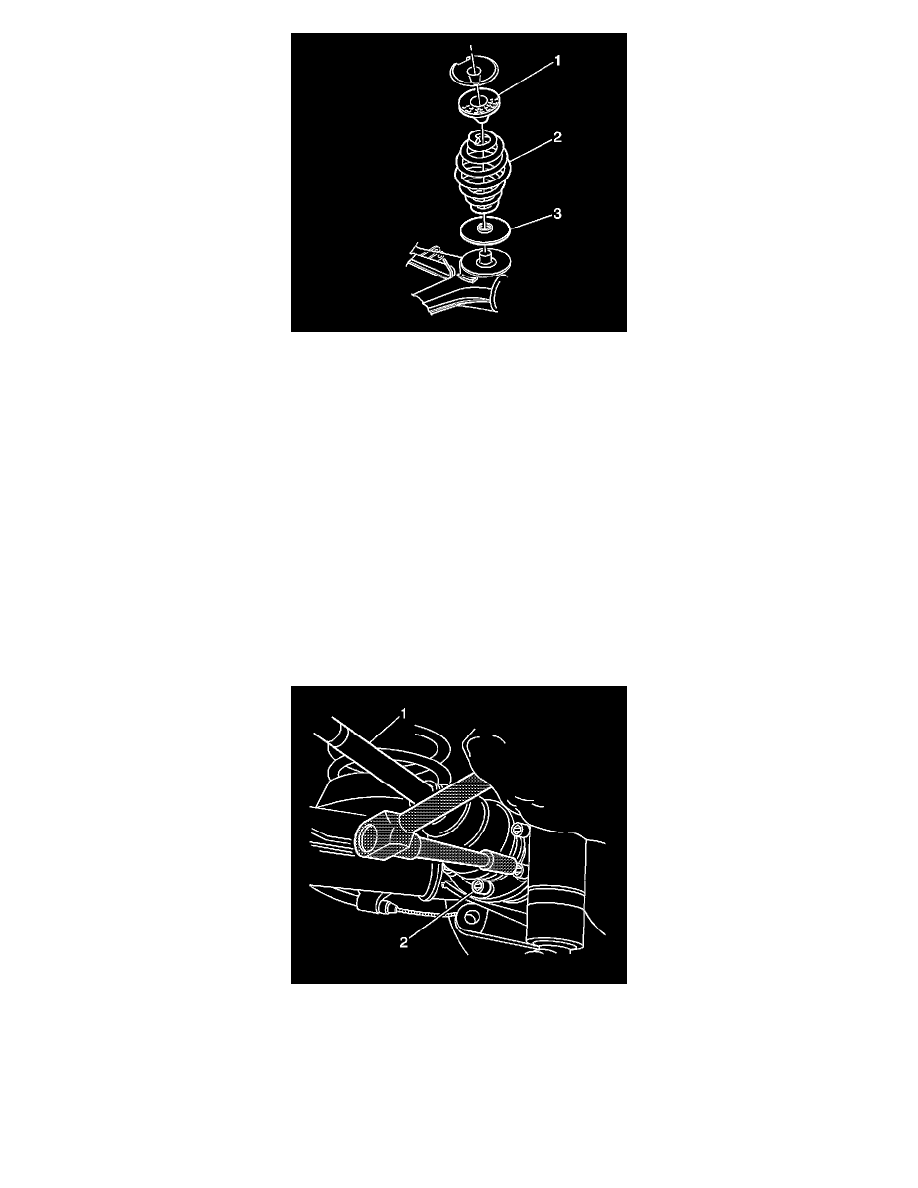
1. Install the lower insulator (3) to the control arm.
2. Install the upper insulator (1) to the spring (2).
3. Push down gently on the control arm. Install the spring and the upper insulator to the lower insulator.
4. Adjust the position of jack in order to align the control arm and the shock absorber.
5. Important: Do not tighten the bolt yet. The weight of the vehicle must be on the tire and wheel assemblies before tightening the suspension
fasteners.
Install the washer and the bolt in order to retain the shock absorber to the control arm.
6. Important: Do not tighten the nut or the bolt yet.
Install the nut and the bolt in order to retain the stabilizer shaft link to the control arm.
7. Important: Do not tighten the nut yet.
Install the outer adjustment link stud and a NEW nut to the control arm.
8. Remove the jack and the wood from the control arm.
9. Install the J42066 , or the equivalent tool, and 2 wheel nuts onto 2 studs in order to prevent the hub from turning.
10. Install the retainers and the bolts (2) in order to retain the outer constant velocity joint to the drive shaft flange.
1. Tighten the bolts to 50 Nm (37 ft. lbs.).
2. Use the J45059 in order to tighten the bolts an additional 68 degrees.
11. Remove the J42066 , or the equivalent tool, and 2 wheel nuts from the 2 studs.
12. Remove the wire supporting the wheel drive shaft (1).
13. Install the tire and wheel assembly.
14. Lower the vehicle.