
Montana AWD V6-3.4L VIN E (2004)
1. If you are installing now brake pads, use a C-clamp in order to compress the piston to the bottom of the caliper bore. Use the old brake pad, a
metal plate or a wooden block across the face of the piston in order to protect the piston and the caliper boot.
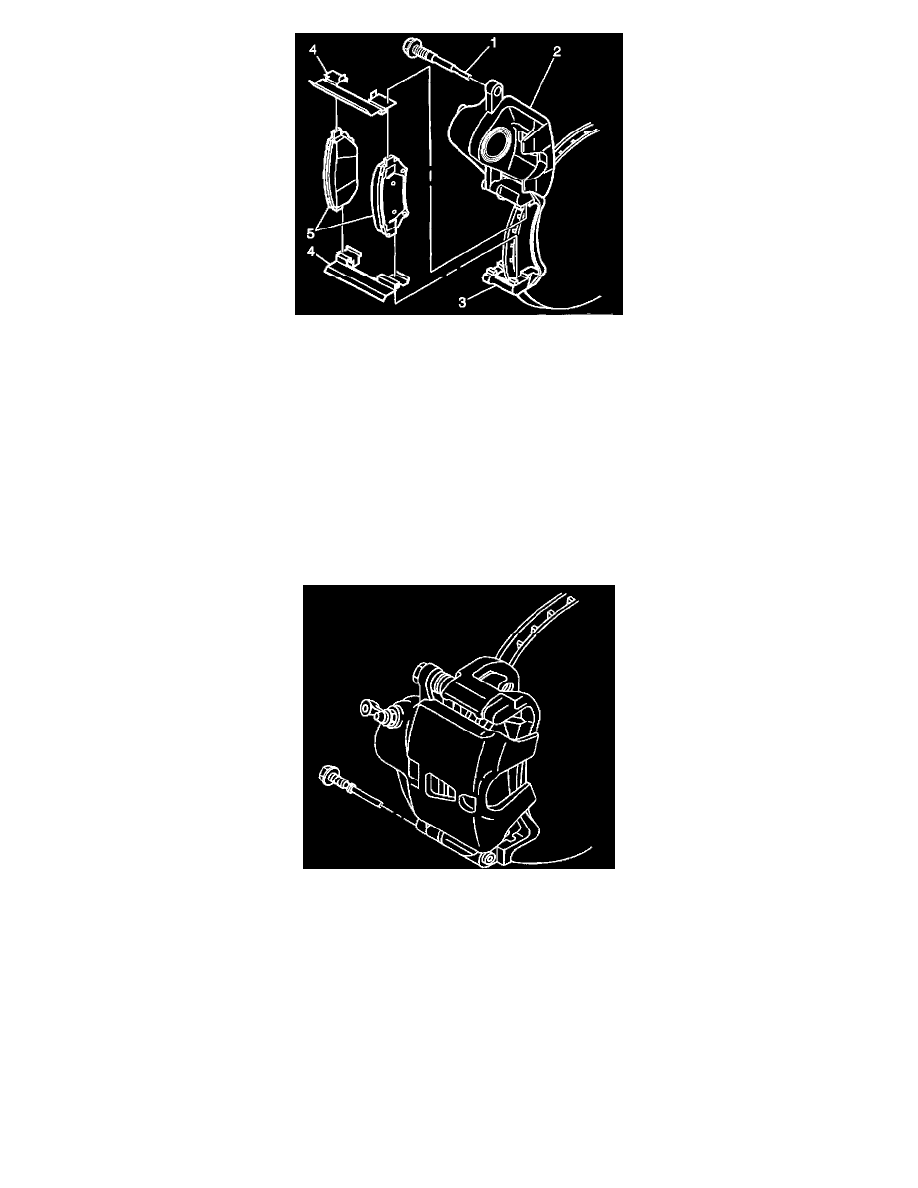
2. Install the two brake pad retainers (4) to the caliper bracket (3).
Important: Ensure that the wear sensor is positioned at the leading edge (upward) of the outer pad during forward wheel rotation.
3. Install the brake pads (5) over the brake pad retainers (4) and onto the caliper bracket (3).
4. Lubricate the bolt (1) and the bolt boot with High Temp Silicone Lube.
Notice:
Use care to avoid damaging pin boot when rotating caliper.
5. Pivot the caliper down onto the pads.
Notice:
Refer to Fastener Notice in Service Precautions.
6. Install the lower caliper bolt
-
Tighten the caliper bolt to 85 Nm (63 ft. lbs.).
7. Remove the two wheel nuts securing the rotor to the hub and bearing.
8. Install the tire and wheel.
9. Lower the vehicle.
10. Fill the master cylinder to the proper level with new clean brake fluid.
11. Pump the brake pedal 3/4 of a full stroke as many times as necessary to obtain a firm brake pedal.
12. Burnish the pads and the rotors.
Rear
Brake Pads Replacement - Rear
Removal Procedure