
Montana AWD V6-3.4L VIN E (2004)
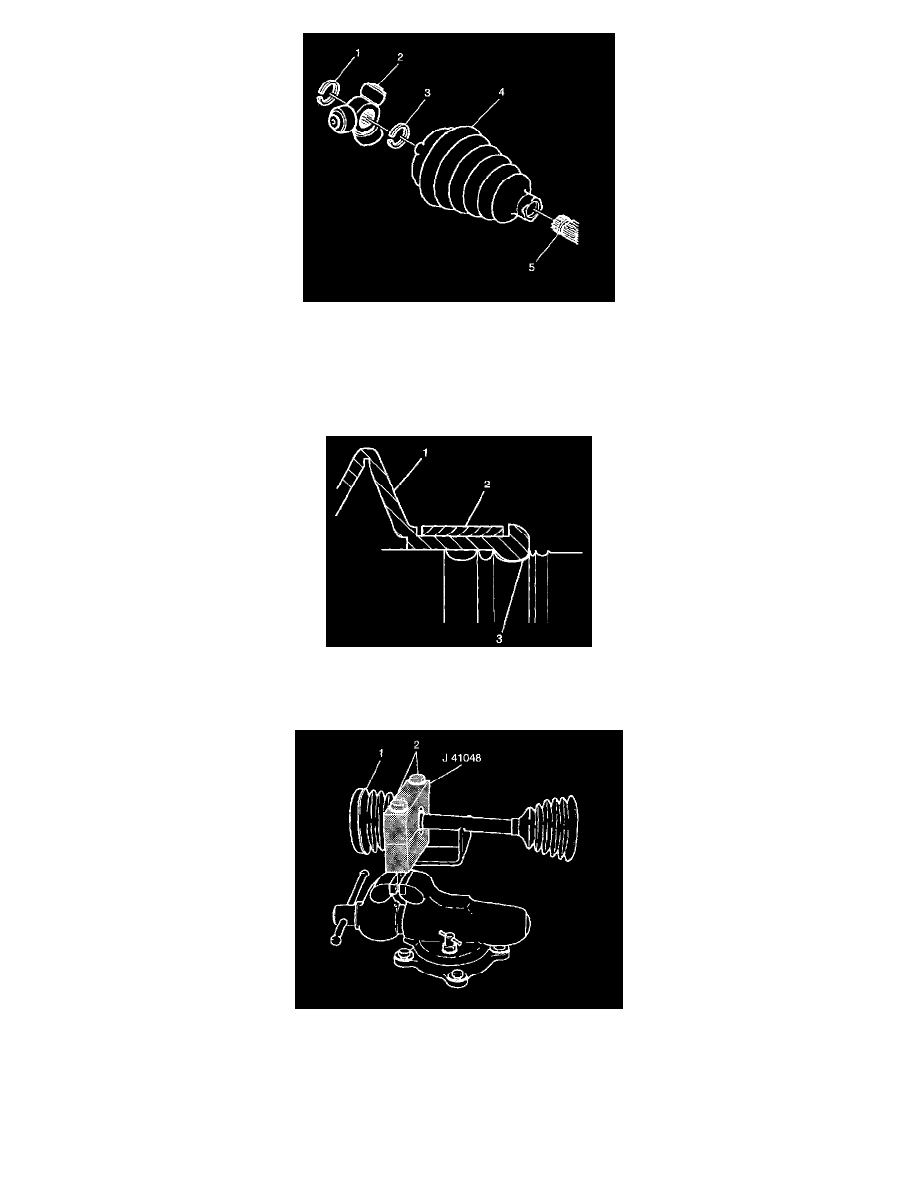
6. Remove the spacer ring (1), spider assembly (2), spacer ring (3) using J 8059, and tripot boot (4). Discard the boot and rings.
7. Clean the halfshaft bar (5). Use a wire brush in order to remove any rust in the boot mounting area (grooves).
8. Inspect the needle rollers, needle bearings, and trunnion. Check the tripot housing for unusual wear, cracks, or other damage. Replace any
damaged parts with the appropriate kit.
Installation Procedure
1. Place the new small swage ring (2) onto the small end of the joint seal (1). Slide the joint seal (1) and the small swage ring (2) onto the halfshaft
bar.
2. Position the small end of the joint seal (1) into the joint seal groove (3) on the halfshaft bar.
3. Mount J 41048 in a vise and proceed as follows:
3.1.
Position the inboard end (1) of the halfshaft assembly in tool J41048.
3.2.
Align the top of seal neck on the bottom die using the indicator.
3.3.
Place the top half of the J 41048 on the lower half.
3.4.
Before proceeding, ensure there are no pinch points on the halfshaft inboard seal. This could cause damage to the halfshaft inboard seal.
3.5.
Insert the bolts (2).
3.6.
Tighten the bolts by hand until snug.