
Parisienne V8-305 5.0L (1985)
1.
Remove the wheel and tire. Invert the wheel nuts and reinstall them on the studs to the specified torque. Be sure to follow the alternating nut
torquing sequence to ensure proper rotor alignment.
2.
Fasten a dial indicator to the caliper so the dial indicator button contacts the rotor about 13 mm (0.500 inch) from the outer edge.
3.
Zero the dial indicator.
4.
Move the rotor one complete revolution and observe total indicated runout (T.I.R.). Lateral runout cannot exceed 0.08 mm (0.003- inch).
^
On front wheel drive vehicles, excessive lateral runout of the rotor can often be improved by indexing the rotor on the hub one or two bolt
positions from the original position. If the lateral runout CANNOT be corrected by indexing the rotor, check the hub and bearing
assembly for looseness.
NOTICE:
Whenever the brake rotor has been separated from the wheel bearing flange, remove any rust or foreign material from the mating
surfaces of the wheel bearing flange and rotor. Failure to do this may result in excessive lateral runout of the rotor, causing brake
pedal pulsation.
5.
If lateral runout exceeds that specified in Step 4, refinish the rotor to specifications, reinstall rotor, and remeasure lateral runout.
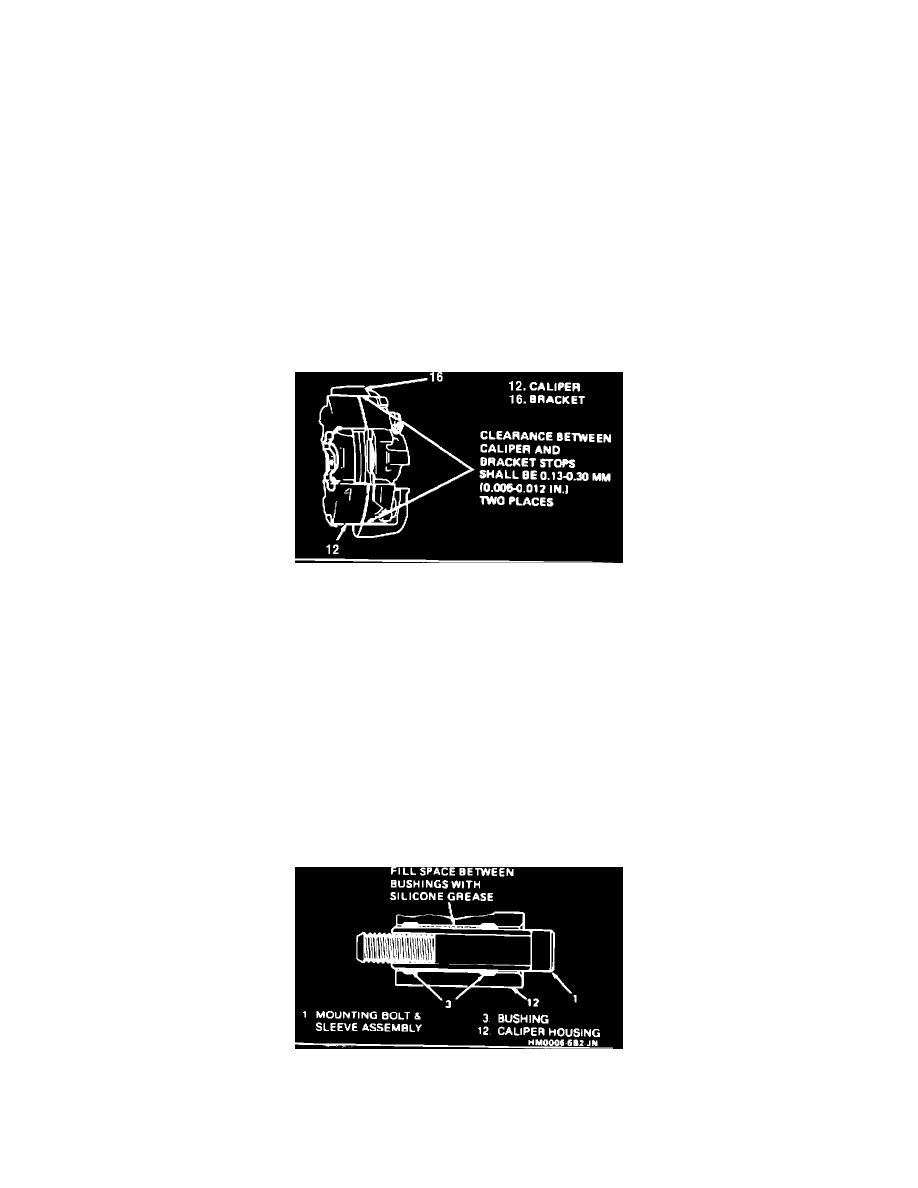
FIGURE 2 - CALIPER TO BRACKET CLEARANCE
WHEEL BOLT TORQUE:
Overtorqued wheel nuts or torquing wheel nuts without alternating the tightening sequence, especially on aluminum wheels, can also create a rotor
runout condition. Refer to Figure 1.
The use of a torque wrench when tightening wheel nuts is necessary to prevent distortion of the rotor, hub or wheel. The wheel nuts should be tightened
in two steps to assure an even clamp load.
CALIPER DRAG:
Caliper drag is usually caused by interference between the caliper to knuckle interface or a caliper bolt binding on the caliper bolt bushing.
Caliper to knuckle clearance is important. Clearance should be checked with the caliper in position and the caliper mounting bolts properly torqued. If
excessive clearance exists, a clunking noise may occur on each brake apply. Too little clearance can cause caliper drag. The desired clearance is .005
-
012 in. at each caliper to knuckle bracket interface, or a total of 010 - .024 in. The caliper bracket stops can be filed to obtain proper
clearance. Refer to Figure 2.
FIGURE 3 - LUBRICATING CALIPER CAVITY
When servicing the caliper, the caliper bolts should be cleaned and the space between the caliper bolt bushings should be filled with silicone grease such
as Part Number 1052863 or equivalent. This will prevent the caliper dragging or binding on the mounting bolts. Refer to Figure 3.
LINING MATERIAL ABRASIVENESS: