
Parisienne V8-350 5.7L DSL (1983)
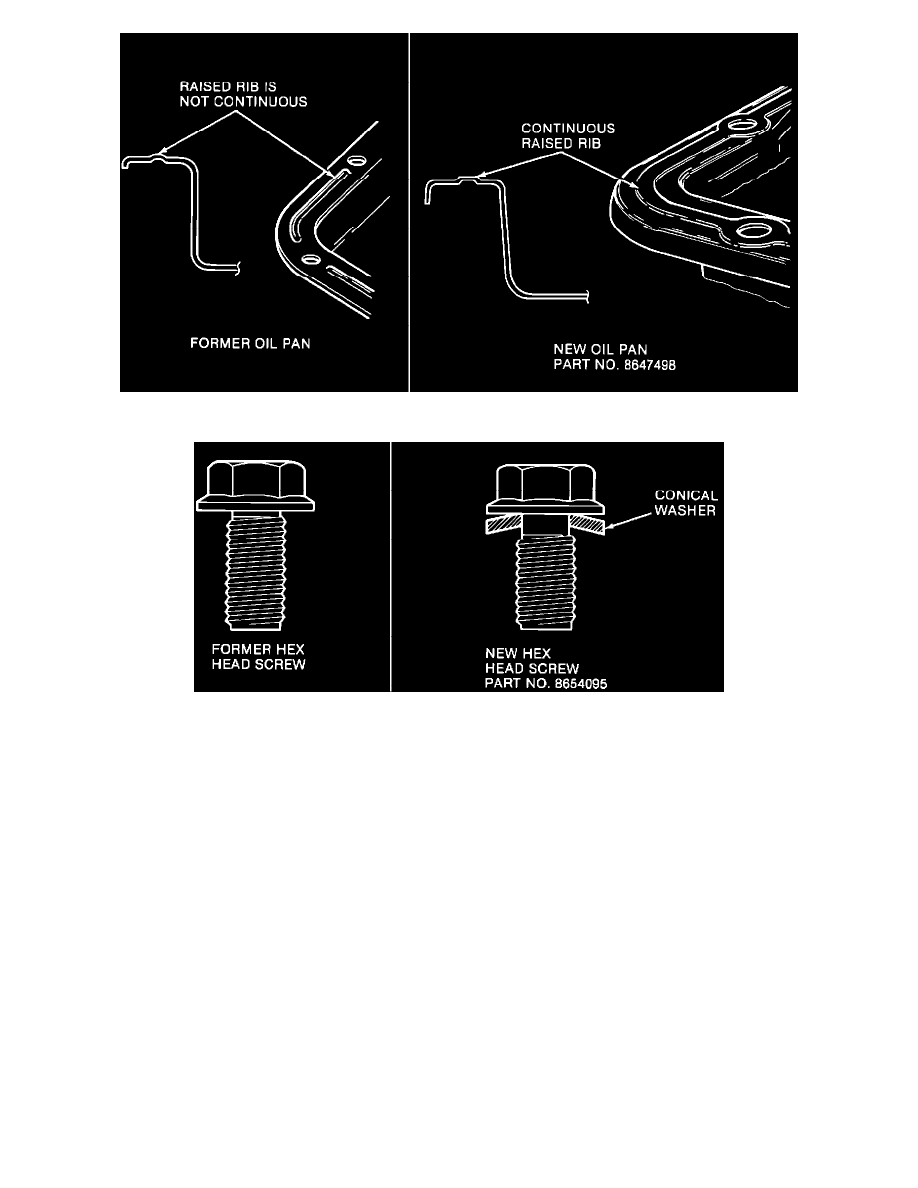
Figure 1 - New Oil Pan Configurations
Figure 2
3.
Replace the former oil pan, (Figure 1) hex screws (Figure 2) and gasket with new oil pan (Figure 1) and hex head screw and conical washer
assemblies (Figure 2). Order service package 8642999.
The service package contains the following:
1 - New Oil Pan 16 - Hex Head Screw and Conical Washer Assembly 1 - Gasket
These parts are also available separately
8647498
New Oil Pan
8654095
New Hex Head Screw & Conical Washer Assembly
8642360
Gasket
4.
When replacing the oil pan, it is critical that a torque wrench is used to tighten the hex head screws. DO NOT USE IMPACT WRENCH!
Torque all hex head screws to 11.0 N-m or (9.0 ft.lbs.), then re-torque all the hex head screws a second time to the same specifications as above.
The second re-torque is important because the gasket material relaxes after the first tightening.