
Safari Wagon V8-305 5.0L (1987)
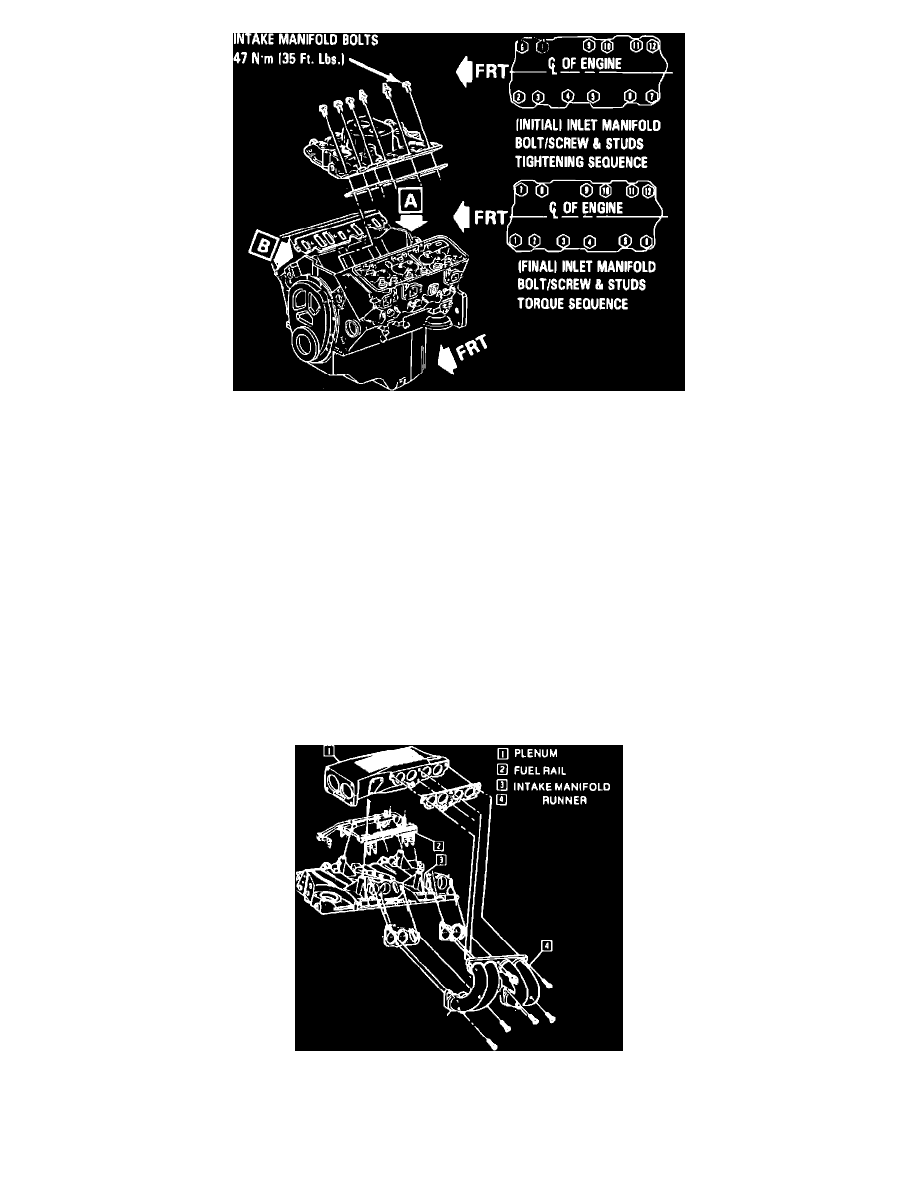
Fig. 8 Intake manifold tightening sequence. 1985---88 V6-262 engine
9.
Remove manifold retaining bolts and the manifold. It may be necessary to remove carburetor, EGR valve and/or idle control solenoid to
provide clearance for manifold bolt removal.
10.
Ensure surfaces are clean and dry, then apply 3/16 bead of RTV sealer on each block ridge and apply suitable sealer around water outlets, install
gaskets and secure gasket position by extending bead of sealer approximately 1/2 inch onto gasket ends.
11.
Install manifold and retaining bolts, ensuring areas between case ridges and manifold are completely sealed.
12.
Torque manifold bolts to specifications in sequence shown in Figs. 6, 7 and 8, then reverse remaining procedure to complete installation.
1985-88 V8-305 W/EFI
1.
Disconnect battery ground cable, drain cooling system and remove air intake duct.
2.
Disconnect accelerator, cruise control and transmission cables, as equipped.
3.
Disconnect coolant hoses, electrical connectors, and the vacuum and breather hoses from throttle body, noting position for installation.
4.
Remove throttle body from plenum, then remove distributor shield.
5.
Disconnect brake booster and vacuum hoses from plenum, noting position for installation.
6.
Connect pressure gauge J-34370-1 or equivalent to pressure tap on fuel rail, position bleed hose in suitable container and slowly relieve fuel
system pressure. Failure to relieve system pressure prior to disconnecting fuel system components may cause fire or personal injury.
Fig. 9 Plenum, runner & fuel line installation. 1985---88 Corvette, 1985---88 V8-305 W/EFI similar