
Solstice L4-2.0L Turbo (2008)
Note
It is critical during installation to ensure the bearing rear cap and cylinder head alignment is correct and the mating surfaces are flush.
-
Ensure that all sealing material has been removed from the components and the sealing surfaces are clean and free of contamination prior to
applying the sealer.
-
Install and align the rear cap within 20 minutes of applying the sealer.
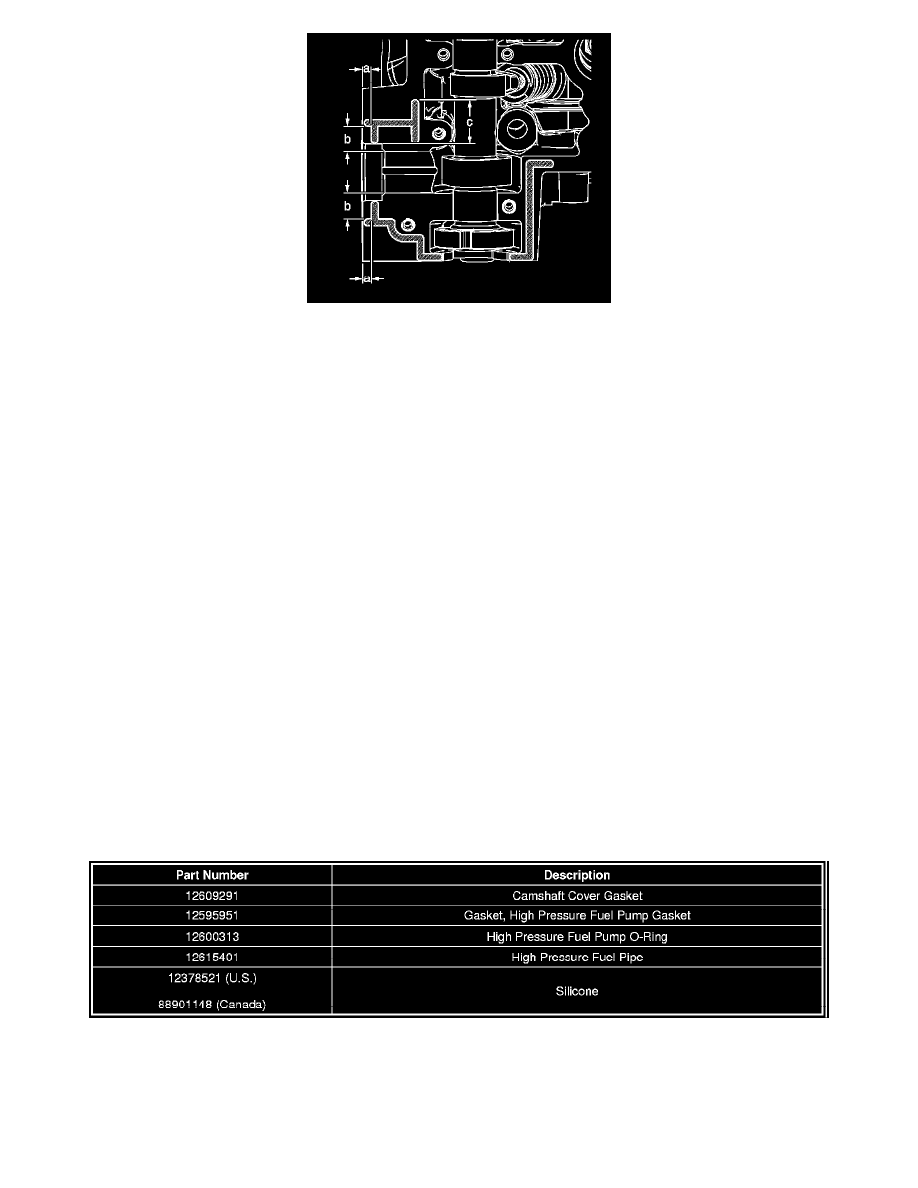
5. Apply a 2.5 mm (0.1 in) bead of sealer, GM P/N 12378521 (in Canada, use P/N 88901148) to the cylinder head at the number 6 intake camshaft
rear cap mating surface.
Note
Apply the sealer to all locations centrally locating the bead on the rail.
-
Run the bead to 5 mm (0.2 in), dimension "a", as shown.
-
Where the cap ends on the perimeter rail, extend bead approximately 4 mm (0.2 in) beyond edge of cap.
-
Run bead, dimension "c", 32 mm (1.3 in) from the edge of the cylinder head as shown.
-
Run bead, dimension "b", 20 mm (0.8 in) from edge of cylinder head as shown.
6. Install the number 6 intake camshaft rear cap.
1. Tighten the cap bolts evenly to 5 Nm(44 lb in).
2. Tighten the cap bolts evenly to 10 Nm(89 lb in).
3. Back the cap bolts out 120 degrees.
4. Tighten the cap bolts evenly a final pass to 10 Nm(89 lb in).
7. Install the camshaft cover and gasket, GM P/N 12609291. Refer to Camshaft Cover Installation in SI.
8. Install the fuel pump. Refer to Fuel Pump Installation in SI.
Important
When installing the fuel pump, install a NEW high pressure fuel pump O-ring (GM P/N 12600313), high pressure fuel pump
gasket-to-cylinder head (GM P/N12595951) and high pressure fuel pipe (GM P/N12615401).
Parts Information
Warranty Information