
Solstice L4-2.0L Turbo (2008)
Notice: Refer to Fastener Notice (See: Service Precautions/Vehicle Damage Warnings/Fastener Notice) .
3. Install the negative battery cable ground bolt (6) at the engine lift bracket.
Tighten the bolt to 25 N.m (18 lb ft).
4. Install the negative battery cable clip (4) to the oil level indicator tube bracket.
5. Raise and support the vehicle.
6. Install the positive battery cable to the starter.
7. Install the positive battery cable to starter nut (2).
Tighten the nut to 10 N.m (89 lb in).
8. Lower the vehicle.
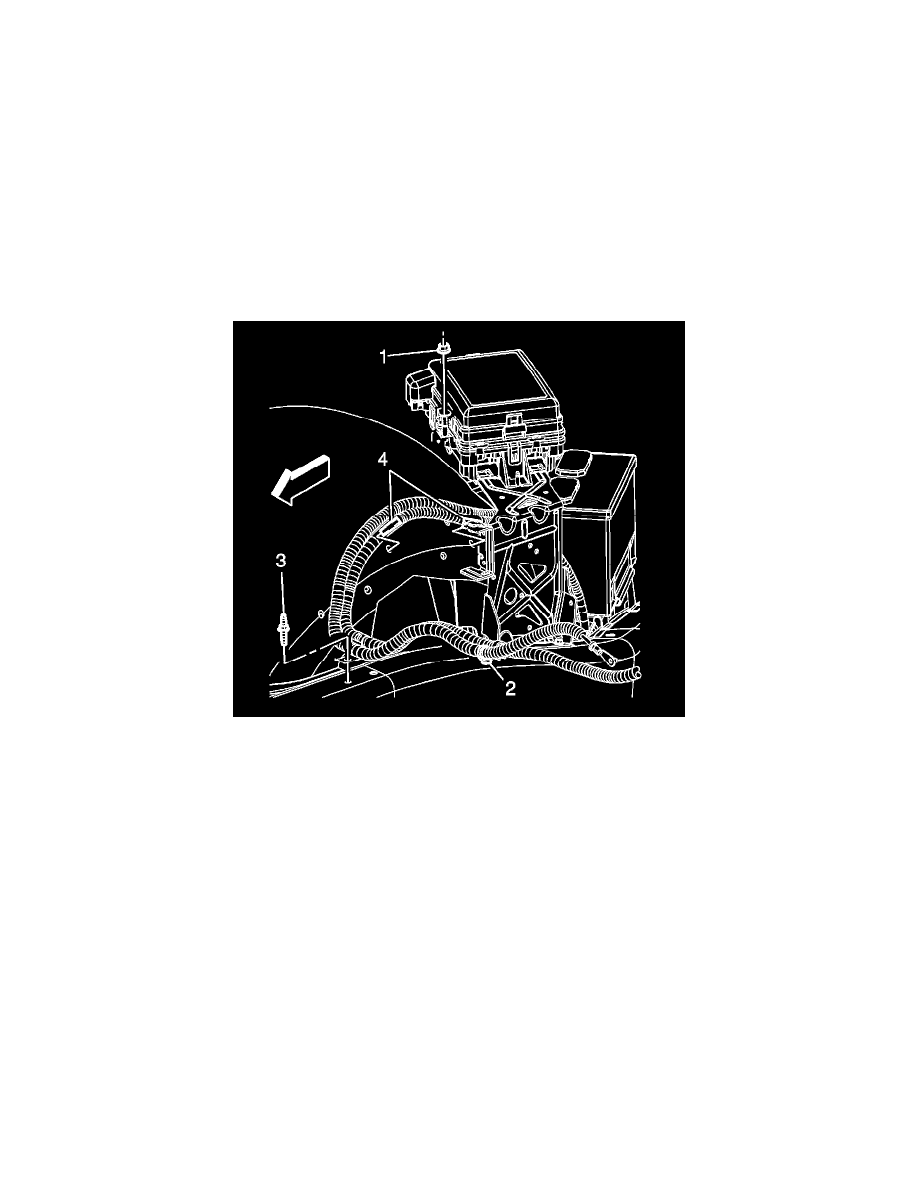
9. Install NEW tie straps (1) securing the battery cables to the engine wiring harness.
10. Install the positive battery cable to the BEC stud.
11. Install the positive battery cable nut (1) to the BEC stud.
Tighten the nut to 10 N.m (89 lb in).
12. Position the battery cable clip and install the stud (3) to the side rail.
Tighten the stud to 10 N.m (89 lb in).
13. Install the battery cable clip (4) to the wheelhouse liner.