
Solstice L4-2.4L (2007)
Remove the trim at the top of the "A" pillar. Run water down the top of the "A" pillar to locate the leak.
Water will gather down at the bottom rear of the "A" pillar pool up and drain into the car at the rearmost arrow. Making sure the seam is sealed at both of
the arrows will create a water path to the outside. Clean the area with a non-oil based cleaner and reseal with urethane.
2006 Solstice Only: Apply a piece of foam from the front inboard urethane inboard of the sill plate retaining holes all the way to the "B" pillar. Remove
the foam gaskets from the sill plate clips.
Condition # 4
The carpet may be wet by the bottom of the "A" pillar.
Cause
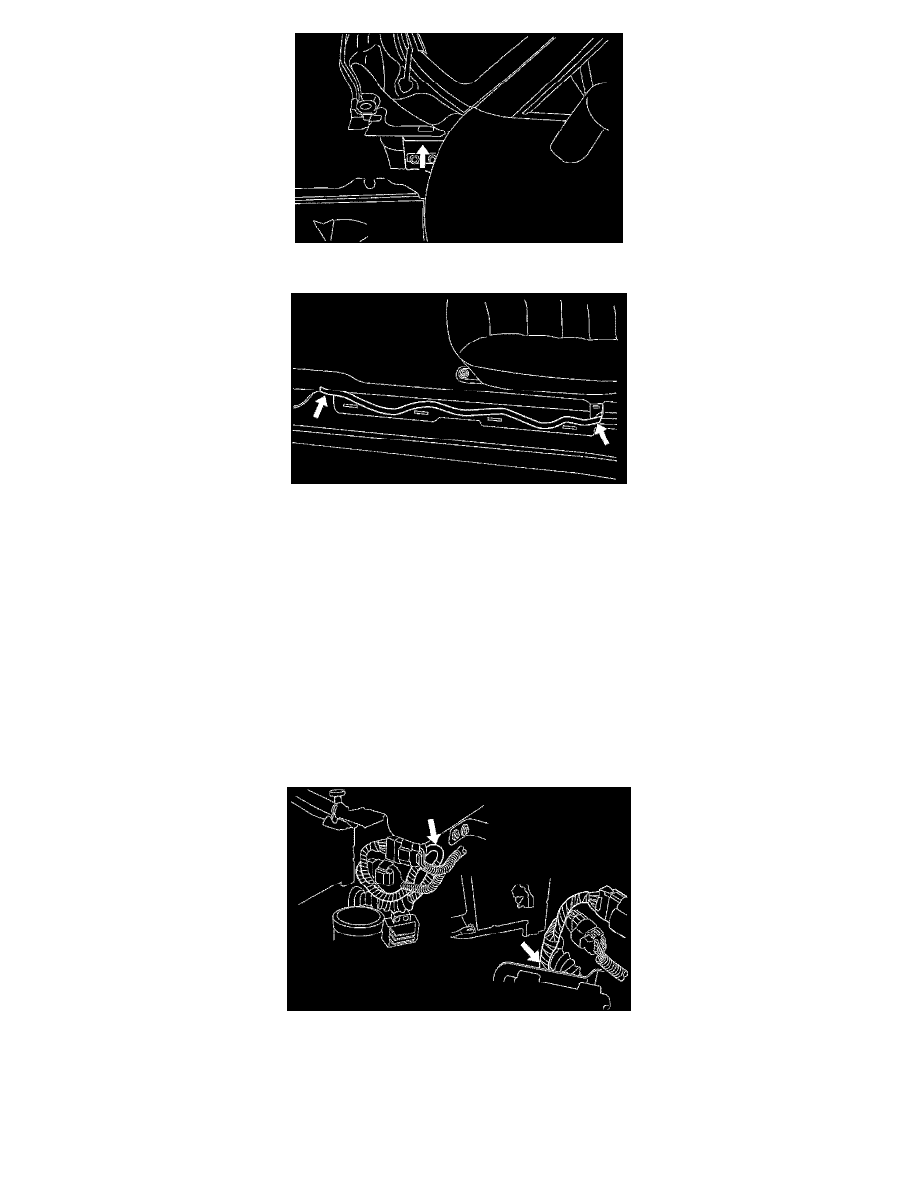
The under hood wire harness on the left hand side just forward of the "A" pillar may not be routed properly causing water to enter the wire harness and
flow inside the vehicle.
Correction
The picture above shows the drip loop pointing upward. The correct position should be pointing downward as show in the picture below of the
illustration above. Also ensure that the grommet is fully seated.
Condition # 5
The customer may comment of water running down the "A" pillar and dripping into the car.