
Solstice L4-2.4L (2007)
Cut a longer thin 30 mm (1-1/8 in) slit in the weatherstrip. The left hand illustration above shows the original weatherstrip while the right hand
illustration shows the slit cut in the weatherstrip to the end of the square mold lines.
Cut a 3 mm (1/8 in) wider piece of weatherstrip out of the bottom of the weatherstrip.
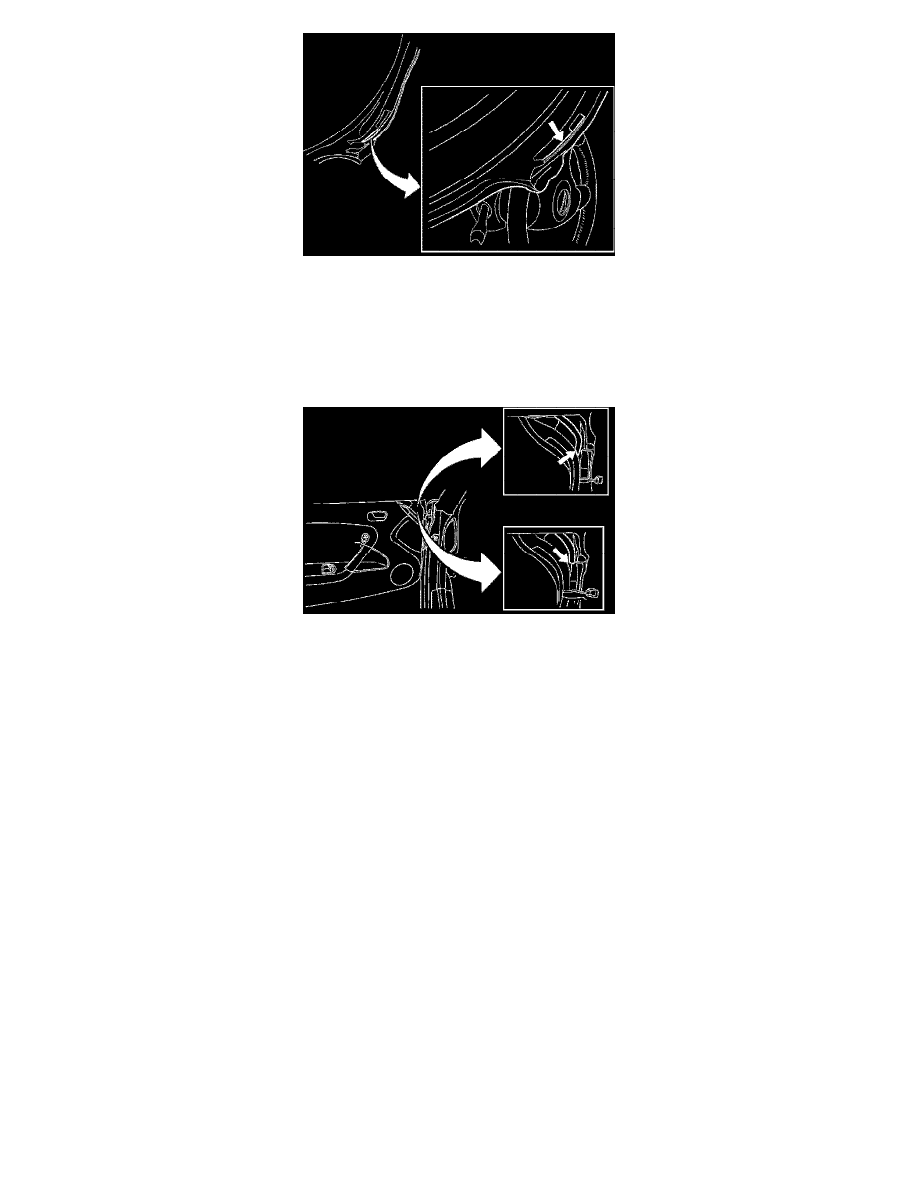
Plan-A and Plan-B Weatherstrips: Make sure that the windnoise weatherstrip located on the front edge of the door is not blocking the drain opening of
the windshield weatherstrip.
Relocate the weatherstrip so there is an approximate 5 mm (1/4 in) gap between the windnoise weatherstrip and the primary door seal. The illustration
above shows the mispositioned weatherstrip (top) and then the correct position (bottom).
Plan-A and Plan-B Weatherstrips: During a torrential rain storm water may leak down the A-Pillar drip from the top receiver pin cup or drip from roof
header onto the shifter. Refer to Corporate Bulletin Number 06-08-67-016 (Apply Sealer to Convertible Top Seam) for further information.
Condition # 2
Important:
A leak in this area may only be present when driving in rain.
The front floor carpets are wet or the carpet may be wet by the bottom of the "A" pillar near the sill plate.
Cause
The front of the dash and the floor pan seam may have a void in the sealer.
Correction