
Solstice L4-2.4L (2007)
1.
Shine a light from inside the vehicle and use a mirror to look up at the seam from inside the engine compartment or below the car. Clean the area
with a non-oil based cleaner and reseal with urethane.
2.
Run water down the front of the "A" pillar to locate the leak. Clean the area with a non-oil based cleaner and reseal with urethane.
Condition # 3
The carpet may be wet by the bottom of the "A" pillar near the sill plate.
Cause # 1
Water may be entering the "A" pillar at the windshield weatherstrip and flowing down the "A" pillar.
Correction # 1
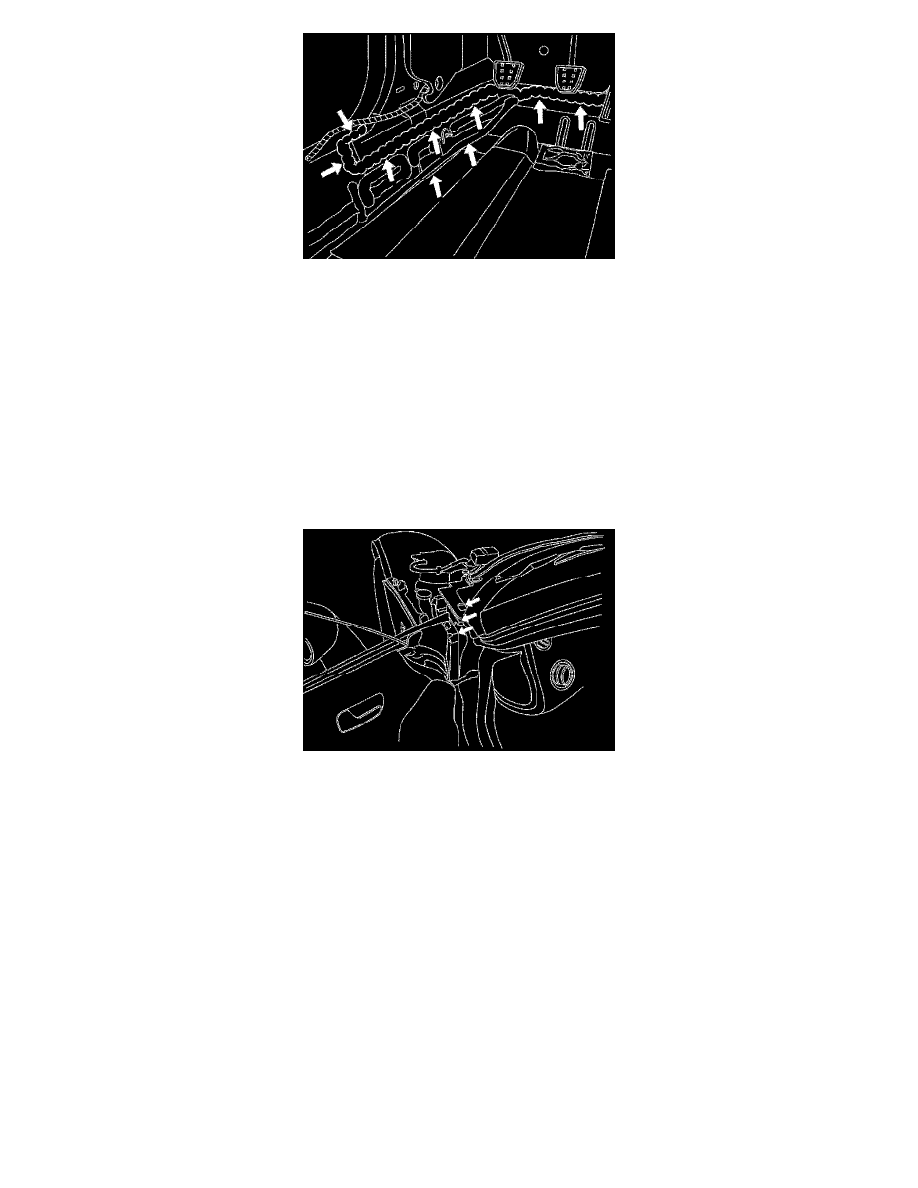
Remove the left or right cowl screen cover and seal three locations:
^
Make sure the hole at top of the pillar is covered. Refer to the top arrow in the illustration.
^
Seal the seam at the top of the pillar with butyl. Refer to the middle arrow in the illustration.
^
Seal around the front top and back side of the upper door hinge with Kent seam sealer P/N 10200. Refer to the bottom arrow in the illustration.
Cause # 2
There may be a lack of sealer at the sill plate to the lower "A" pillar.
Correction # 2