
Sunfire L4-138 2.3L DOHC VIN D MFI (1995)
7. Loosen camshaft housing to cylinder head attaching bolts in reverse order of tightening sequence, Fig. 21.
8. Leave two camshaft housing to cylinder head attaching bolts loosely installed. Thread four of the camshaft housing to cylinder head bolts into
tapped holes on camshaft housing cover to separate cover from housing.
9. Remove two camshaft housing to cylinder head bolts and remove camshaft housing cover.
10. Note position of timing chain sprocket dowel pin for reassembly, then remove camshaft, using care not to damage journals.
11. Remove oil seal from camshaft. This seal must be replaced any time cover and camshaft housing are separated.
12. Remove valve lash adjuster. Keep valve lash adjusters in order for reassembly. Store valve lash adjusters in the upside down position in clean
engine oil to prevent lifter bleed down.
13. Remove camshaft housing and gasket from cylinder head.
14. Reverse procedure to install. Prior to installation, lubricate camshaft journals and valve lash adjusters with lubricant No. 1052365, or equivalent.
Apply suitable sealant to threads of camshaft housing and cover retaining bolts and ignition coil and module assembly attaching bolts. When
installing camshaft housing cover to camshaft housing, refer to Fig. 22 for seal positioning. Tighten camshaft housing and cover bolts in sequence
shown in Fig. 21. Torque bolts to 11 ft. lbs., then tighten an additional 75°. Torque timing chain housing to engine and camshaft housing fasteners
to 19 ft. lbs.
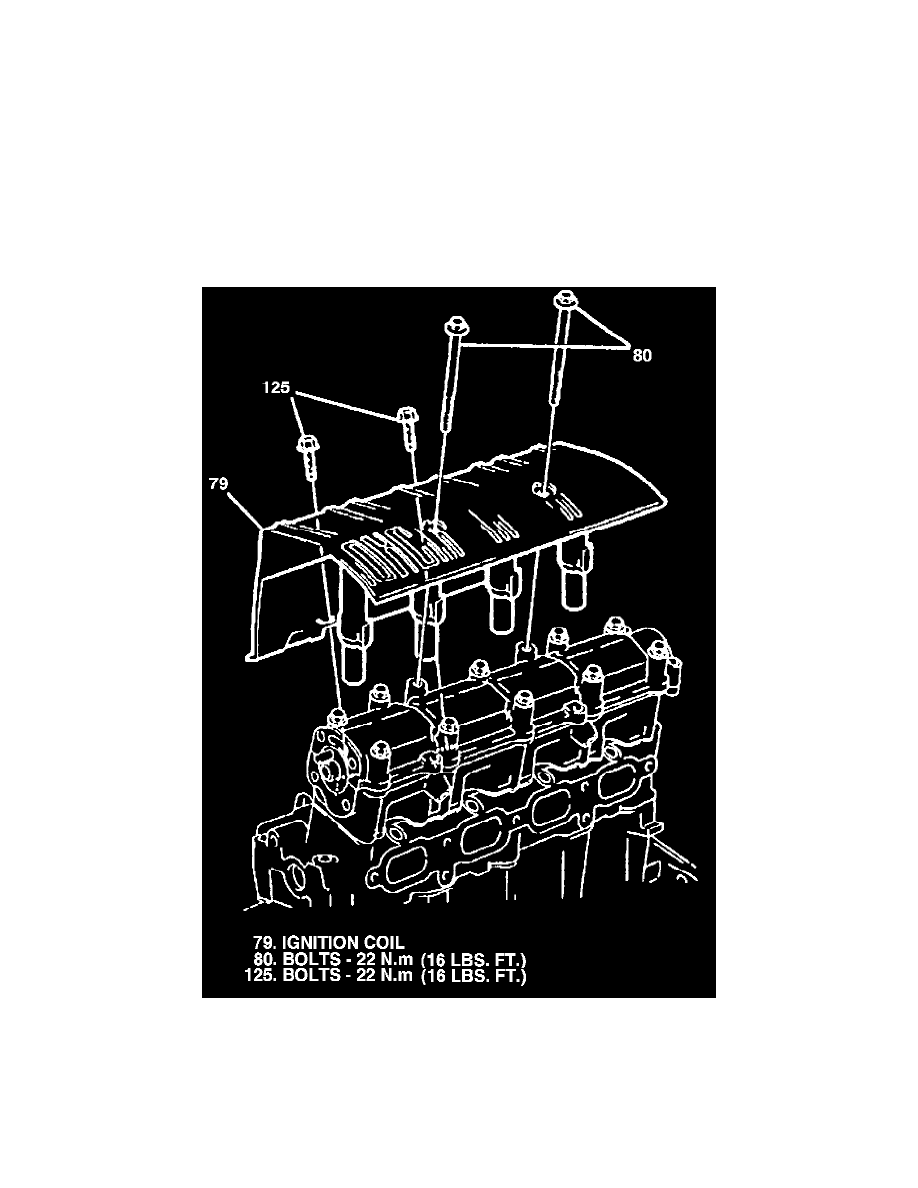
Fig. 19 Ignition Coil & Module Assembly Removal