
Sunfire L4-144 2.4L DOHC VIN T SFI (2001)
2. Dry the area thoroughly.
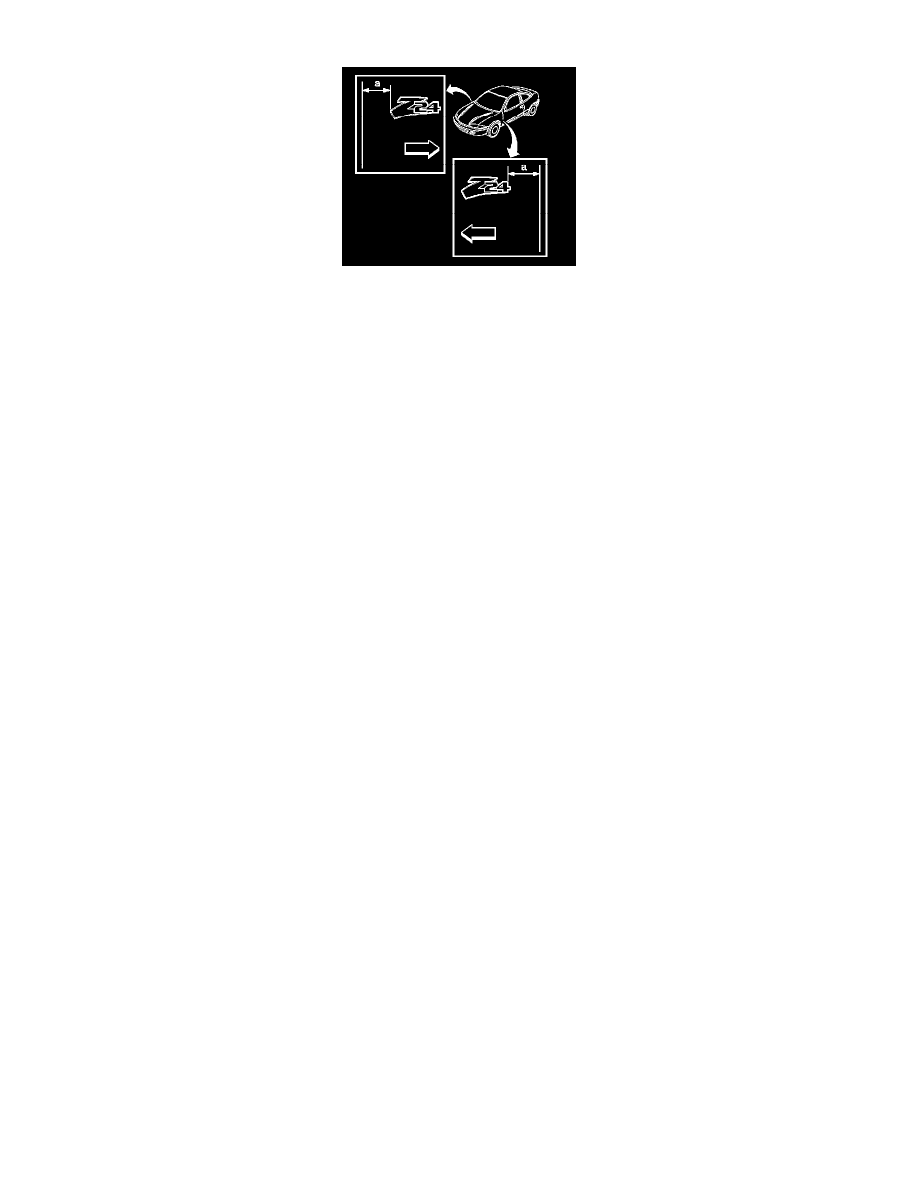
3. If the location of the emblem/nameplate has not been marked, apply tape and use the following dimensions:
Dimension "A" is 47 mm (1 7/8 in) from the fender edge to the emblem.
4. Heat the mounting surface to approximately 27-41°C (80-105°F).
5. Ensure that the temperature of the emblem/name plate is approximately 29-32°C (85-90°F).
6. Remove the protective liner from the back of the emblem/name plate.
7. Position the emblem/name plate to the location marks and press the emblem/name plate to the mounting surface.
8. Apply equal pressure along the emblem/name plate in order to uniformly bond the item to the mounting surface.
9. Remove the protective tape from the mounting surface.
Exterior Trim Molding/Nameplate Replacement
Exterior Trim Molding/Nameplate Replacement
1. Cover the adjacent finishes with masking tape in order to prevent damage to the finish.
2. Seal the following components:
*
The screw holes in the body panels.
*
The bolts that may permit water entry into the body interior
*
The clips that may permit water entry into the body interior
3. Use the following materials for sealing:
*
A body caulking compound
*
The presealed screws
*
The nuts
*
The clips
4. Do not use rotating adhesive removal discs on the moldings. Such use generates excessive heat. Excessive heat may cause molding damage.
5. The following components are attached to the body panels using adhesive tape:
*
The moldings
*
The emblems
*
The name plates
6. Keep the following components at temperatures between 21-38°C (70-100°F) prior to installation:
*
The body surface
*
The molding
*
The emblem
*
The name plate
Use auxiliary heat sources in order to warm the surface if the temperature is below 21°C (70°F).
7. Ensure that all of the surfaces are clean and free of wax or oily film.
8. If the molding pulls loose from the adhesive backing (tape remains on the body panel), DO NOT remove the tape from the body.
9. Wash the affected area using soap and water. Wipe the area dry.
Use a clean rag to wipe the following areas using 3M General Purpose Adhesive Cleaner (P/N 08984), or equivalent. DO NOT use the cleaner on
an air-dry enamel.
10. Apply a length of masking tape as a molding guide, if needed. You may also use a straight edge.
11. If you do not remove the tape from the body, apply Loctite 414 adhesive GM P/N 1052621 or equivalent to the back of the molding. Position the
molding to the body.
Apply constant pressure to the molding for 30 seconds or until a firm bond is made.