
Sunfire L4-144 2.4L DOHC VIN T SFI (2001)
Tie Rod: Service and Repair
Inner Tie Rod
TIE ROD REPLACEMENT-INNER-ON VEHICLE
-
Tools Required
-
J34028 Inner Tie Rod Wrench
Removal Procedure
1. Raise the vehicle. Refer to Vehicle Lifting.
2. Remove the tire and wheel assembly from the vehicle. Refer to Tire and Wheel Removal and Installation.
3. Remove the rack and pinion boot. Refer to Rack and Pinion Boot Replacement-On Vehicle.
Notice Do not change the rack bearing preload adjustment before removing the inner tie rod from the steering rack. This could cause damage to the
pinion or the steering rack or both.
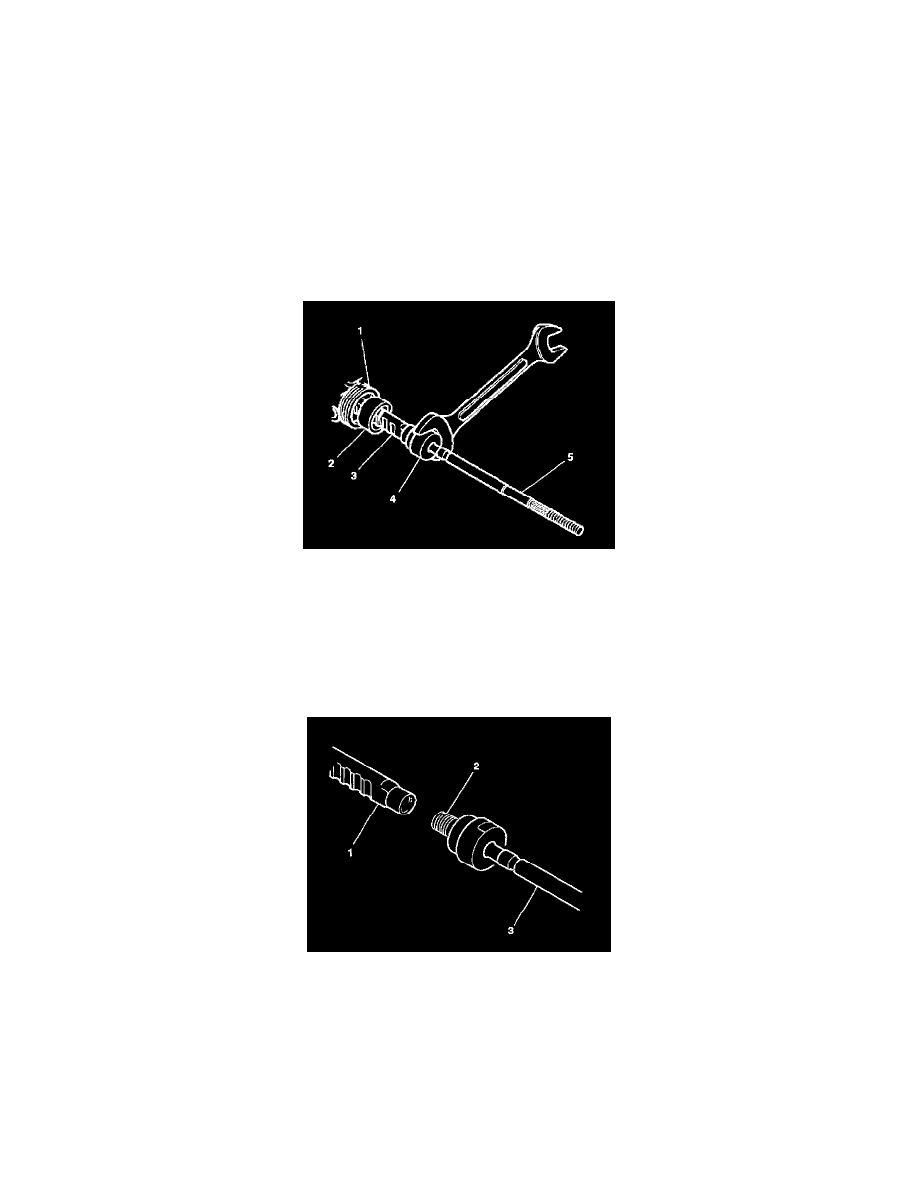
4. Remove the shock dampener (2) from the inner tie rod (5).
5. Slide the shock dampener (2) back onto the rack (1).
Important Do not hold the steering rack while removing the inner tie rod if the preload adjustment has not been changed.
6. Remove the inner tie rod (5) from the rack assembly (1) as follows:
-
Place a wrench on the flats of the inner tie rod housing (4)
-
Rotate the inner tie rod housing (4) counterclockwise until the inner tie rod (5) separates from the rack.
7. Remove the old Loctite (R) from the threads (2) of the rack (1) and the inner tie rod (3).
Installation Procedure
Important Make sure the shock dampener is on the rack before installing the inner tie rod.
The threads must be clean prior to the Loctite (R) application. Check the Loctite (R) (or equivalent) container for expiration date. Use only enough
Loctite (R) to evenly coat the threads.