
Sunfire L4-2.2L VIN 4 (1996)
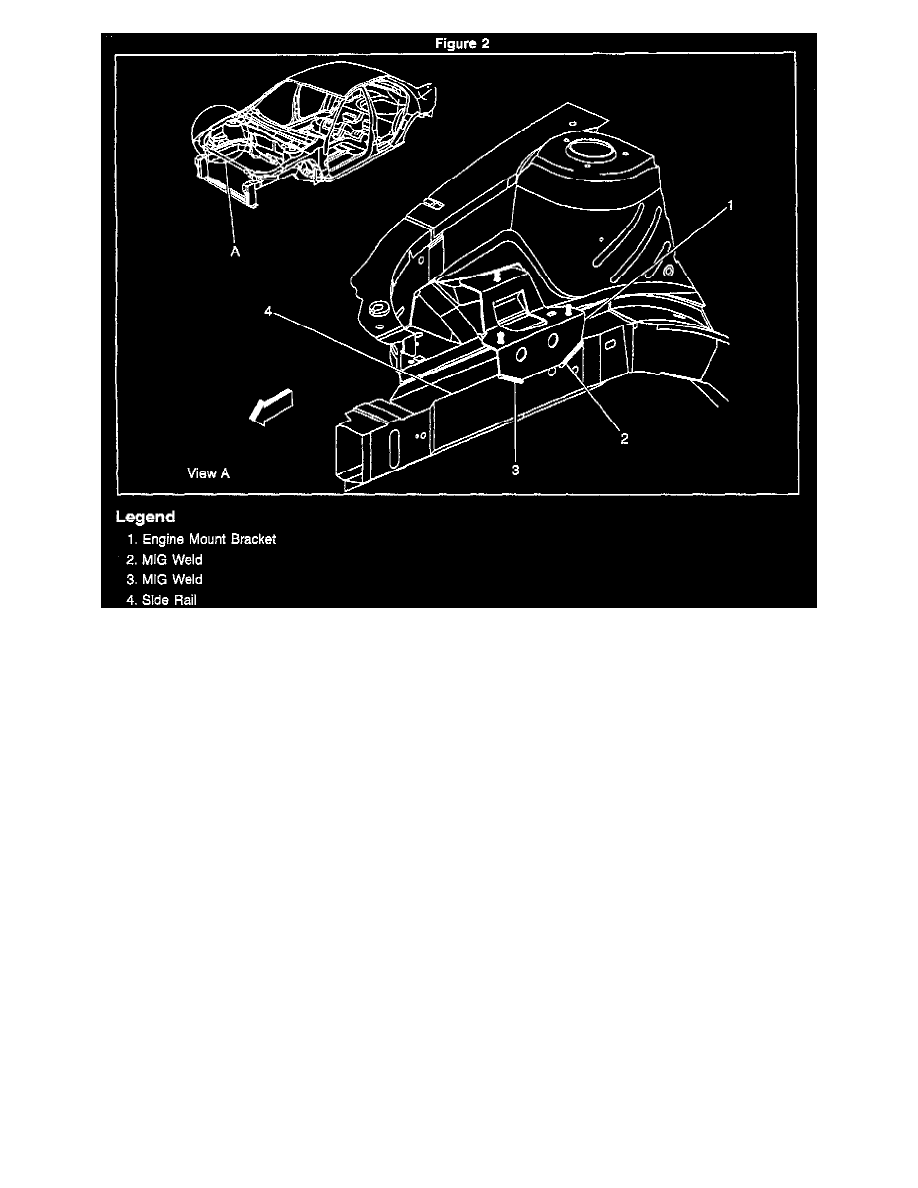
Figures 1 and 2
1.
Protect any adjacent components: fuel lines, windshield, and plastics with weld resistant blanket.
2.
Locate and grind out existing welds that secure mounting bracket to the wheelhouse. See Figures 1 and 2.
Important:
There are two design variations for the right engine mounting bracket. Design "A" is pictured in Figure 1; it has one continuous weld along the lower
edge where the bracket attaches to the rail.
Important:
When repairing this weld, grind out WELD ONLY, using a suitable tool such as a burr mandrel, cutoff wheel or equivalent. Re-weld the entire length
of the lower edge of the bracket.
3.
From top, weld top edge of bracket to wheelhouse, apply one continuous MIG weld extending the full length of bracket.
4.
Raise vehicle and protect adjacent components with weld resistant blanket to prevent damage to CV boots and brake lines.
5.
a.
(Figure 1) - From below, grind out WELD that secures engine mount bracket to rails, or
b.
(Figure 2) - From below, grind out TWO WELDS that secure engine mount bracket to rail.
6.
a.
MIG weld one continuous bead along entire lower edge of bracket to rail, or
b.
MIG weld two continuous beads (63 mm) along the beveled corners of mounting bracket to the rail.
7.
Clean and prepare all welded surfaces for painting.
8.
Primer and top coat welded surfaces.
LH Rear Transaxle Mount