
Sunfire L4-2.2L VIN F (2002)
place.
4.2.
Remove the red retainer from the allen head screw using a small flat-blade tool, if equipped.
4.3.
Turn the allen head screw until the sunroof glass panel is fully closed.
You may need to apply a significant amount of force to move the sunroof actuator with the allen wrench.
4.4.
Relieve the pressure on the sunroof actuator by backing off the alien screw approximately 15 degrees.
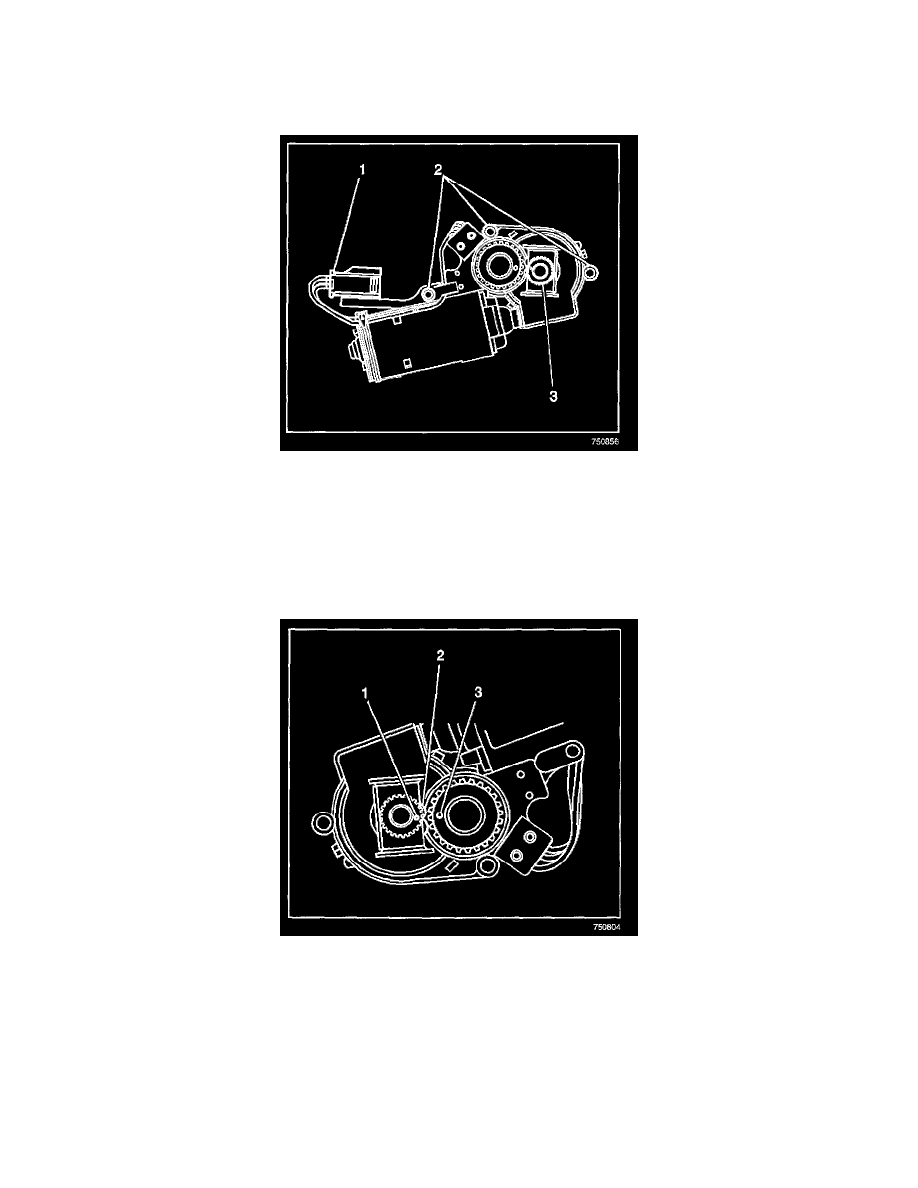
5. Remove the sunroof actuator bolts (2) from the sunroof actuator.
6. Disconnect the wire harness from the connector (1) on the sunroof actuator.
7. Remove the sunroof actuator from the sunroof module.
INSTALLATION PROCEDURE
IMPORTANT: Before you install a new sunroof actuator or re-install the old actuator to the sunroof module, ensure that the actuator is timed to the
closed position.
1. Verify that the original sunroof actuator or the new sunroof actuator is timed to the closed position by performing the following steps.
1.1.
The hole in the large timing gear (3), the notch in the disk (2) below the drive gear and the scribe mark (1) on the drive gear should all be in
line with each other.
1.2.
If the actuator is not timed to the closed position, connect the switch, headliner harness and express module to the sunroof actuator and run
the actuator to the closed position. Verify all timing marks are aligned.