
Sunfire L4-2.2L VIN F (2002)
Compressor Clutch Bearing: Service and Repair
Clutch Rotor and/or Bearing Install (V5 - Conventional Mount)
TOOLS REQUIRED
^
J 6083 Snap Ring Pliers
^
J 8092 Driver Handle
^
J 8433-1 Puller Bar
^
J 8433-3 Forcing Screw
^
J 9481-A Bearing Installer
^
J 21352-A Support Block
^
J 33017 Pulley and Bearing Assembly Installer
^
J 33019 Bearing Staking Tool
^
J 33023-A Puller Pilot
^
J 34992 Compressor Holding Fixture
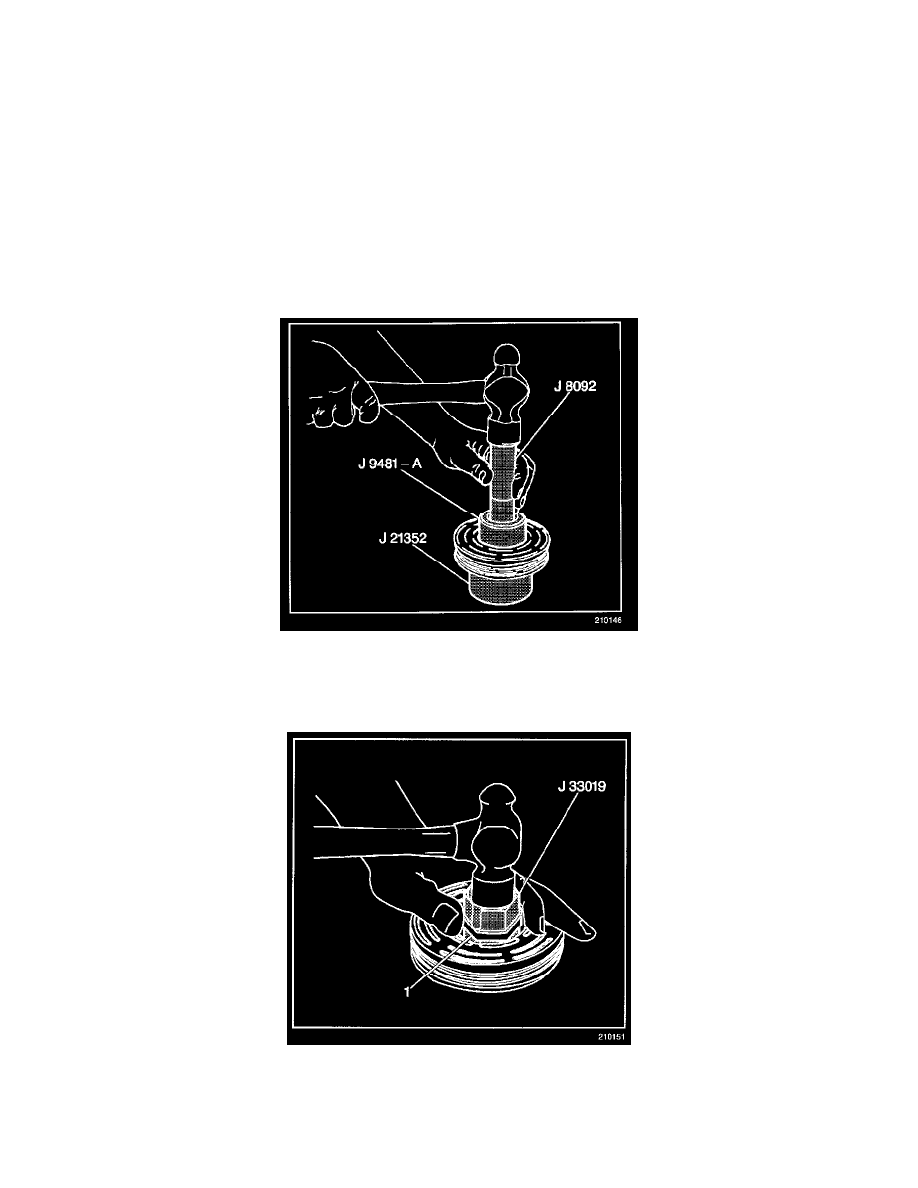
NOTE: Do not support the rotor by resting the pulley rim on a flat surface during the bearing installation or the rotor face will be bent.
1. Place the pulley rotor on the J 21352-A in order to fully support the rotor hub during the bearing installation.
2. Align the new bearing with the hub bore.
3. Using the J 9481-A and the J 8092, drive the bearing into the hub.
The J 9481-A applies force to the outer race of the bearing.
4. Place the J 33019 and the staking pin in the hub bore.
5. Shift the rotor and bearing assembly on the J 21352-A in order to fully support of the hub under the location of the staking pin.
6. Use a heavy-duty rubber band (1) in order to hold the stake pin in the guide of the J 33019.
IMPORTANT: Do not allow a metal stake to contact the outer face of the bearing in order to prevent distortion of the outer race.