
Sunfire L4-2.2L VIN F (2002)
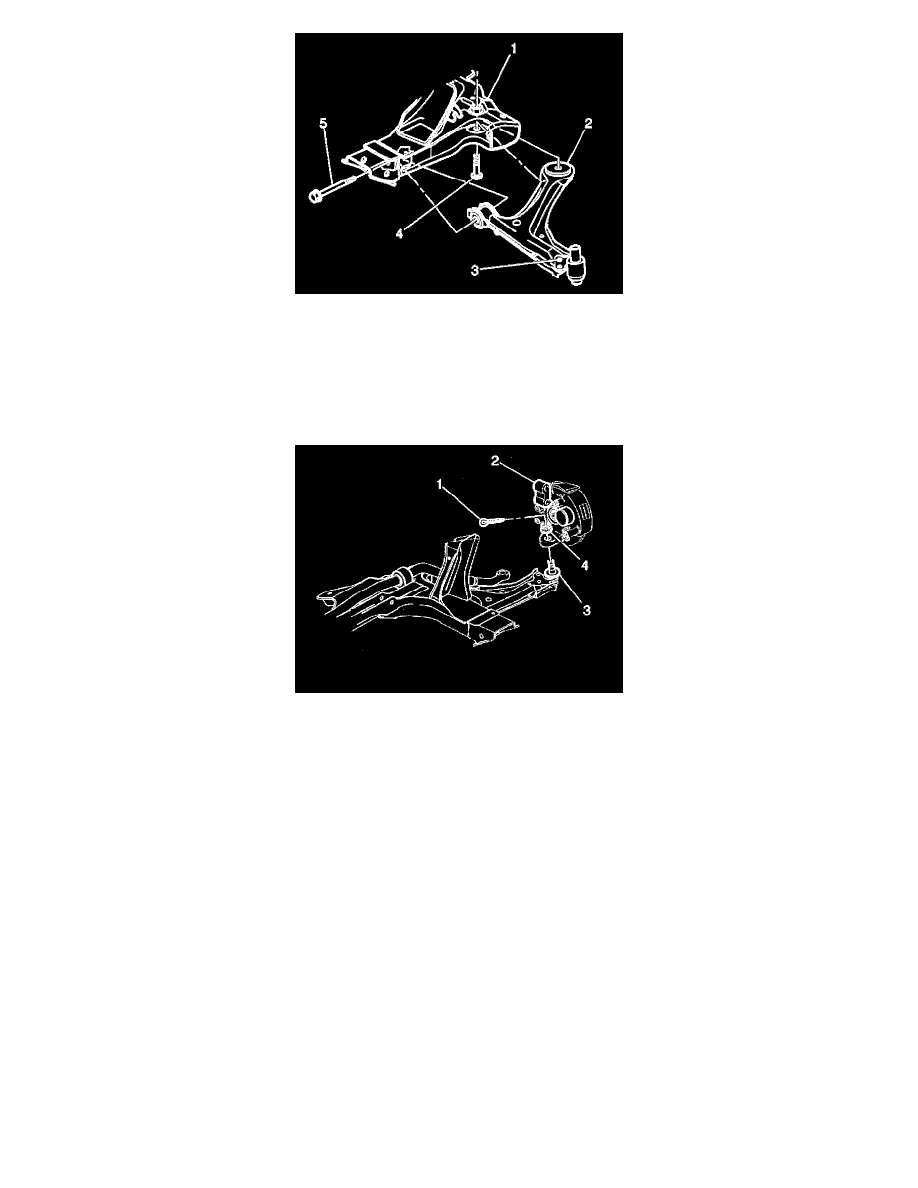
3. Install the lower control arm (2) to the front suspension support (1).
Notice: Refer to Fastener Notice in Service Precaution.
4. Install the lower control arm front (5) and rear (4) mounting bolts.
^
Tighten the front bolt to 107 Nm (79 ft. lbs.).
^
Tighten the rear bolt to 170 Nm (125 ft. lbs.).
5. Install the lower ball joint stud (3) to the steering knuckle (2).
6. Install the ball joint stud (3) through the steering knuckle (2).
7. Install the ball joint nut (4).
Tighten the ball joint nut to 55 Nm (41 ft. lbs.) minimum - 65 Nm (50 ft. lbs.) maximum to install line cotter pin.
8. Install the wiring harness to the lower control arm.
9. Install the cotter pin (1).
10. If the vehicle is equipped with a stabilizer shaft remove the stabilizer shaft link.
11. Install the tire and wheel assemblies.
12. Inspect the front wheel alignment.