Sunfire L4-2.2L VIN F (2002)

3. Insert the inner race into the cage.
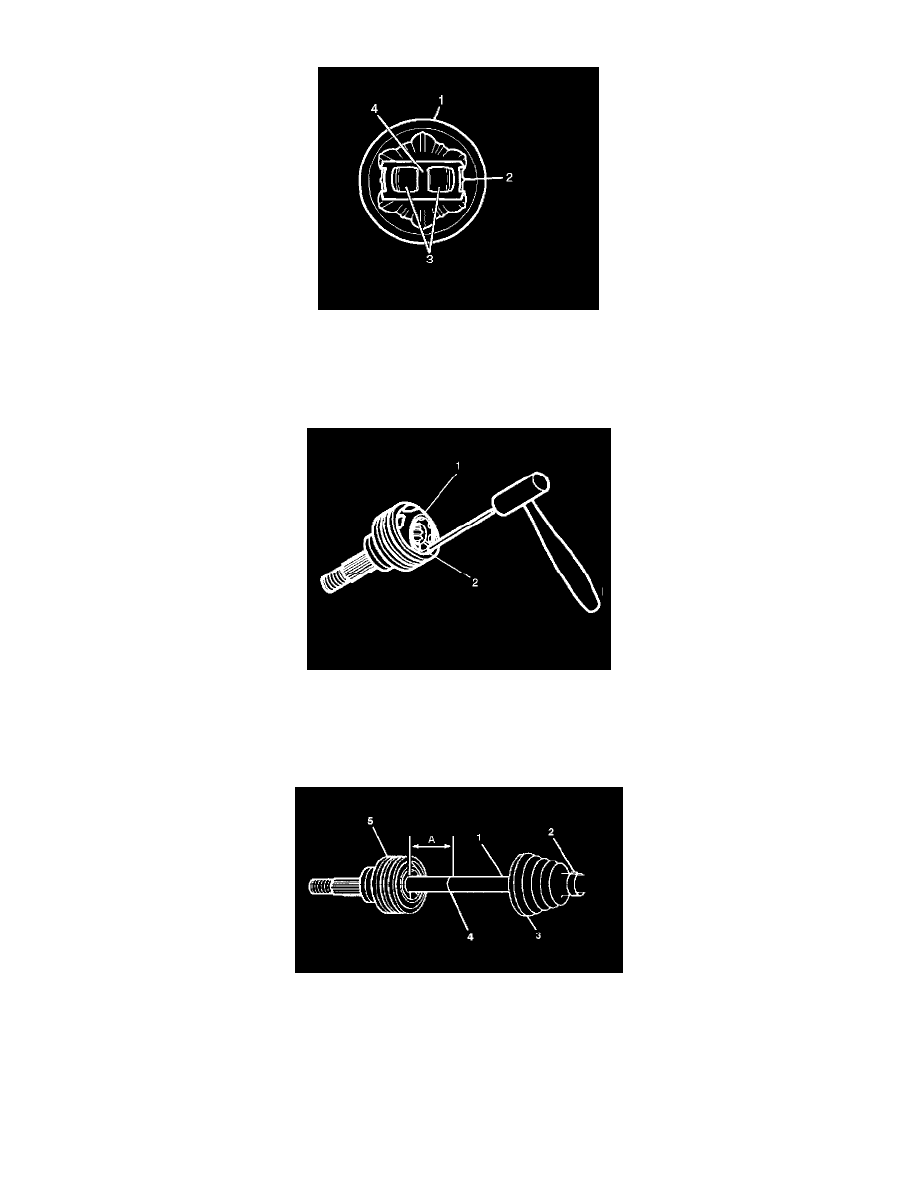
4. Hold the cage and the inner race 90 degrees to the centerline of the outer race. Align the cage windows (3) with the lands of the outer race (2).
Important: Ensure that the inner race is oriented the same as prior to disassembly. Use the reference mark placed earlier.
5. Install the cage and the inner race into outer race.
6. Place a brass drift against the CV joint cage (1).
7. Tap gently on the brass drift with a hammer in order to tilt the cage (1).
8. Install the first chrome alloy ball (2) when the CV joint cage (1) tilts.
9. Repeat this process to install all six of the balls.
10. Pack the CV joint with half of the grease supplied in the service kit.
11. Install the new small retaining clamp (2) on the neck of the seal (3). Do not crimp.
12. Clean the halfshaft bar (1). Use a wire brush to remove any rust in the seal mounting area (grooves).
13. Slide the CV joint seal (3) onto the halfshaft bar (1). Expose the reference mark (4) by sliding the CV joint seal (3) up the halfshaft bar (1) toward
the tripot end.
