
Torrent AWD V6-3.4L VIN F (2006)
Brake Shoe: Service and Repair
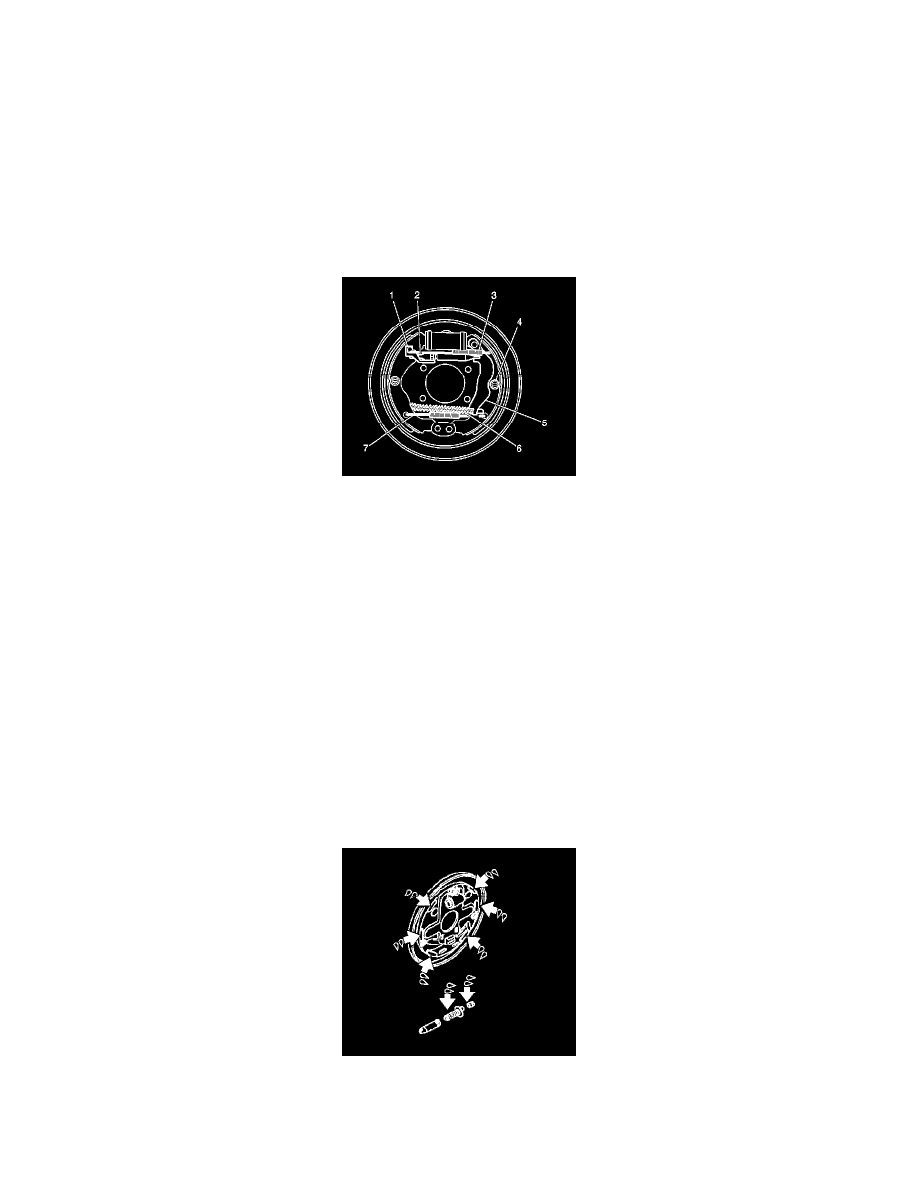
Brake Shoe Replacement
Removal Procedure
Caution: Refer to Brake Dust Caution in Service Precautions.
Caution: Keep fingers away from rear brake shoe springs to prevent fingers from being pinched between spring and shoe web or spring and backing
plate.
1. Raise and support the vehicle. Refer to Vehicle Lifting.
2. Remove the brake drum.
3. Notice: Do not over stretch the adjuster spring. Damage can occur if the spring is over stretched.
Disengage the adjuster spring hook end from the tab on the adjuster actuator (1).
4. Remove the straight end of the adjuster spring from the brake shoe.
5. Remove the adjuster actuator from the brake shoe.
6. Remove the return spring (7) from the brake shoes.
7. Remove the park brake cable (6) from the park brake actuator lever (5).
8. Remove the brake shoe hold-down springs and retainers (4) from the brake shoes.
9. Remove the adjuster from the brake shoes and the park brake actuator lever (2).
10. Remove the horseshoe clip retaining the park brake actuator lever to the brake shoe.
11. Remove the park brake actuator lever and wave washer from the brake shoe.
12. Clean all of the drum brake system components with denatured alcohol.
13. Inspect all of the drum brake system components.
14. Replace drum brake system components as necessary.
15. Inspect the wheel cylinder for the following conditions:
^
Brake fluid leakage
^
Worn or damaged dust boots
16. Replace damaged or leaking wheel cylinders as necessary.
Installation Procedure
1. Apply a thin, light coat of high temperature, silicone brake lubricant to the following areas:
^
The brake shoe contact points on the backing plate
^
The adjuster screw threads
^
The inside diameter of the adjuster socket