
Torrent AWD V6-3.4L VIN F (2006)
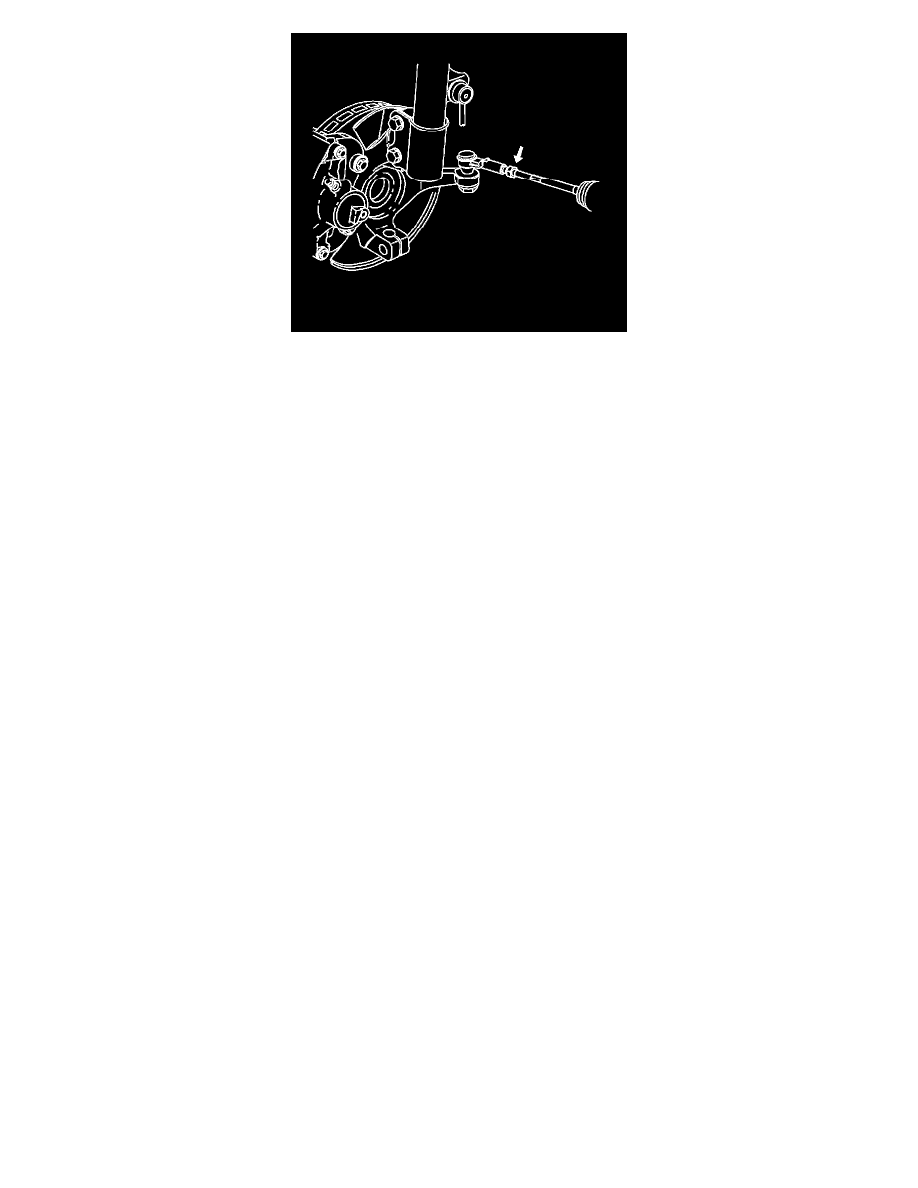
2. Loosen both inner tie rod jam nuts.
3. Important: The inner tie rod must rotate freely from the boot seal surface. Do not allow the boot to rotate.
Loosen the inner tie rod seal to boot surface.
4. Use a wrench on the tie rod flats to increase or decrease the toe angle specifications.
5. Notice: Refer to Fastener Notice in Service Precautions.
Tighten the inner tie rod jam nuts.
^
Tighten the jam nuts to 60 Nm (44 ft. lbs.).
6. Inspect the toe angle to ensure proper adjustment and adjust as necessary.
Measuring Wheel Alignment
Measuring Wheel Alignment
Steering and vibration complaints are not always the result of improper alignment. One possible cause is wheel and tire imbalance. Another possibility
is tire lead due to worn or improperly manufactured tires. Lead/pull is defined as follows: At a constant highway speed on a typical straight road,
lead/pull is the amount of effort required at the steering wheel to maintain the vehicle's straight path. Lead is the vehicle deviation from a straight path
on a level road without pressure on the steering wheel.
Before performing any adjustment affecting wheel alignment, perform the following inspections and adjustments in order to ensure correct alignment
readings:
^
Inspect the tires for the proper inflation and irregular tire wear.
^
Inspect the runout of the wheels and the tires.
^
Inspect the wheel bearings for backlash and excessive play.
^
Inspect the ball joints and tie rod ends for looseness or wear.
^
Inspect the control arms and stabilizer shaft for looseness or wear.
^
Inspect the steering gear for looseness at the frame.
^
Inspect the struts/shock absorbers for wear, leaks, and any noticeable noises.
^
Inspect the vehicle trim height.
^
Inspect the steering wheel for excessive drag or poor return due to stiff or rusted linkage or suspension components.
^
Inspect the fuel level. The fuel tank should be full or the vehicle should have a compensating load added.
Give consideration to excess loads, such as tool boxes, sample cases, etc. If normally carried in the vehicle, these items should remain in the vehicle
during alignment adjustments. Give consideration also to the condition of the equipment being used for the alignment. Follow the equipment
manufacturer's instructions
Satisfactory vehicle operation may occur over a wide range of alignment settings. However, if the setting exceeds the service allowable specifications,
correct the alignment to the service preferred specifications. Refer to Wheel Alignment Specifications .
Perform the following steps in order to measure the front and rear alignment angles:
1. Install the alignment equipment according to the manufacturer's instructions.
2. Jounce the front and the rear bumpers 3 times prior to checking the wheel alignment.
3. Measure the alignment angles and record the readings.
4. Important: When performing adjustments to vehicles requiring a 4-wheel alignment, set the rear wheel alignment angles first in order to obtain
proper front alignment angles.