
Vibe L4-1.8L VIN L (2003)
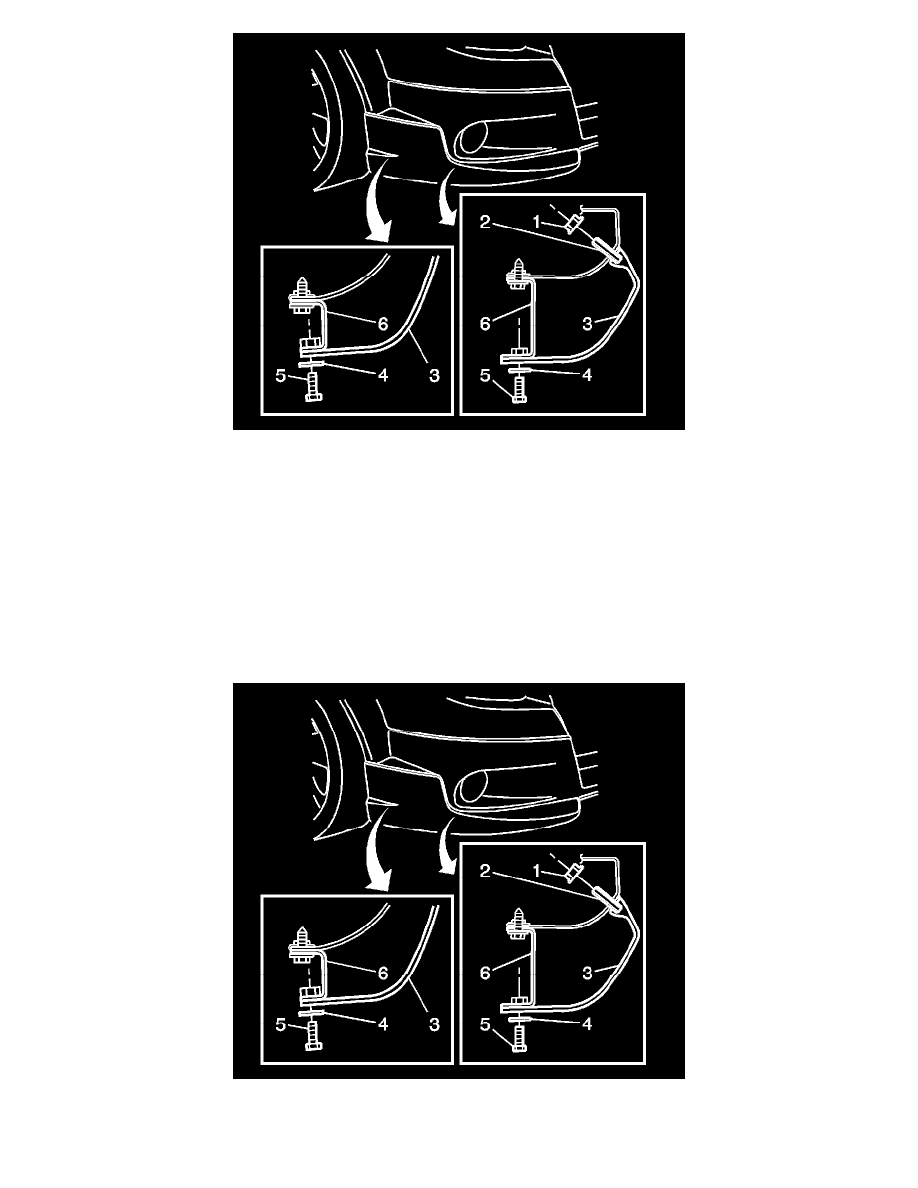
6. Remove the nuts (1) from the set screws (2).
7. Remove the screws (5) and washers (4) from the brackets (6).
8. Remove the front bumper fascia extension. Refer to Molding/Nameplate Replacement - Exterior Trim (See: Exterior Moulding / Trim/Body
Emblem/Service and Repair/Molding/Nameplate Replacement - Exterior Trim) in Exterior Trim.
9. Remove the front bumper fascia extension brackets, if necessary.
Installation Procedure
1. Install the front bumper fascia extension brackets, if removed.
2. Install two way tape to the front bumper fascia extension. Refer to Molding/Nameplate Replacement - Exterior Trim (See: Exterior Moulding /
Trim/Body Emblem/Service and Repair/Molding/Nameplate Replacement - Exterior Trim) in Exterior Trim.
3. Peel back 25.0 mm of the tape liner from both ends.
4. Align front bumper fascia extension to the brackets.
Notice: Refer to Fastener Notice in Cautions and Notices.
5. Install the screws (5) and the washers (4) to the brackets (6).