
Vibe L4-1.8L VIN L (2003)
Canister Vent Valve: Service and Repair
EVAPORATIVE EMISSION (EVAP) CANISTER VENT VALVE REPLACEMENT
REMOVAL PROCEDURE
NOTE: The EVAP canister may have released carbon particles which caused this part to fail and may cause damage to other components. Check the
EVAP canister for loose carbon before returning the vehicle to service.
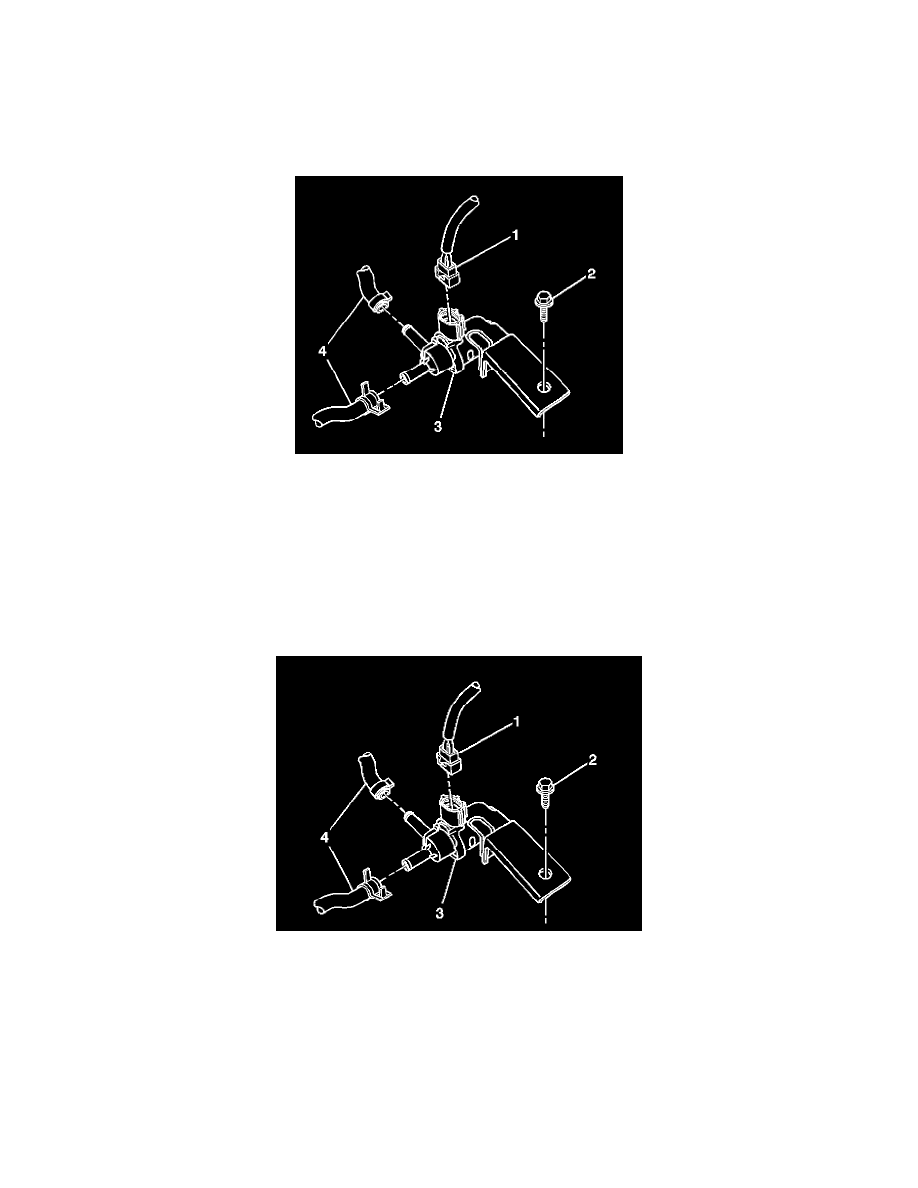
1. Remove the one vent hose (4) from the air cleaner and the EVAP canister vent valve (3).
2. Disconnect the other vent hose (4) from the EVAP canister vent valve (3).
3. Disconnect the electrical connector (1) from the EVAP canister vent valve (3).
4. Remove the fastener (2) from the EVAP canister vent valve (3).
5. Remove the EVAP canister vent valve (1) from the air cleaner housing.
6. Inspect the EVAP canister vent valve and the EVAP vent system for carbon particle contamination before replacing the EVAP canister vent valve.
INSTALLATION PROCEDURE
1. Inspect the EVAP canister vent solenoid valve and the EVAP control system for carbon particle contamination before replacing the EVAP canister
vent solenoid.
2. Install the EVAP canister vent valve (3) to the air cleaner housing with the one fastener (2).
3. Tighten the EVAP canister vent valve fastener (2).
NOTE: Refer to Fastener Notice in Service Precautions.
Tighten
Tighten the fastener to 8.8 N.m (77 lb in).
4. Connect the one vent hose (4) to the EVAP canister vent valve (3) and the air cleaner housing.
5. Connect the other vent hose (4) to the EVAP canister vent valve (3).
6. Connect the electrical connector (1) to the vent valve.