
Vibe L4-1.8L VIN L (2003)
Seat Belt Retractor: Service and Repair
Seat Belt Retractor Replacement - Right Rear
REMOVAL PROCEDURE
1. Remove the right rear seat.
2. Remove the right rear seat hinge.
3. Remove the right rear door sill trim.
4. Remove the right rear seat garnish trim.
5. Remove the rear storage compartment.
6. Remove the rear compartment access panel.
7. Remove tool storage access panel.
8. Remove tool storage tray.
9. Remove child tether upper anchor brackets.
10. Remove the right lower quarter trim panel.
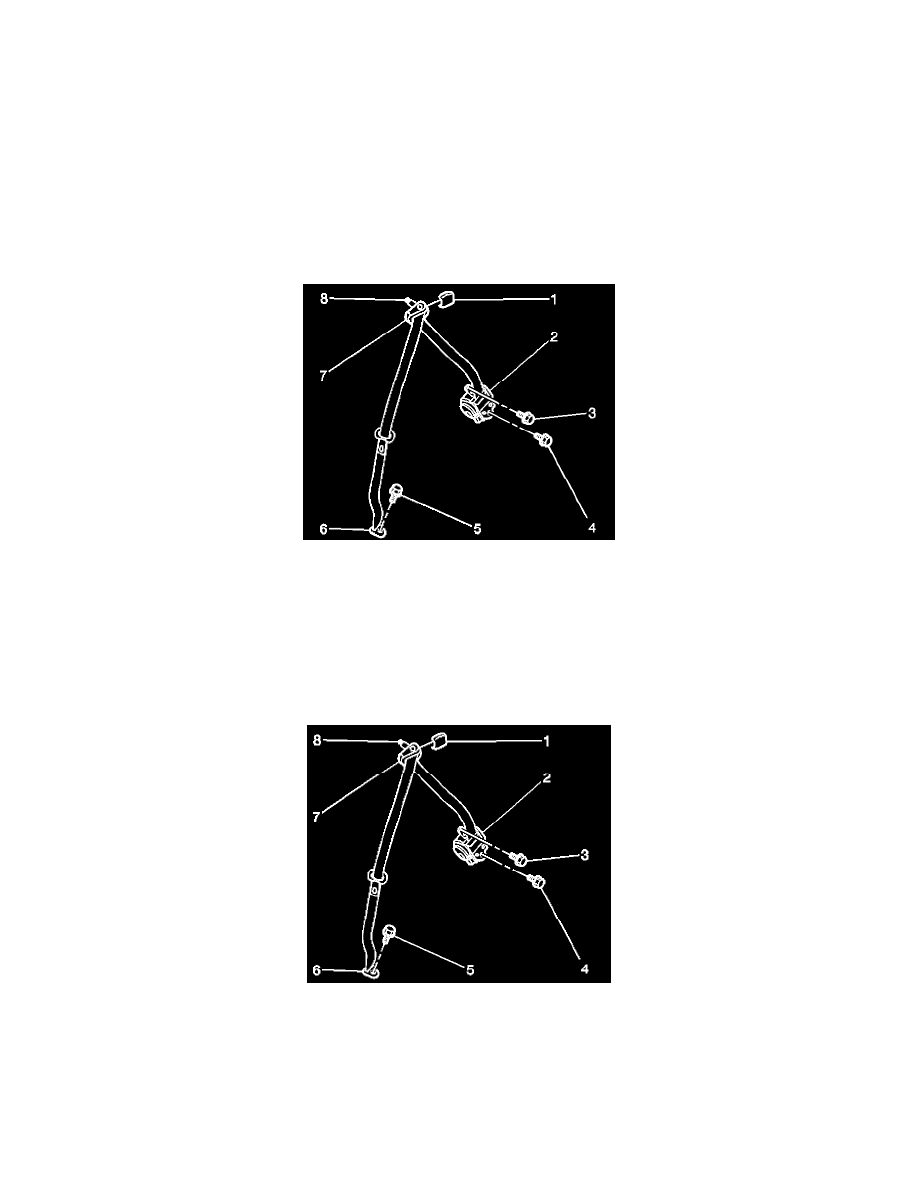
11. Remove the right shoulder adjuster bolt cover (1).
12. Remove the right shoulder adjuster bolt (8).
13. Remove the right shoulder adjuster (7).
14. Remove the lower anchor bolt (5).
15. Remove the upper retractor bolt (3).
16. Remove the lower retractor bolt (4).
17. Remove the retractor assembly (2).
INSTALLATION PROCEDURE
1. Install the rear seat belt retractor (2) to the vehicle. Secure the retractor with the upper mounting bolt (3) and the lower mounting bolt (4).
NOTE: Refer to Fastener Notice in Service Precautions.
Tighten
-
Tighten the rear seat belt retractor upper mounting bolt to 51 N.m (44 lb ft).
-
Tighten the lower mounting bolt to 41 N.m (30 lb ft).