
Vibe FWD L4-1.8L VIN 8 (2004)
Trunk / Liftgate Latch: Service and Repair
Latch Replacement - Lift Gate
Latch Replacement - Lift Gate
Removal Procedure
1. Open the liftgate.
2. Remove the liftgate trim panel. Refer to Trim Panel Replacement - Lift Gate (See: Interior Moulding / Trim/Trim Panel/Service and Repair) .
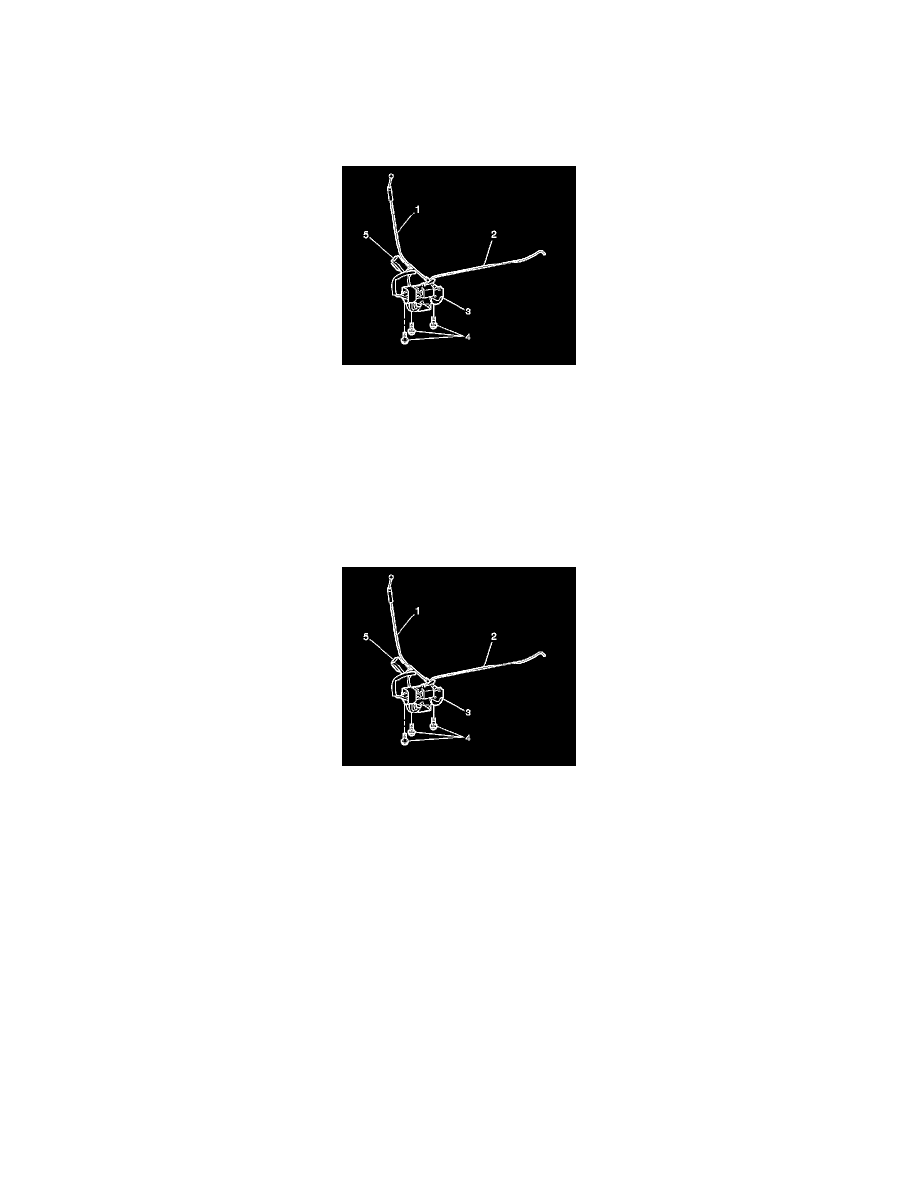
3. Disconnect the latch cable (1).
4. Disconnect the electrical connector (5) from the liftgate latch (3).
5. Disconnect the rod (2) from the lock cylinder. Refer to Lock Cylinder Replacement - Lift Gate (See: Trunk / Liftgate Lock Cylinder/Service and
Repair) .
6. Remove the bolts (4) from the liftgate latch (3).
7. Remove the liftgate latch (3) from the liftgate.
Installation Procedure
1. Install the liftgate latch (3) to the liftgate.
Notice: Refer to Fastener Notice in Cautions and Notices.
2. Install the bolts (4) to the liftgate latch (3).
Tighten the liftgate latch bolts (4) to 7 N.m (62 lb in).
3. Connect the rod (2) to the lock cylinder. Refer to Lock Cylinder Replacement - Lift Gate (See: Trunk / Liftgate Lock Cylinder/Service and Repair
) .
4. Connect the electrical connector (5) to the liftgate latch (3).
5. Connect the latch cable (1).
6. Install the liftgate trim panel. Refer to Trim Panel Replacement - Lift Gate (See: Interior Moulding / Trim/Trim Panel/Service and Repair) .
7. Close the liftgate.