
Vibe FWD L4-1.8L VIN 8 (2004)
Tie Rod End: Service and Repair
Tie Rod End Replacement - Outer
Removal Procedure
Tools Required
-
J 6627-A Tie Rod Puller
1. Raise and support the vehicle. Refer to Vehicle Lifting.
2. Remove the front tire and wheel assembly.
3. Remove the cotter pin from the outer tie rod nut.
4. Remove the outer tie rod nut.
5. Use the J 6627-A, or equivalent, in order to separate the outer tie rod from the knuckle.
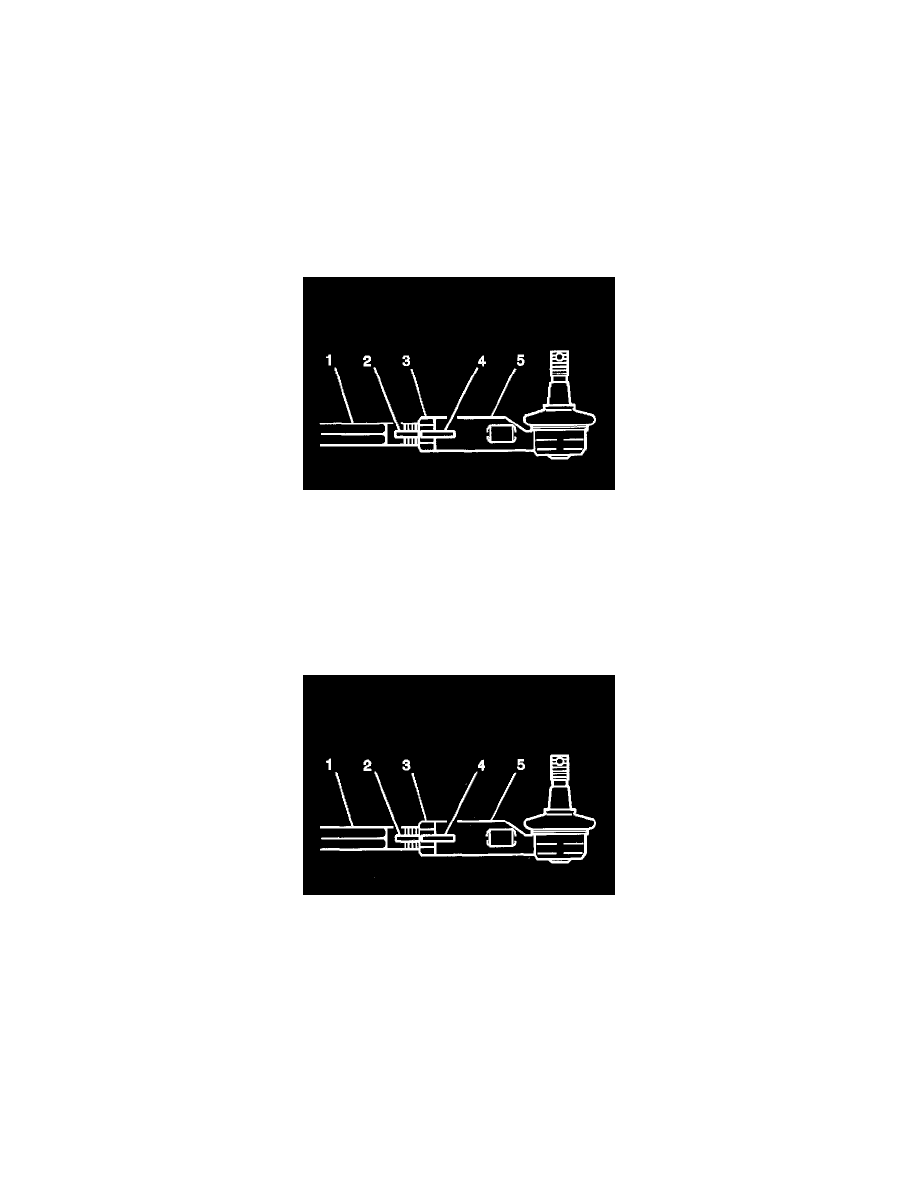
6. Use paint in order to place matchmarks (2, 4) on the following components:
-
The inner tie rod (1)
-
The lock nut (3)
-
The outer tie rod (5)
7. Loosen the lock nut.
8. Remove the outer tie rod from the inner tie rod.
Installation Procedure
1. Install the outer tie rod (5) to the inner tie rod (1). Align the outer tie rod with the matchmarks (2, 4). Do not tighten the lock nut (3).
2. Install the outer tie rod to the steering knuckle.
Notice:
Refer to Fastener Notice in Service Precautions.
See: Service Precautions/Vehicle Damage Warnings/Fastener Notice
3. Install the outer tie rod nut to the outer tie rod.
Tighten the outer tie rod nut to 49 Nm (36.1 ft. lbs.). Align the cotter pin slot by tightening the outer tie rod nut up to 1/6 additional turn, or 70
Nm (52 ft. lbs.) maximum. Do not loosen the nut in order to insert the cotter pin.
4. Install the cotter pin into the hole in the tie rod stud.
5. Install the front tire and wheel assembly.
6. Adjust the front toe.
Tighten the lock nut against the outer tie rod to 74 Nm (54.6 ft. lbs.).