
Vibe FWD L4-1.8L VIN L (2005)
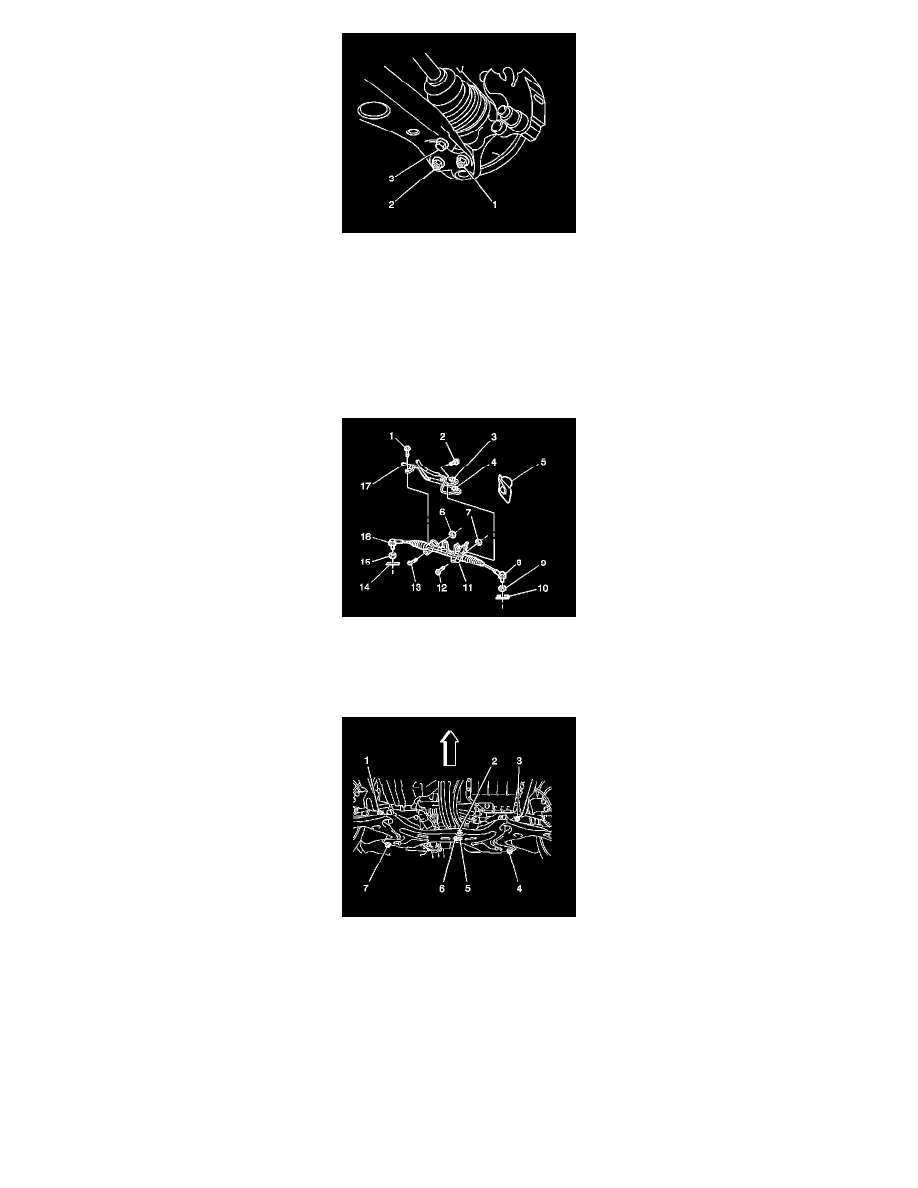
9. Remove the following components from the left control arm:
*
The bolt (3)
*
The 2 nuts (1, 2)
10. Remove the following components from the right control arm:
*
The bolt
*
The 2 nuts
11. If you are removing the crossmember WITHOUT the steering gear, complete the following steps:
1. Use wire in order to suspend the steering gear (11).
2. Remove the 2 nuts (6, 7) and the 2 bolts (12, 13).
12. Remove the 2 nuts (2, 5) and the bolt (6).
13. Support the crossmember with a jack.
14. Remove the 4 bolts (1, 3, 4, 7).
15. Use the jack in order to lower the crossmember.
Important: If you are replacing the components on front suspension crossmember, continue with this procedure.
16. Remove the 2 control arms. Refer to Lower Control Arm Replacement in Front Suspension.
17. Remove the following components from the crossmember. Refer to Stabilizer Shaft Replacement (FWD) Stabilizer Shaft Replacement (AWD)
in Front Suspension.
*
The 2 stabilizer shaft link nuts