Vibe FWD L4-1.8L VIN L (2005)

Tighten
Tighten the flare nut to 15.2 N.m (11.2 lb ft).
7. Install the brake fluid reservoir. Refer to Master Cylinder Reservoir Replacement. See: Master Cylinder Reservoir Replacement
8. Install the top portion of the air filter housing. Install the hooks to the bottom portion of the housing.
9. Install the air filter hose to the throttle body. Secure the hose with the hose clamp.
10. Bleed the hydraulic brake system. Refer to Hydraulic Brake System Bleeding. See: Service and Repair
11. Inspect the brake system for leaks. Refer to Brake System External Leak Inspection. See: Testing and Inspection/Component Tests and General
Diagnostics/Brake System External Leak Inspection
12. Measure the brake pedal travel. Adjust as necessary. Refer to Brake Pedal Travel Measurement and Inspection. See: Testing and
Inspection/Component Tests and General Diagnostics/Brake Pedal Travel - Measurement & Inspection
Master Cylinder Replacement (Non-ABS)
Master Cylinder Replacement (Non-ABS)
Removal Procedure
1. Loosen the air filter hose clamp and remove the air filter hose from the throttle body.
2. Unhook the air filter housing hooks and remove the top portion of the housing with the hose.
Caution: Refer to Brake Fluid Irritant Caution in Cautions and Notices.
Notice: Refer to Brake Fluid Effects on Paint and Electrical Components Notice in Cautions and Notices.
3. Remove the master cylinder reservoir. Refer to Master Cylinder Reservoir Replacement.
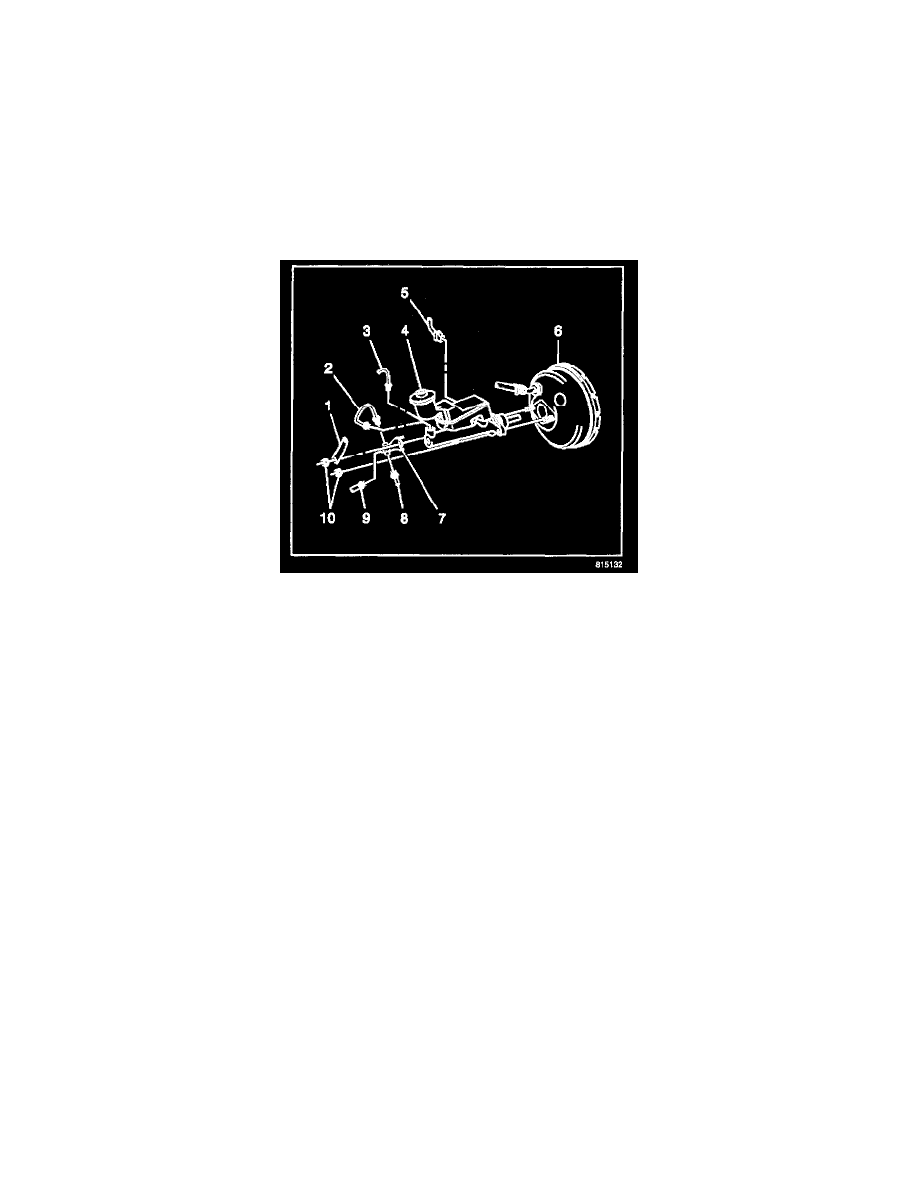
4. Remove the 2 brake pipes (2,3) from the master cylinder.
5. Remove the 3 brake pipes (2,8,9) from the proportioning valve (7).
6. Remove the following components from the vacuum booster:
6.1. The 2 nuts (10)
6.2. The check valve bracket (1)
6.3. The proportioning valve (7)
6.4. The master cylinder
Installation Procedure
1. Adjust the booster piston rod. Refer to the Adjustment Procedure in Vacuum Brake Booster Replacement.
Caution: Refer to Brake Fluid Caution in Cautions and Notices.
Notice: Refer to Filling the Master Cylinder Notice in Cautions and Notices.
2. Bench bleed the master cylinder. Refer to Master Cylinder Bench Bleeding. See: Master Cylinder Bench Bleeding
Notice: Refer to Fastener Notice in Cautions and Notices.
3. Install the following components to the vacuum booster:
3.1. The master cylinder
3.2. The proportioning valve (7)
