
Vibe FWD L4-1.8L VIN L (2005)
Park Brake Shoe Replacement
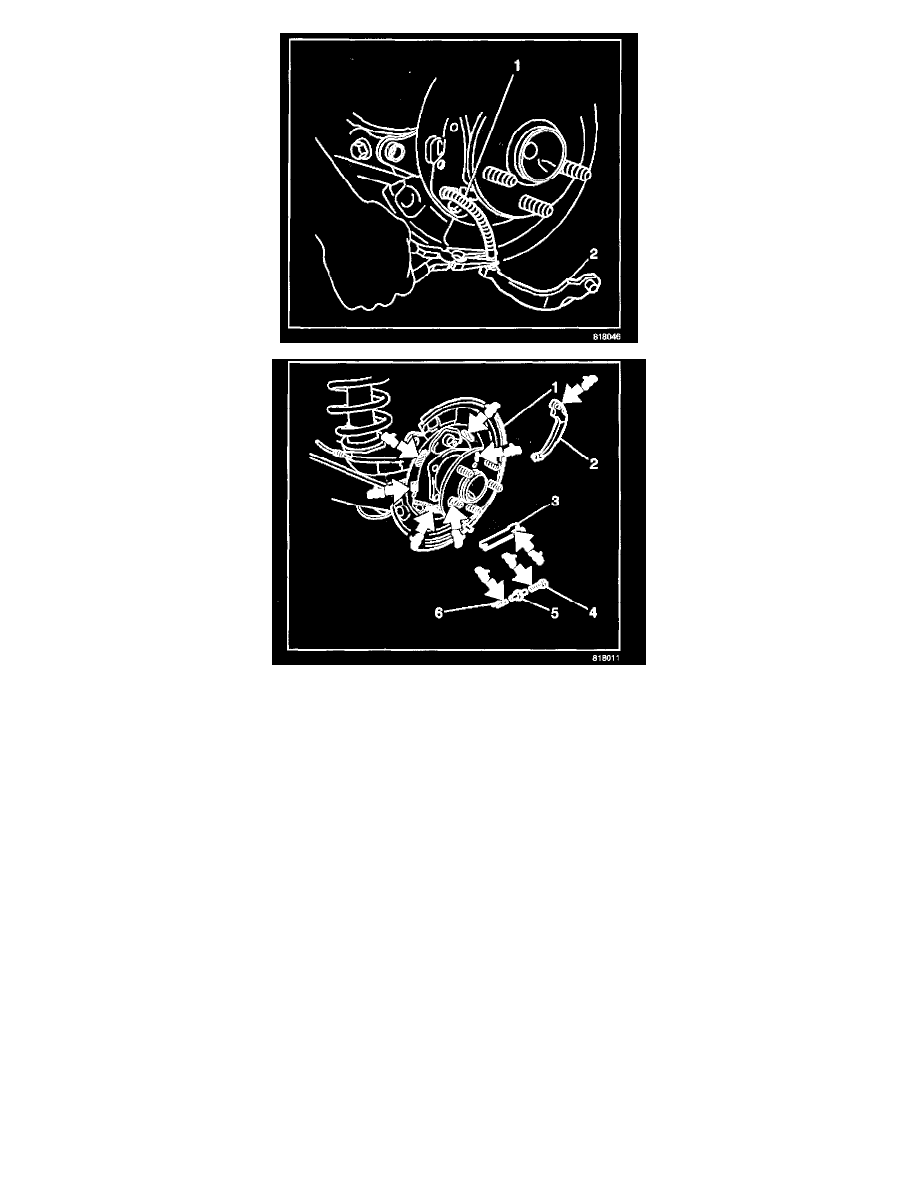
Removal Procedure
1. Remove the rear disc. Refer to Brake Rotor Replacement - Rear in Disc Brakes. See: Disc Brake System/Brake Rotor/Disc/Service and
Repair/Brake Rotor Replacement - Rear
2. Remove the return springs (1,2).
3. Remove the tension spring (1).
4. Separate the adjuster (15) from the front brake shoe (17).
5. Remove the hold-down spring (16) and the pin (1) from the front shoe.
6. Remove the front shoe.
7. Separate the adjuster from the rear brake shoe (8).
8. Remove the adjuster and the adjuster strut (7).
9. Disassemble the adjuster (10,11,15)
10. Remove the hold-down spring (9) and the pin (2) from the rear shoe.
11. Separate the rear shoe from the park brake shoe lever (6).
12. Remove the rear shoe.
13. Remove the park brake shoe lever (2) from the park brake cable (1).
14. Inspect the park brake hardware. Refer to Park Brake Hardware Inspection (Drum Brakes) or Park Brake Hardware Inspection (Disc Brakes). See:
Service and Repair/Park Brake Hardware Replacement (Disc)
Installation Procedure
1. Apply Lubriplate Lubricant, GM P/N 1050109, Canadian P/N 5264008, or the equivalent, to the metal contact points on the following
components:
^
The backing plate (1) The park brake shoe lever (2)
^
The adjuster strut (3)
^
The adjuster (4,5,6)
2. Assemble the adjuster.