
Vibe FWD L4-1.8L VIN L (2005)
Brake Light Switch: Adjustments
STOP LAMP SWITCH ADJUSTMENT
1. Disconnect the negative battery cable.
CAUTION: Refer to Battery Disconnect Caution in Service Precautions.
2. Disconnect the stop lamp switch electrical connector.
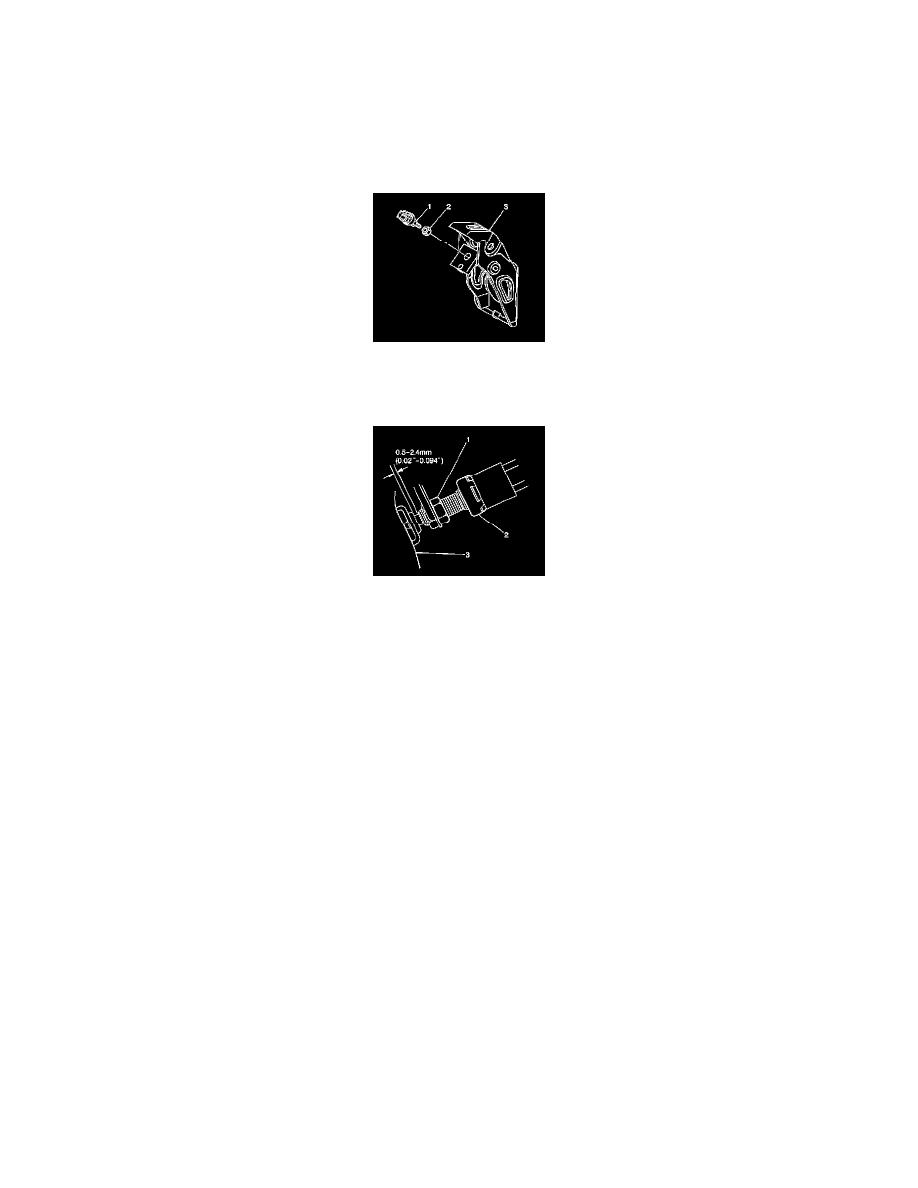
3. Loosen the locknut (2) for the stop lamp switch (1).
4. Connect the stop lamp switch electrical connector.
5. Connect the negative battery cable.
6. Turn the stop lamp switch (2) until the switch lightly contacts the pedal stopper.
7. Turn the stop lamp switch back one turn.
8. Verify the distance between the end of the stop lamp switch plunger and the end of the threaded portion of the stop lamp switch is within 0.5-2.4
mm (0.02-0.094 in).
9. Tighten the locknut (1) for the stop lamp switch.
NOTE: Refer to Fastener Notice in Service Precautions.
Tighten the locknut to 10 N.m (89 lb in).
10. Inspect the brake pedal height. Adjust the brake pedal height if necessary. Refer to Brake Pedal Travel Measurement and Inspection.
11. Inspect the operation of the brake lights in order to verify the adjustment of the stop lamp switch.
-
If the brake lights illuminate when the assistant depresses the brake pedal, the operation is normal.
-
If the brake lights do not illuminate when the assistant releases the brake pedal, the operation is normal.