
Vibe FWD L4-1.8L VIN L (2005)
Suspension Strut / Shock Absorber: Service and Repair
Rear Shock Absorber
Shock Absorber Replacement
Removal Procedure
1. Remove the rear compartment trim panel.
2. Remove the rear accessory panel.
3. Remove the rear storage compartment.
4. Remove the tool storage compartment.
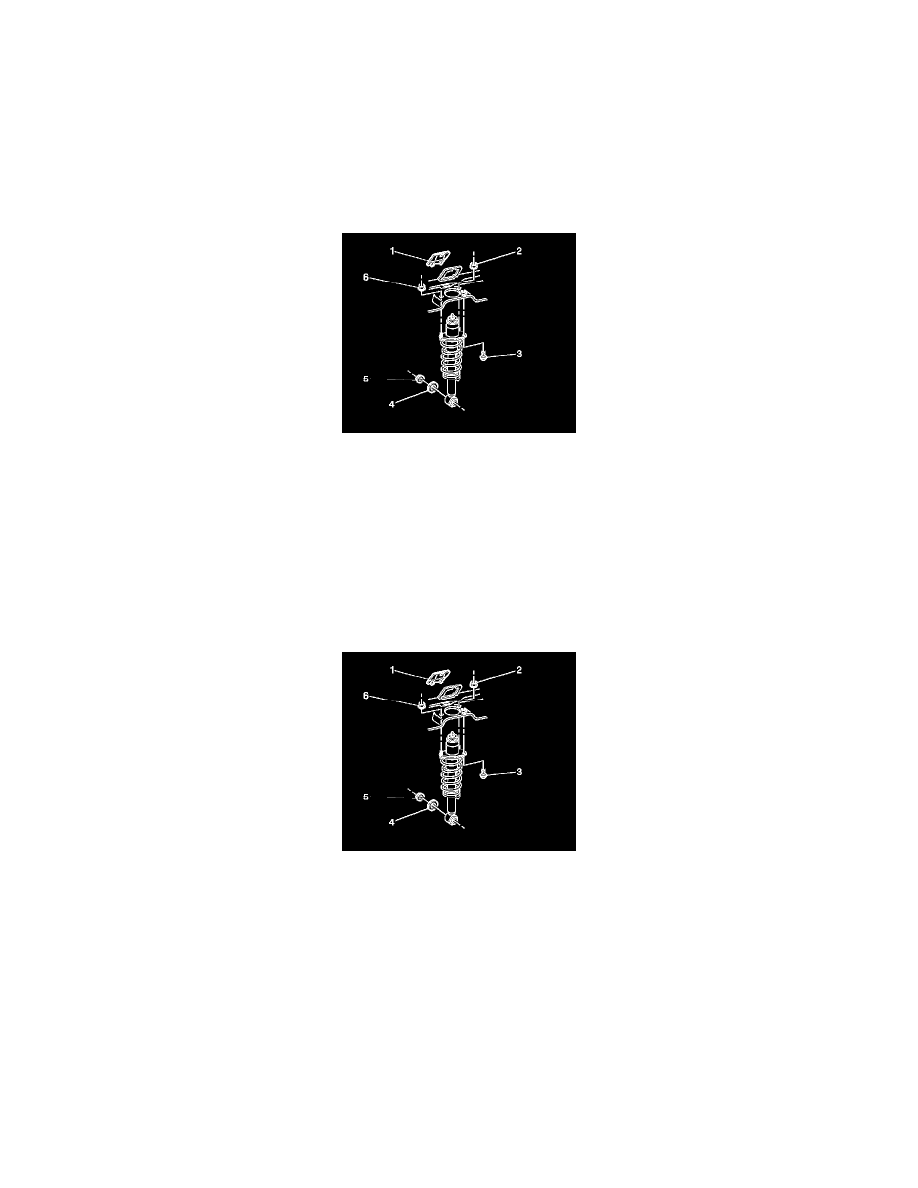
5. Remove the shock absorber fastener access panel (1).
6. Remove the 2 nuts (2,6).
7. Raise and support the vehicle. Refer to Vehicle Lifting.
8. Use a block of wood and a jack in order to support the rear axle.
9. Remove the bolt (3).
10. Remove the nut (5) and the washer (4).
11. Remove the shock absorber with the coil spring.
12. Remove the coil spring, if necessary.
Installation Procedure
1. If you removed the coil spring, install the coil spring.
Notice: Refer to Fastener Notice in Service Precautions.
2. Install the shock absorber and the bolt (3).
^
Tighten the bolt to 80 Nm (59.0 ft. lbs.).
Important: Do not tighten the lower shock absorber nut. The weight of the vehicle must be on the tire and wheel assemblies before tightening the
nut.
3. Install the washer (4) and the nut (5).
4. Remove the jack and the block of wood.
5. Lower the vehicle.
6. Bounce the rear of the vehicle in order to stabilize the suspension.
7. Install the 2 nuts (2,6).
^
Tighten the nuts to 80 Nm (59.0 ft. lbs.).
8. Install the shock absorber fastener access panel (1).
9. Install the tool storage compartment.