Vibe FWD L4-2.4L (2009)

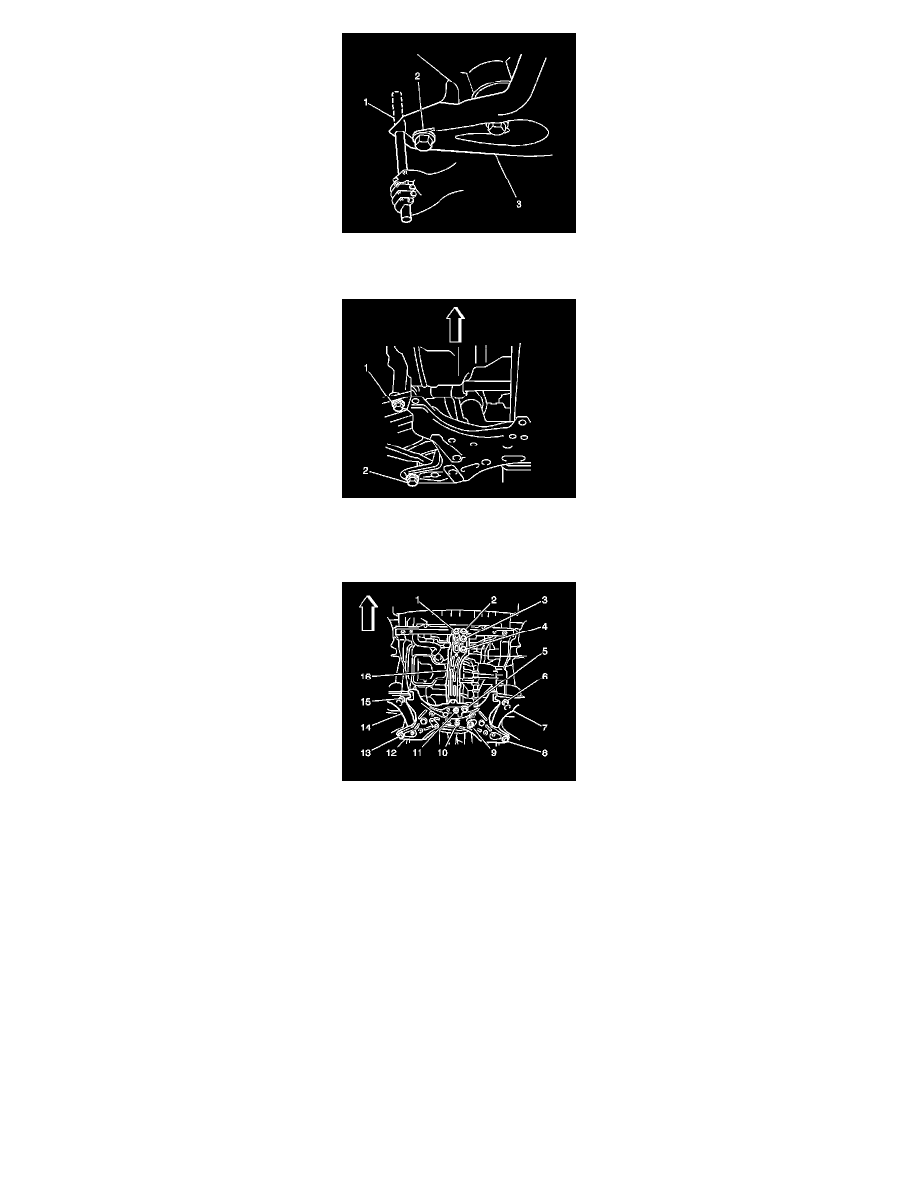
8. Insert a wood dowel (1) into the hole in the right side of the crossmember (3) and the hole in the body.
9. Use the dowel in order to align the bolt holes.
10. Install the 2 bolts (1, 2) to the crossmember.
11. Insert the dowel into the hole in the left side of the crossmember and the hole in the body.
12. Use the dowel in order to align the bolt holes.
13. Install the 2 bolts to the crossmember (8, 6).
14. Insert the dowel into the hole in the right side of the crossmember and the hole in the body.
15. Use the dowel in order to align the bolt holes.
Caution: Refer to Fastener Caution (See: Service Precautions/Vehicle Damage Warnings/Fastener Caution).
16. Install the bolt (13) and tighten to 157 Nm (116 lb ft).
17. Install the bolt (15) and tighten to 113 Nm (83 lb ft).
18. Insert the dowel into the hole in the left side of the crossmember and the hole in the body.
19. Use the dowel in order to align the bolt holes.
20. Install the bolt (8) and tighten to 157 Nm (116 lb ft).
21. Install the bolt (6) and tighten to 113 Nm (83 lb ft).
22. Remove the jack from the crossmember.
23. Install the 3 nuts (9, 10, 11) and tighten to 52 Nm (38 lb ft).
24. Install the bolts (1, 2) and tighten to 60 Nm (40 lb ft).
25. Install the bolts (3, 4, 5) and tighten to 81 Nm (60 lb ft).
