
Vibe FWD L4-2.4L (2009)
Repair).
2. Remove the front and rear side door sill trim plates. Refer to Door Sill Plate Replacement (Front Sill) (See: Scuff Plate/Service and Repair)Door
Sill Plate Replacement (Rear Sill) (See: Scuff Plate/Service and Repair).
3. Remove the center pillar lower trim panel. Refer to Center Pillar Lower Trim Panel Replacement (See: ).
4. Remove the seat belt height adjuster. Refer to Seat Belt Height Adjuster Replacement - Front (See: Restraint Systems/Seat Belt Systems/Seat Belt
Height Adjuster/Service and Repair).
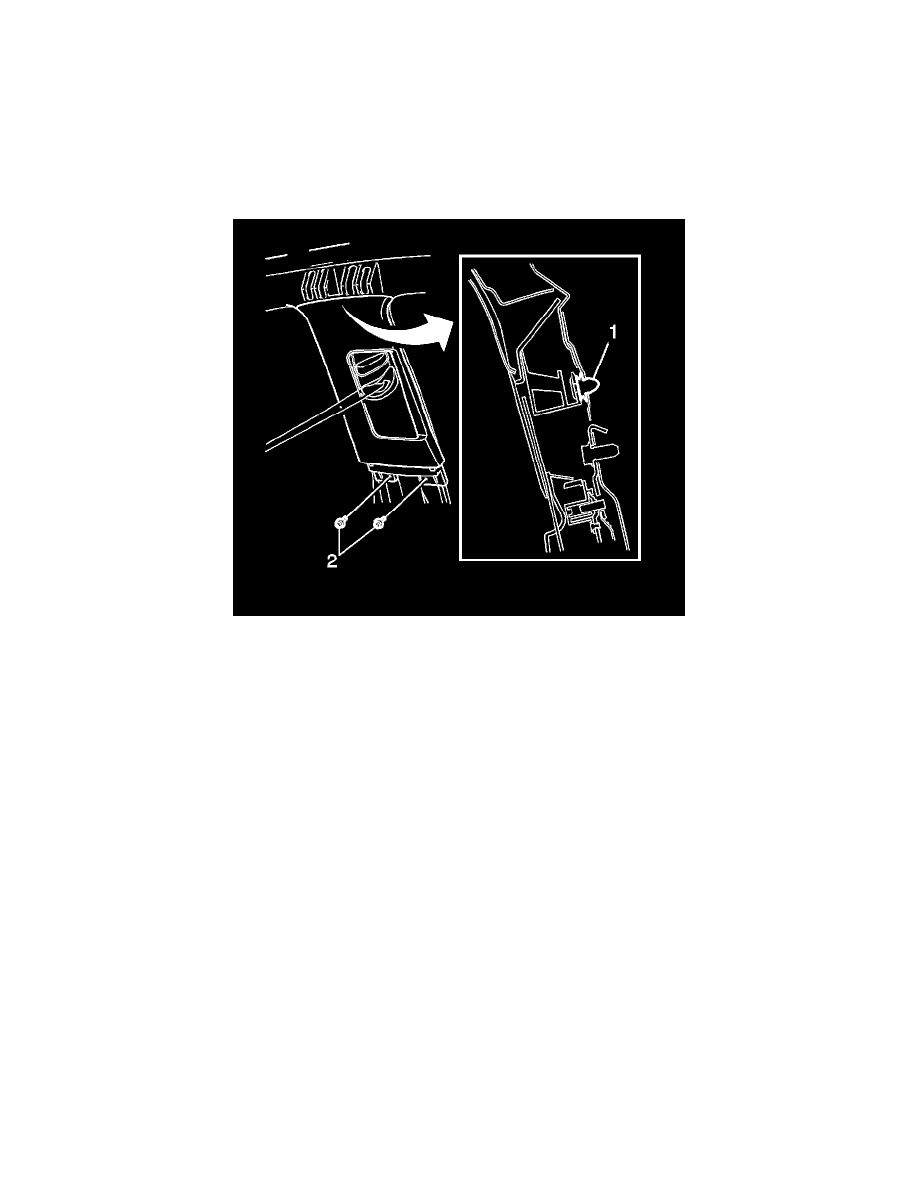
5. Remove the two screws (2).
6. Using a trim removal tool, disengage the retainer (1) and remove the center pillar upper trim panel.
Installation Procedure
1. Engage the retainer (1) and install the center pillar upper trim panel.
2. Install the two screws (2).
3. Install the seat belt height adjuster. Refer to Seat Belt Height Adjuster Replacement - Front (See: Restraint Systems/Seat Belt Systems/Seat Belt
Height Adjuster/Service and Repair).
4. Install the center pillar lower trim panel. Refer to Center Pillar Lower Trim Panel Replacement (See: ).
5. Install the front and rear side door sill trim plates. Refer to Door Sill Plate Replacement (Front Sill) (See: Scuff Plate/Service and Repair)Door
Sill Plate Replacement (Rear Sill) (See: Scuff Plate/Service and Repair).
6. Enable the SIR System. Refer to SIR Disabling and Enabling (See: Dashboard / Instrument Panel/Air Bag(s) Arming and Disarming/Service and
Repair).
Liftgate Trim Panel Replacement
Liftgate Trim Panel Replacement
Special Tools
J 38778 Door Trim Pad and Garnish Clip Remover
Removal Procedure